GeoServer Configuration Guide
This guide covers essential configuration tasks for GeoServer in the SDL platform, including GeoWebCache setup, data stores, and security settings.
GeoWebCache S3 BlobStore Configuration
GeoWebCache in SDL is configured to use MinIO (S3-compatible storage) for distributed tile caching. This configuration enables multiple GeoServer instances to share the same tile cache and provides better scalability.
Configuration Steps
-
Navigate to Tile Caching > BlobStores in the GeoServer admin interface
-
Click Add new BlobStore
-
Select S3 BlobStore from the Type dropdown
-
Fill in the configuration fields as shown below:
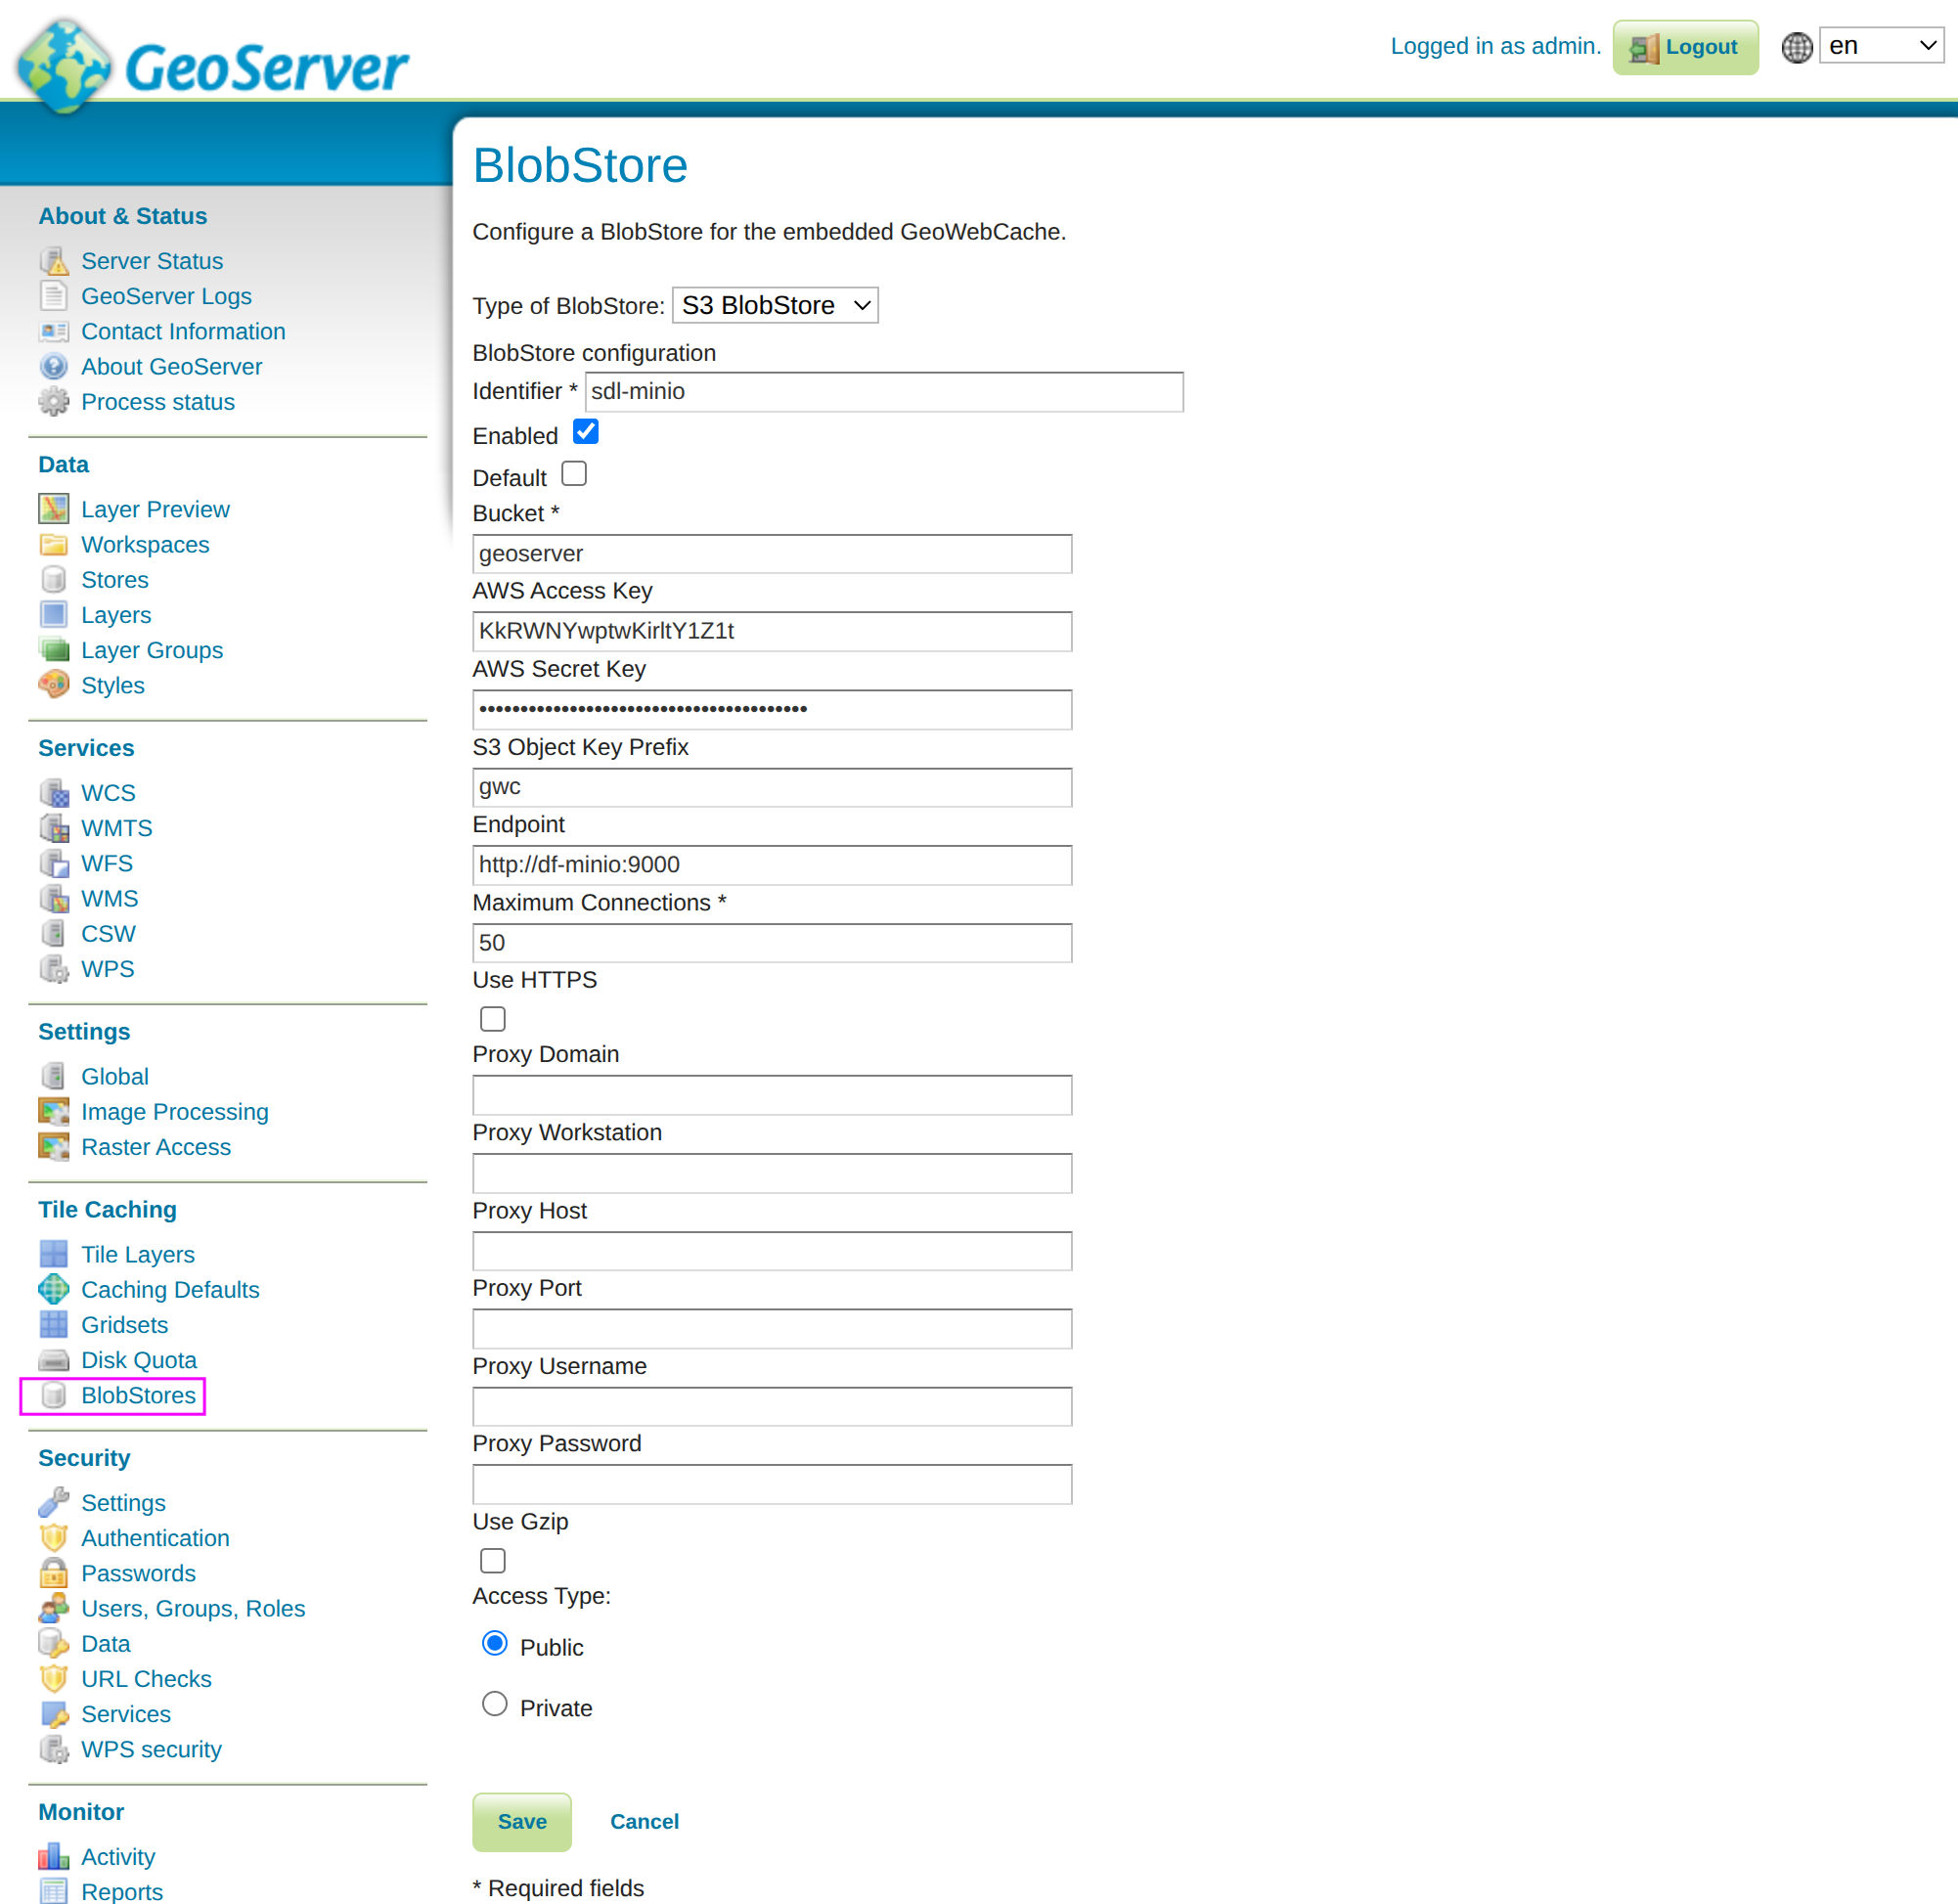
Configuration Field Reference
| Field | Description |
|---|---|
Identifier |
Name for the BlobStore |
Enabled |
Self-explanatory |
Default |
Make this the default BlobStore for new layers |
Bucket |
S3 bucket name for storing tiles |
AWS Access Key |
MinIO access key (from df-minio secret, get from k9s or see commands below) |
AWS Secret Key |
MinIO secret key (from df-minio secret, get from k9s or see commands below) |
S3 Object Key Prefix |
Minio directory name within |
Endpoint |
MinIO service URL, e.g. http://df-minio:9000 |
Maximum Connections |
Connection pool size |
Use HTTPS |
Enable HTTPS for S3 connections, off if e.g. http://df-minio:9000 |
Use Gzip |
Enable gzip compression for transfers |
Access Type |
Public or Private bucket access |
Retrieving MinIO Credentials
The MinIO credentials are stored in the df-minio Kubernetes secret:
# Get MinIO access key
kubectl get secret -n data-fabric df-minio -o jsonpath='{.data.rootUser}' | base64 -d

# Get MinIO secret key
kubectl get secret -n data-fabric df-minio -o jsonpath='{.data.rootPassword}' | base64 -d
Verifying Configuration
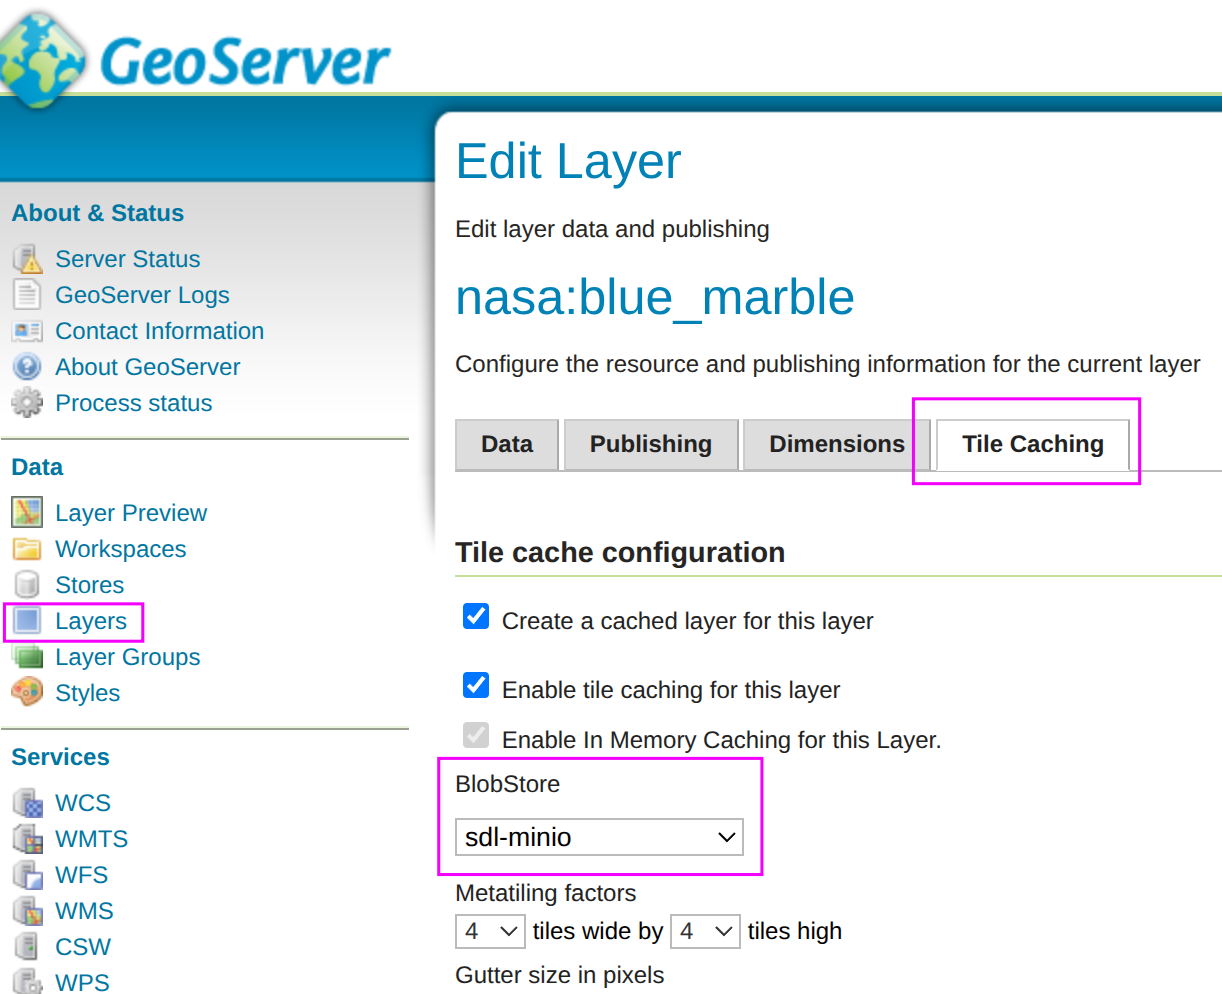
After saving the BlobStore configuration:
-
Navigate to Tile Caching > Tile Layers
-
Select a layer to cache
-
In the layer configuration, set BlobStore to
sdi-minio -
Save the layer configuration
-
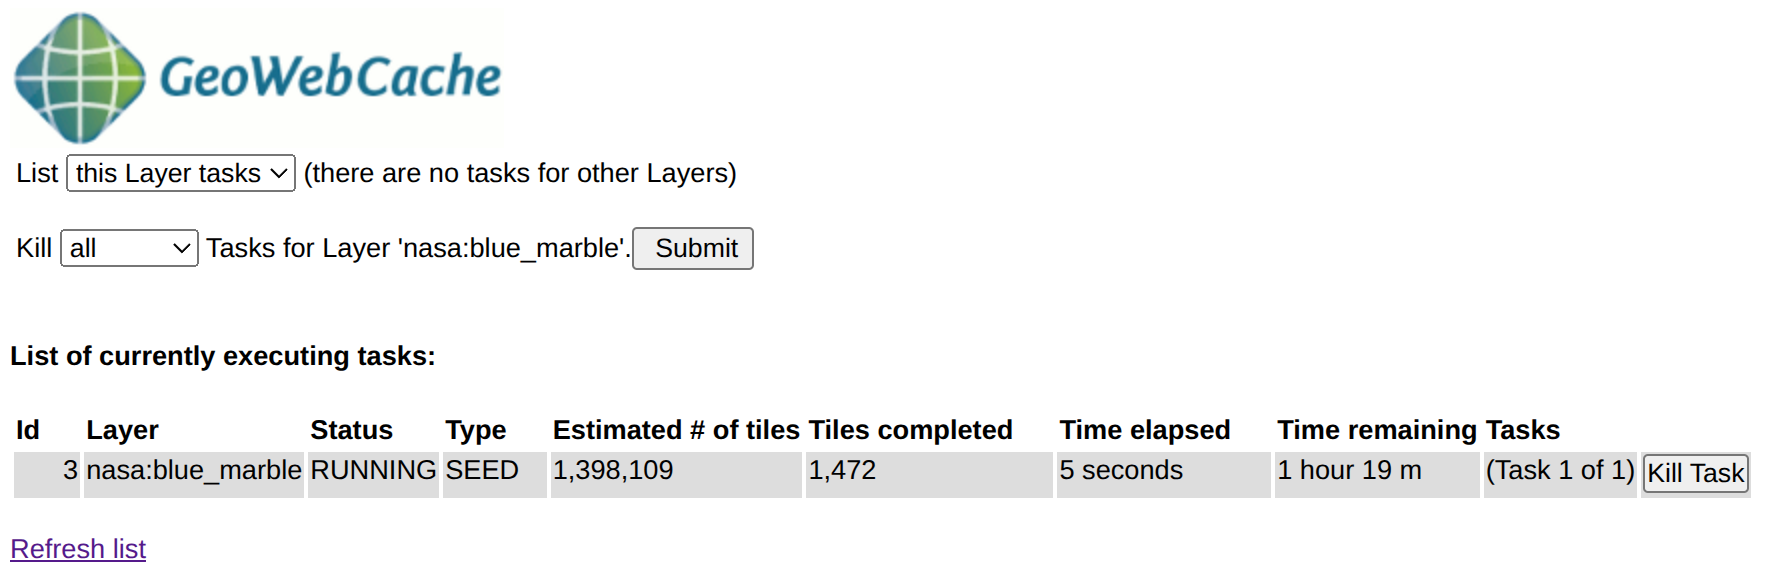
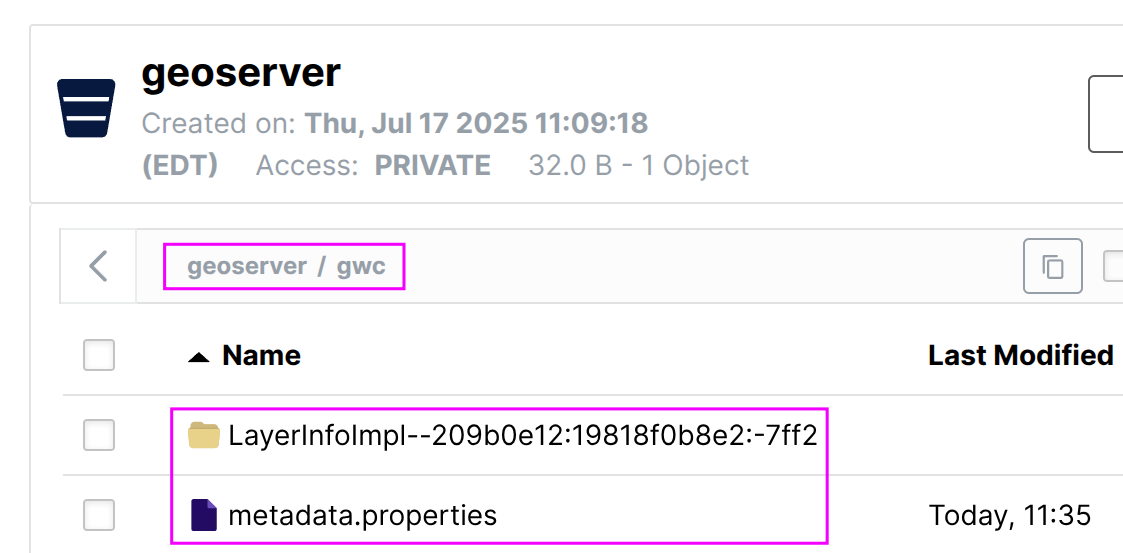
Test by going to map.yourURL/geoserver/gwc/demo, clicking
Seed this layer, submitting a seed job, and checking if tiles appear in MinIO.
PostGIS Datastore Configuration
Creating a PostGIS Datastore
-
Navigate to Data > Stores in GeoServer
-
Click Add new Store
-
Select PostGIS under Vector Data Sources
-
Configure the connection:
| Parameter | Description | Value |
|---|---|---|
Workspace |
Workspace for this datastore |
|
Data Source Name |
Unique name for this datastore |
|
Description |
Optional description |
|
host |
Database server hostname |
|
port |
Database server port |
|
database |
Database name |
|
schema |
Database schema |
|
user |
Database username |
|
passwd |
Database password |
Retrieved from |
Validate connections |
Test connections before use |
✓ (checked) |
Total connections across all GeoServer instances should not exceed PostgreSQL’s max_connections setting.
|
# Get Postgres Datahub Password
kubectl get secret -n data-fabric postgres-secrets -o jsonpath='{.data.postgresDatahubSecret}' | base64 -d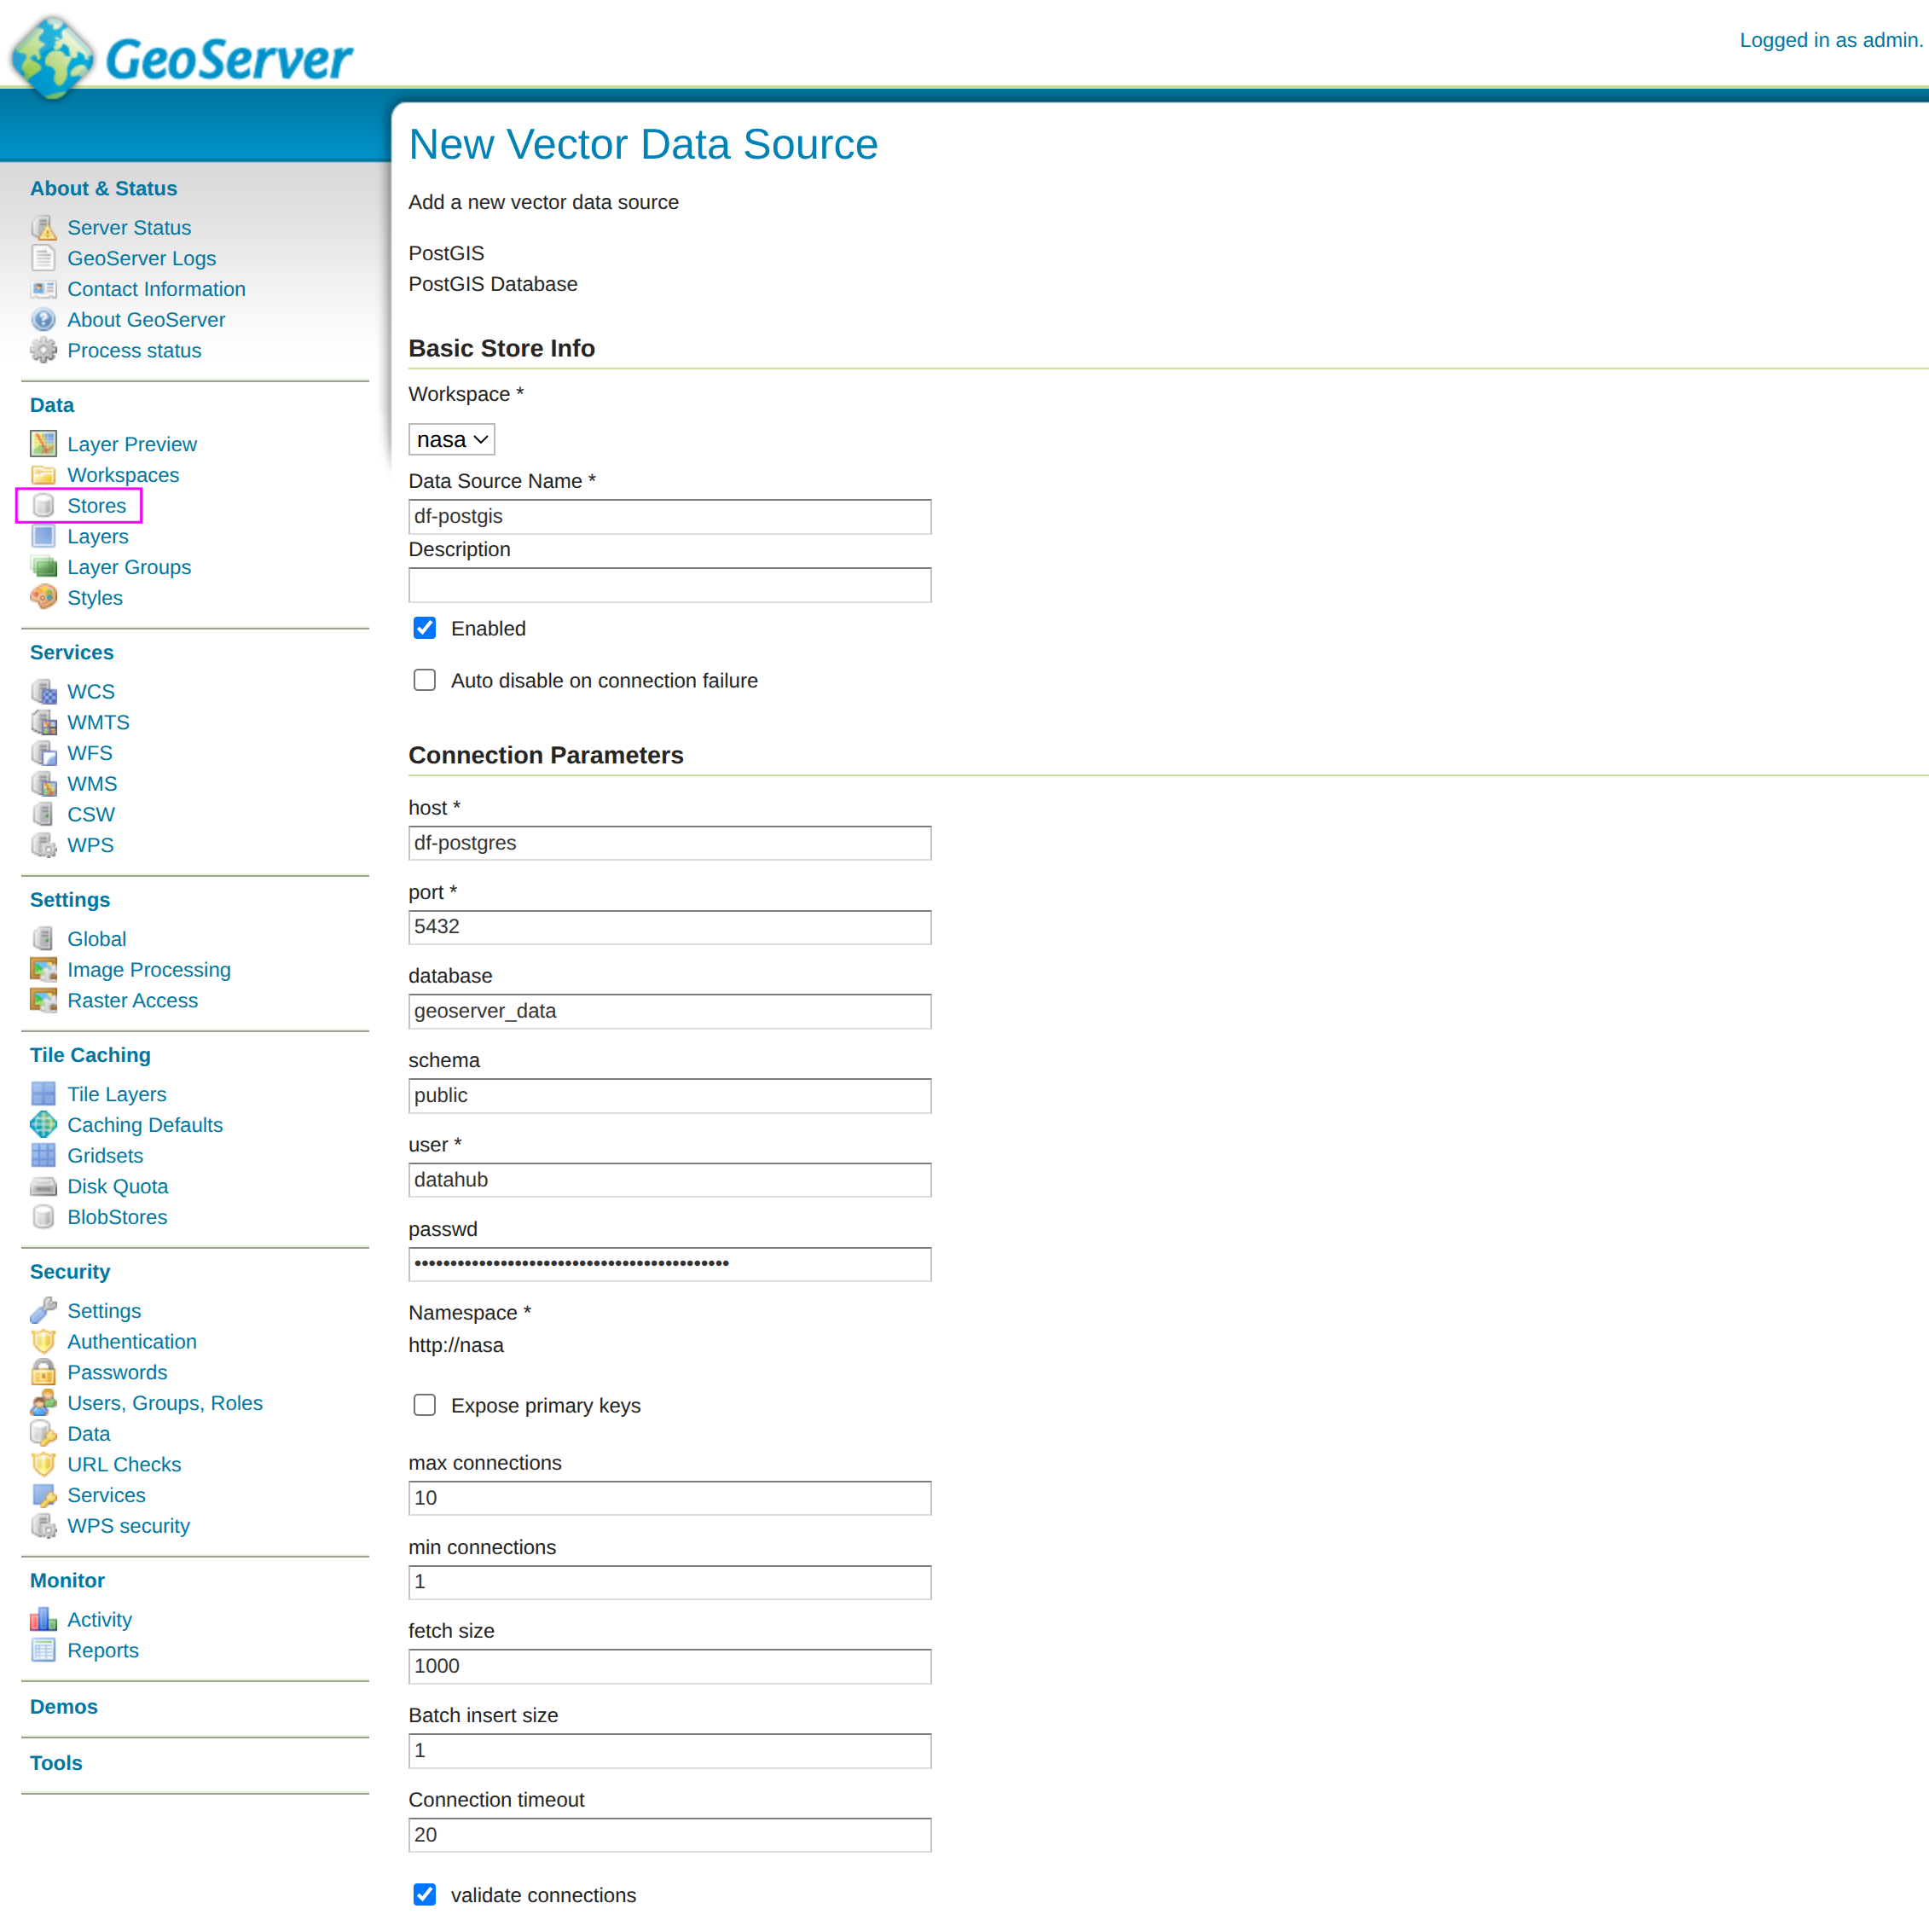
Security Configuration
Keycloak Integration Settings
The OIDC plugin configuration for Keycloak integration:
| Setting | Value |
|---|---|
Client ID |
|
Client Secret |
From |
Discovery URL |
|
Roles Claim |
|
Send Client Secret |
|
Logout URI |
|
Performance Tuning
JVM Settings
Optimal JVM settings for production:
env:
  - name: JAVA_OPTS
    value: >-
      -Xms4g -Xmx8g
      -XX:+UseG1GC
      -XX:MaxGCPauseMillis=200
      -XX:ParallelGCThreads=4
      -XX:ConcGCThreads=2
      -Dfile.encoding=UTF-8
      -Djava.awt.headless=true
      -Djavax.servlet.request.encoding=UTF-8
      -Djavax.servlet.response.encoding=UTF-8
      -Duser.timezone=UTC
-Dorg.geotools.coverage.jaiext.enabled=trueNext Steps
-
Infrastructure Guide - Deep dive into deployment architecture
-
Layer Management - Managing layers and access control
-
API Reference - REST API documentation