TRAX Pipeline
This guide walks operators through connecting SDL to a TRAX data source and starting the TRAX integration pipeline. The workflow starts in the SDL catalog, switches to TRAX to confirm the gRPC connection settings, then returns to SDL to configure and start the pipeline.
- Prerequisites
- Step 1: Start data onboarding
- Step 2: Select the TRAX source
- Step 3: Create the TRAX OMNI gRPC connection
- Step 4: Configure the TRAX gRPC server
- Step 5: Configure TLS authentication if required
- Step 6: Configure the TRAX source in SDL
- Step 7: Design the TRAX pipeline
- Step 8: Configure outputs
- Step 9: Review and start
- Validate TRAX data
- Troubleshooting
Prerequisites
Before starting, make sure you have:
-
Access to SDL
-
Permission to connect data sources and create pipelines
-
Access to configure the TRAX routing table, if the gRPC connection has not already been created
-
TRAX VM IP address and gRPC port for the target environment
-
Client certificate and certificate password, if the TRAX environment requires TLS authentication
Step 2: Select the TRAX source
-
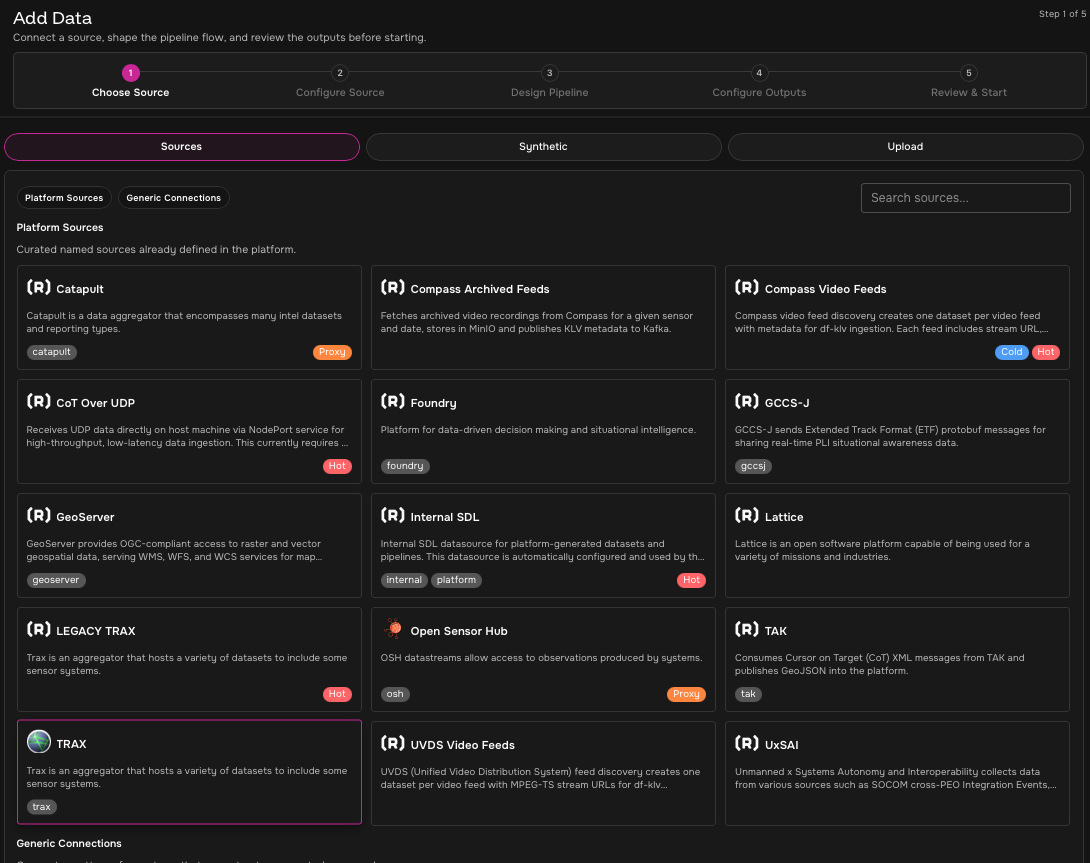
On the Add Data page, keep Sources selected.
-
Under Platform Sources, find and select TRAX.
Step 3: Create the TRAX OMNI gRPC connection
If the TRAX gRPC connection already exists, confirm the endpoint and certificate requirements with the environment owner and continue to Step 6.
-
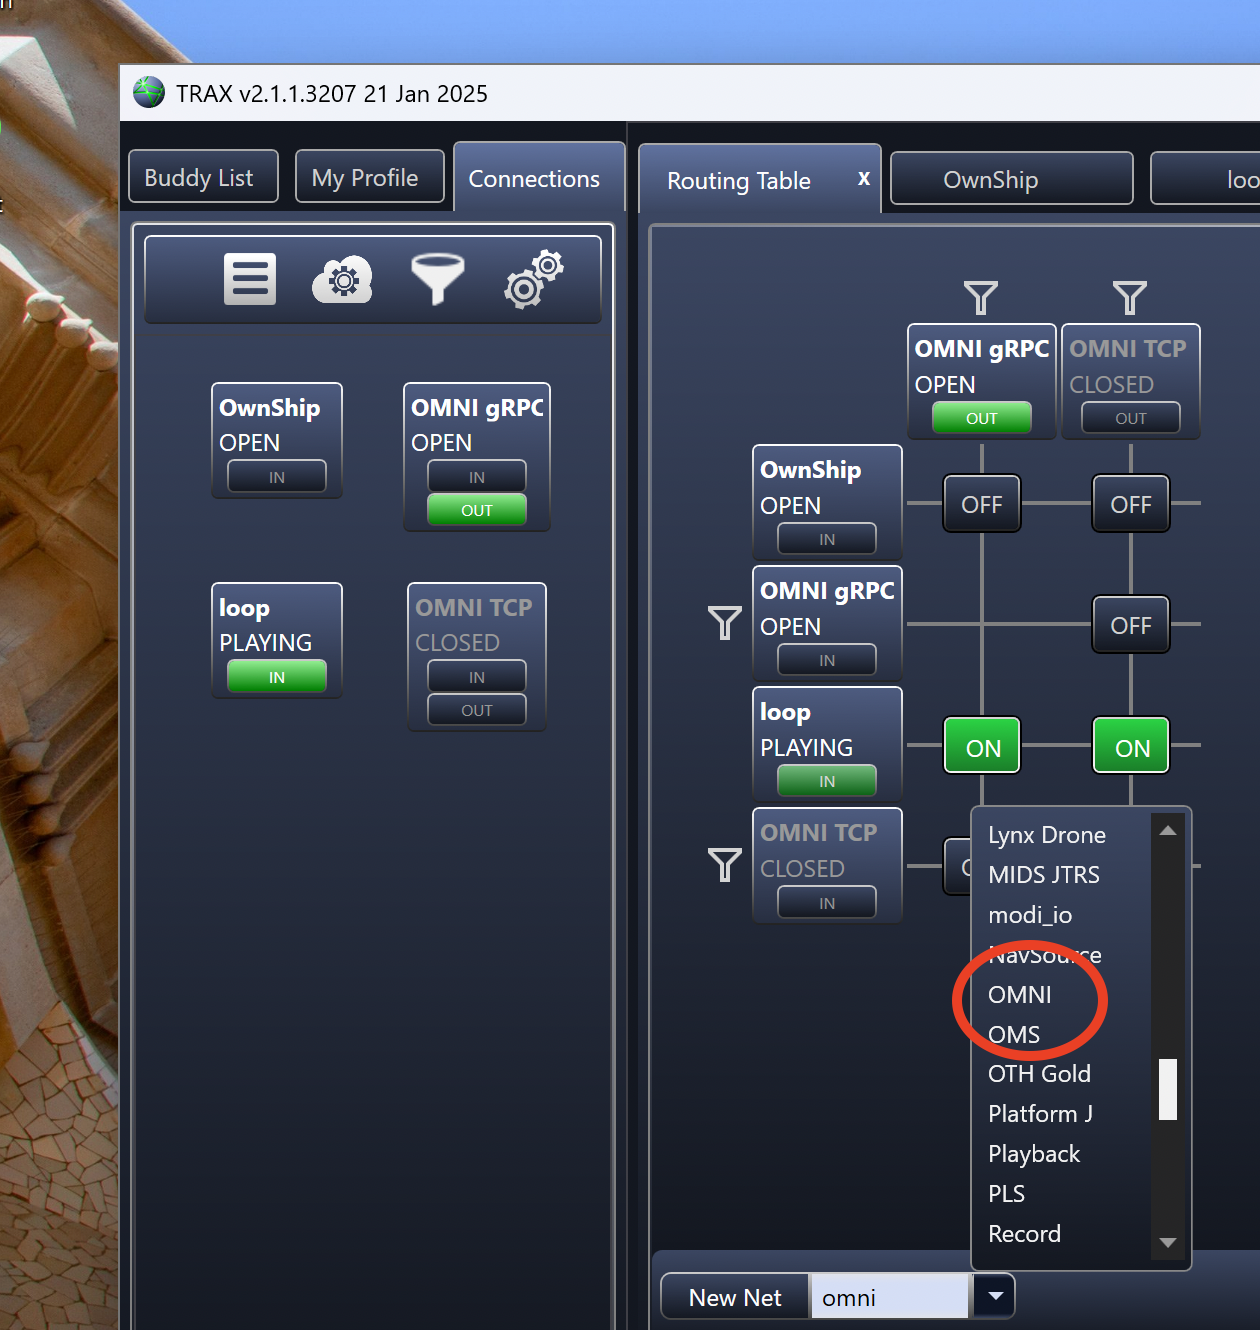
In TRAX, open the Routing Table.
-
Create a new network connection.
-
Set the connection type to OMNI.
Step 4: Configure the TRAX gRPC server
-
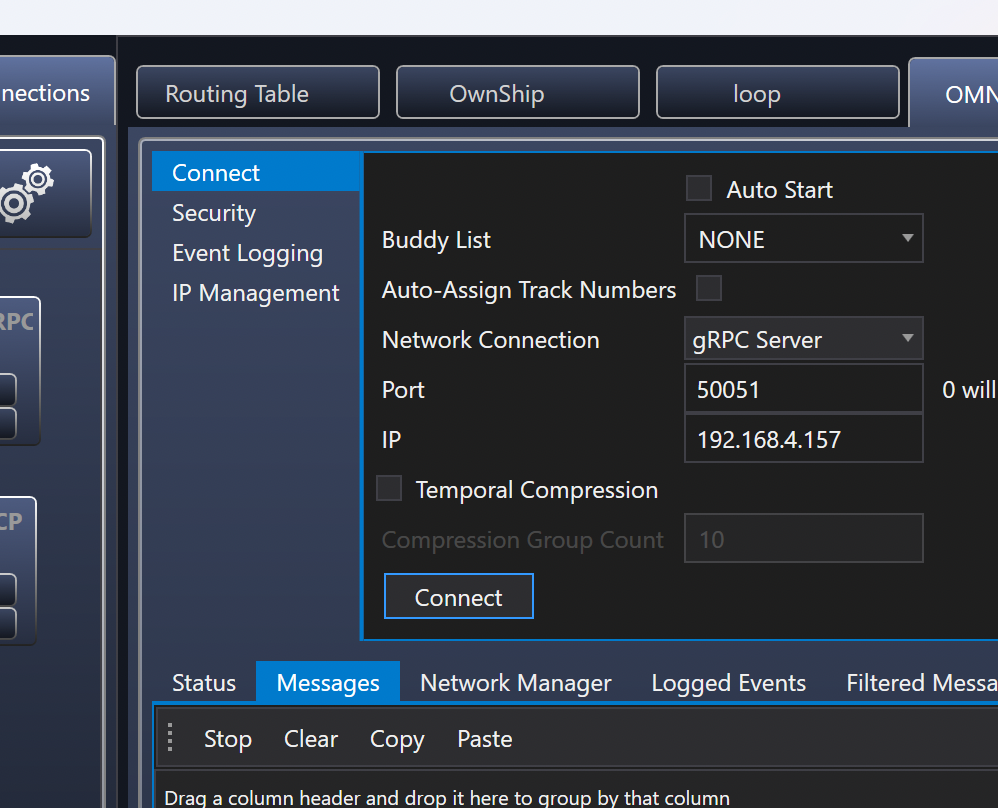
Configure the TRAX network connection as a gRPC Server.
-
Set the server port provided for the environment.
-
Set the server IP address to the discoverable IPv4 address for the TRAX VM.
If you need to confirm the TRAX VM IP address, open Command Prompt on the TRAX VM and run:
ipconfigUse the IPv4 address for the TRAX VM.
+ image::trax-vm-ipconfig-ipv4.png[Command Prompt showing TRAX VM IPv4 address,width=70%]
The SDL-side TRAX Endpoint should match the reachable TRAX gRPC server address and port, for example <TRAX_VM_IP>:<PORT>.
Step 5: Configure TLS authentication if required
If the TRAX connection requires TLS authentication:
-
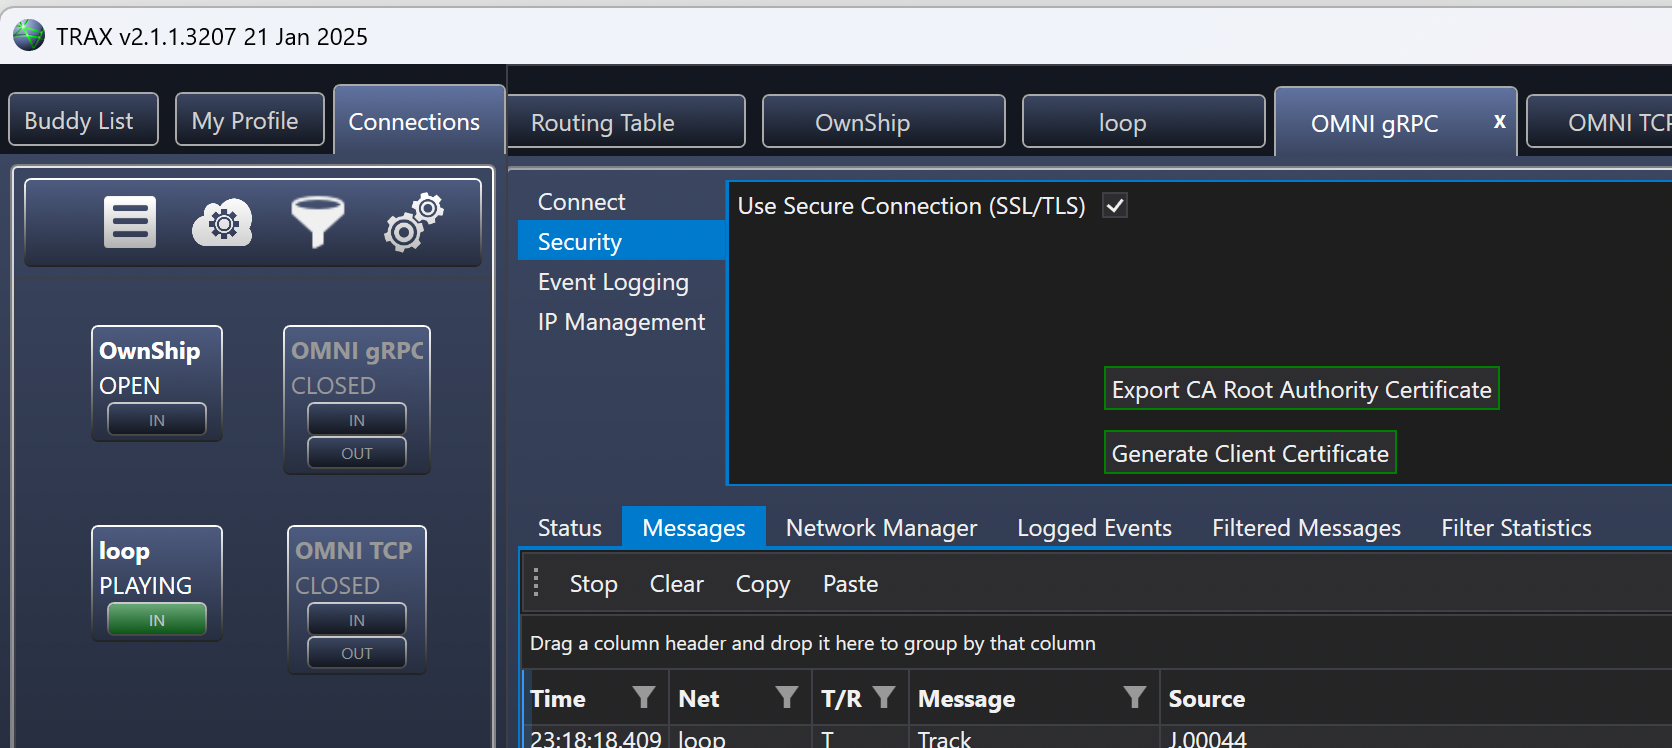
In TRAX, open the Security tab for the connection.
-
Select Use Secure Connection (SSL/TLS).
-
Select Export CA Root Authority Certificate to export the CA certificate.
-
Select Generate Client Certificate if the SDL TRAX source requires a client certificate.
-
Set the certificate password when prompted.
-
Use the exported certificate material and password when configuring the SDL TRAX source.
If the environment does not require TLS authentication, leave the client certificate and certificate password empty and set the TLS fields according to the environment owner guidance.
Step 6: Configure the TRAX source in SDL
Return to SDL and enter the TRAX connection details from the TRAX gRPC setup.
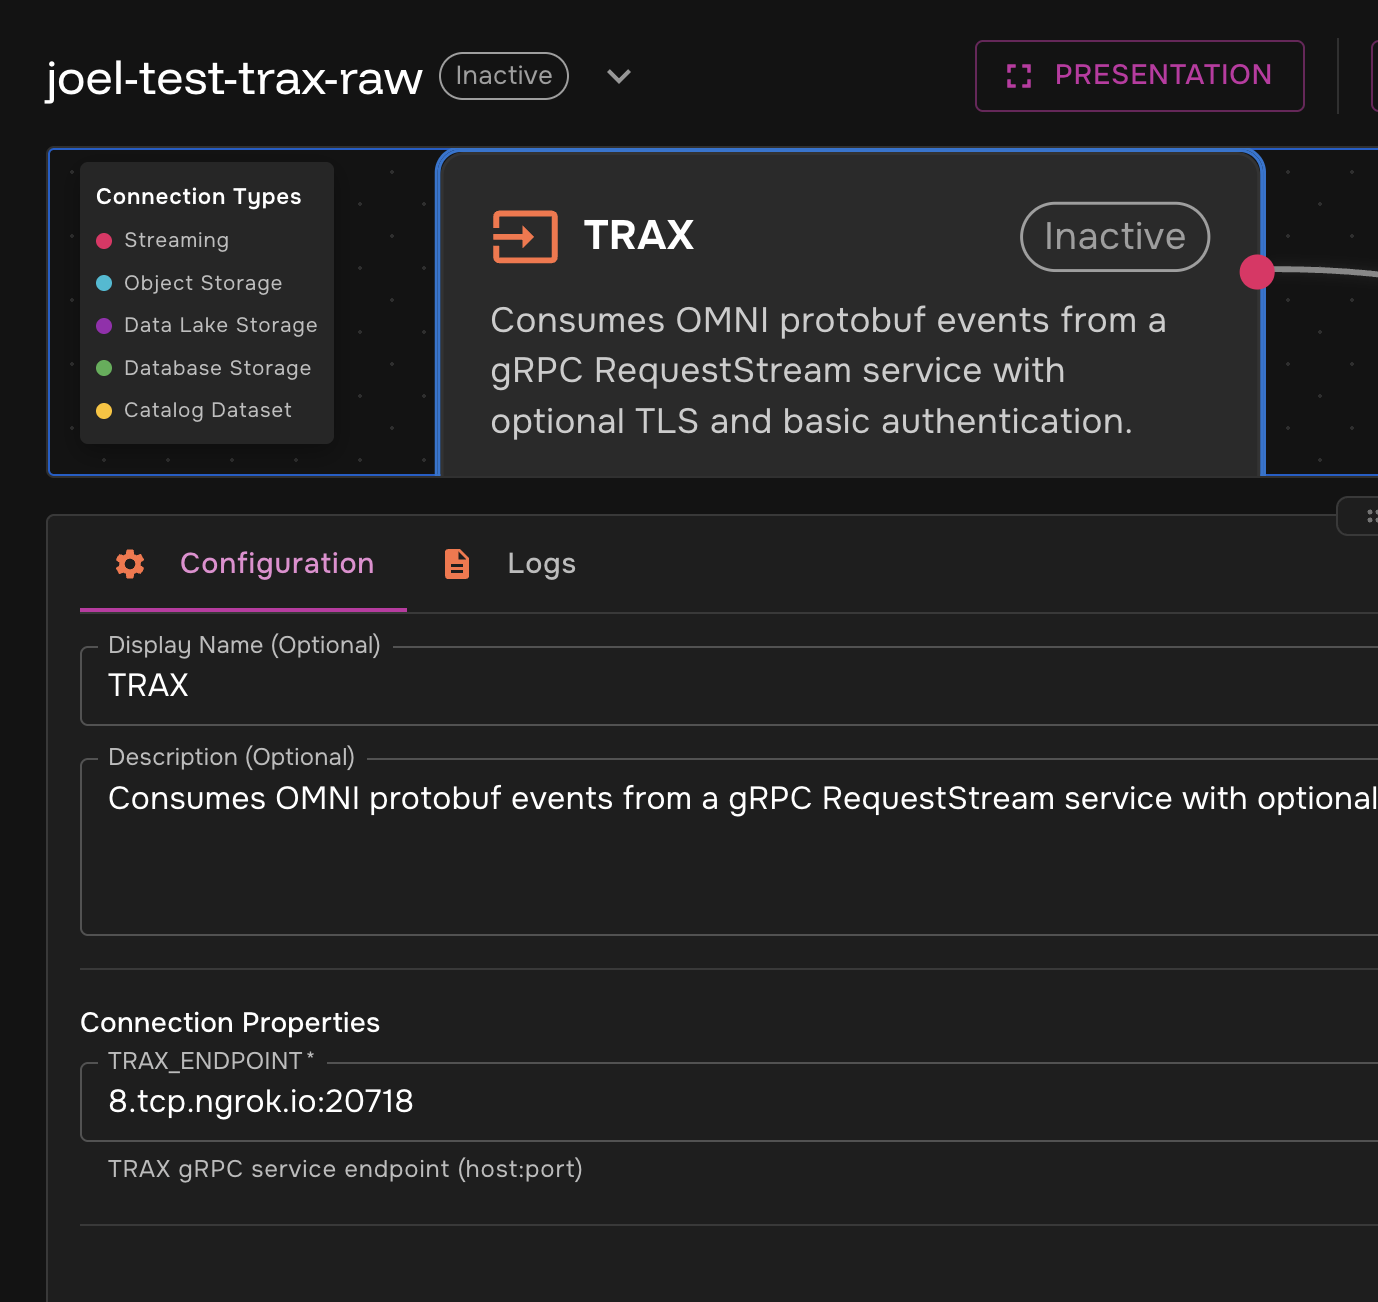
| Field | Required | What to enter | Example |
|---|---|---|---|
Connection Name |
Yes |
A readable name for this TRAX connection. Names must start and end with alphanumeric characters and may contain alphanumeric characters, hyphens, underscores, and dots. |
|
Connection Groups |
Yes |
The group that should own the connection. |
|
Classification |
Yes |
The classification marking for datasets created from the source. |
|
TRAX Endpoint |
Yes |
Reachable TRAX gRPC server endpoint in |
|
Client certificate (.p12) |
Environment-specific |
Client certificate exported from TRAX, if required by the environment. |
|
Certificate password |
Environment-specific |
Password for the client certificate, if required. |
|
Enable TLS |
Environment-specific |
Enable TLS for the TRAX connection when required by the environment. |
|
TLS insecure |
Environment-specific |
Skip TLS certificate verification only when directed by the environment owner. |
|
-
Select Save Source after the required fields are complete.
Step 7: Design the TRAX pipeline
-
On the Design Pipeline step, select TRAX Integration to use the preconfigured pipeline template.
-
Review the flow preview.
-
Select Configure Outputs.
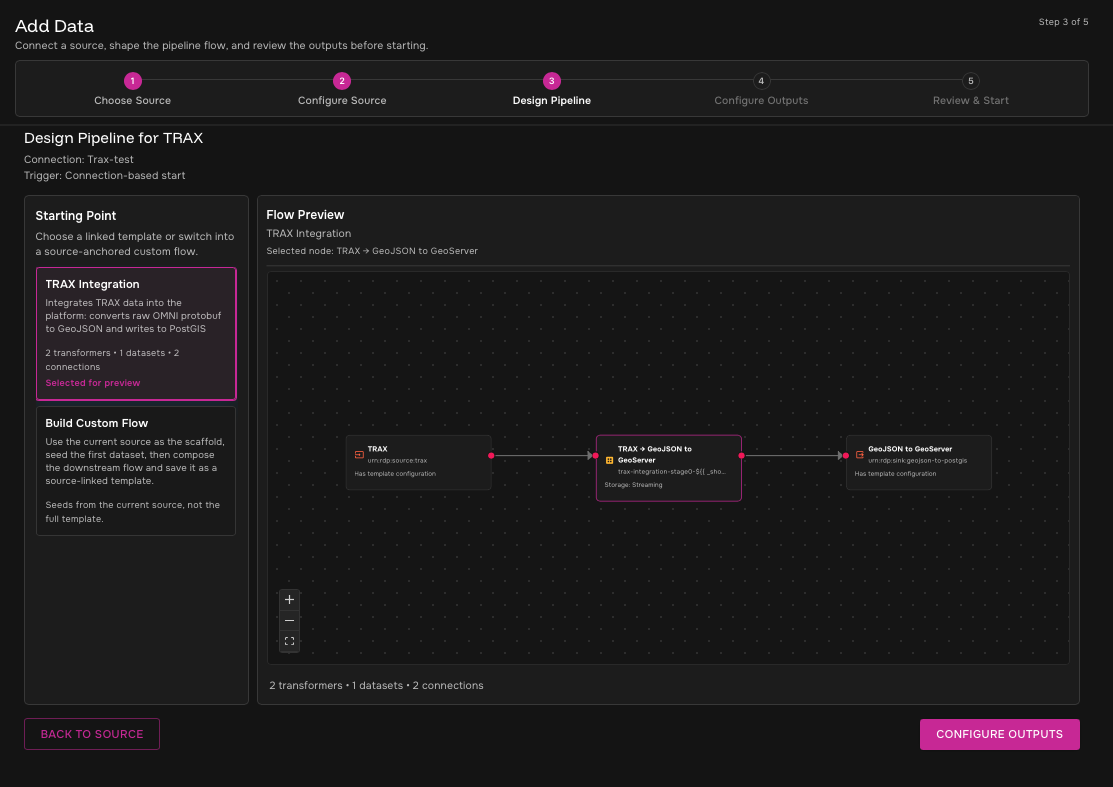
The TRAX integration template converts raw OMNI protobuf events into GeoJSON and publishes the output through the configured GeoServer/PostGIS path.
Step 8: Configure outputs
-
Review the generated TRAX output dataset.
-
Update the display name or storage/topic name if required by the environment.
-
Review the optional GeoJSON to GeoServer sink settings.
-
Select Review & Start.
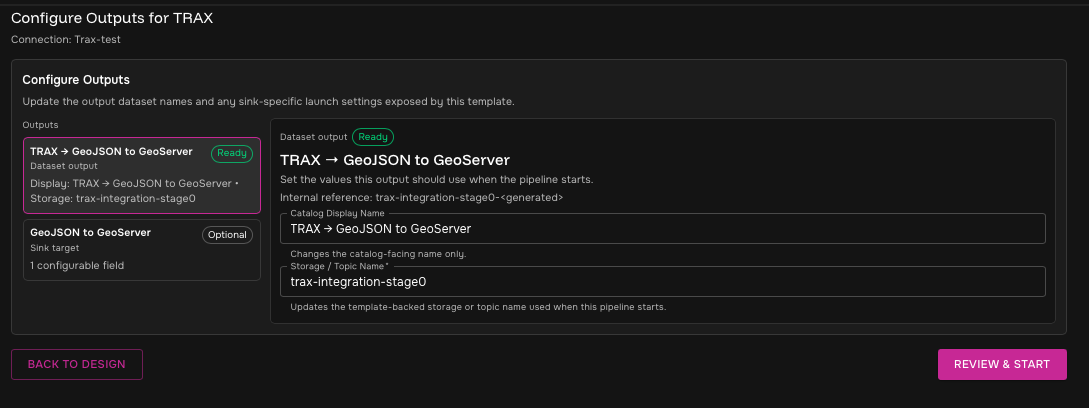
To route TRAX data to MSS/CS, confirm the ontology publishing workflow for the target environment. The expected flow may require mapping or publishing TRAX data through the ontology layer before MSS/CS consumes it.
Step 9: Review and start
-
Confirm the selected source, template, output dataset, and sink settings are correct.
-
Select Start Pipeline.
-
After the pipeline starts, confirm the TRAX pipeline is running and output data is being written to the expected destination.
Validate TRAX data
After the pipeline starts, verify:
| Check | Expected result |
|---|---|
TRAX gRPC connection |
TRAX has an active OMNI gRPC Server connection using the expected IP address and port. |
TRAX source |
The SDL TRAX source is configured with the matching endpoint and TLS settings. |
Pipeline status |
The TRAX integration pipeline is running. |
Outputs |
TRAX output data is written to the configured dataset or GeoServer/PostGIS destination. |
Troubleshooting
| Symptom | What to check |
|---|---|
SDL cannot connect to TRAX |
Confirm the TRAX VM IPv4 address, gRPC server port, and network reachability from SDL. |
TLS or certificate errors |
Confirm whether TLS is required, whether the |
No TRAX data appears downstream |
Confirm the TRAX routing table connection is active, the pipeline is running, and the selected output destination is configured correctly. |
MSS/CS does not receive TRAX data |
Confirm the environment-specific ontology publishing path and any required mapping before expecting MSS/CS delivery. |