Publishing CoT Messages to Lattice
This guide walks you through creating an SDL data pipeline that transforms Cursor-on-Target (CoT) XML messages and publishes them to Anduril Lattice.
- Overview
- Prerequisites
- Step 1: Create a Lattice Sandbox Environment
- Step 2: Create a New Pipeline
- Step 3.1: Add the CoT XML Generator (alternative: connect to a TAK server)
- Step 3 Alternative: TAK to Lattice
- Step 4: Create CoT XML Dataset
- Step 5: Add the CoT to Lattice Transformer
- Step 6: Create Lattice Dataset
- Step 7: Add the Publish to Lattice Transformer
- Step 8: Save and Run the Pipeline
- Step 9: View Results in Lattice
- Step 10: Add additional branches and transformers as desired
- Summary
- Next Steps
Overview
In this example, you’ll learn how to:
-
Create a Lattice sandbox environment for testing
-
Build a data pipeline in SDL
-
Transform CoT XML messages into Lattice entity format
-
Publish entities to an Anduril Lattice instance
-
Visualize the results in Lattice’s live view
Prerequisites
Before starting this guide, you should have:
-
Access to SDL
-
Access to Lattice Sandboxes (developer environment)
-
Basic understanding of data pipelines
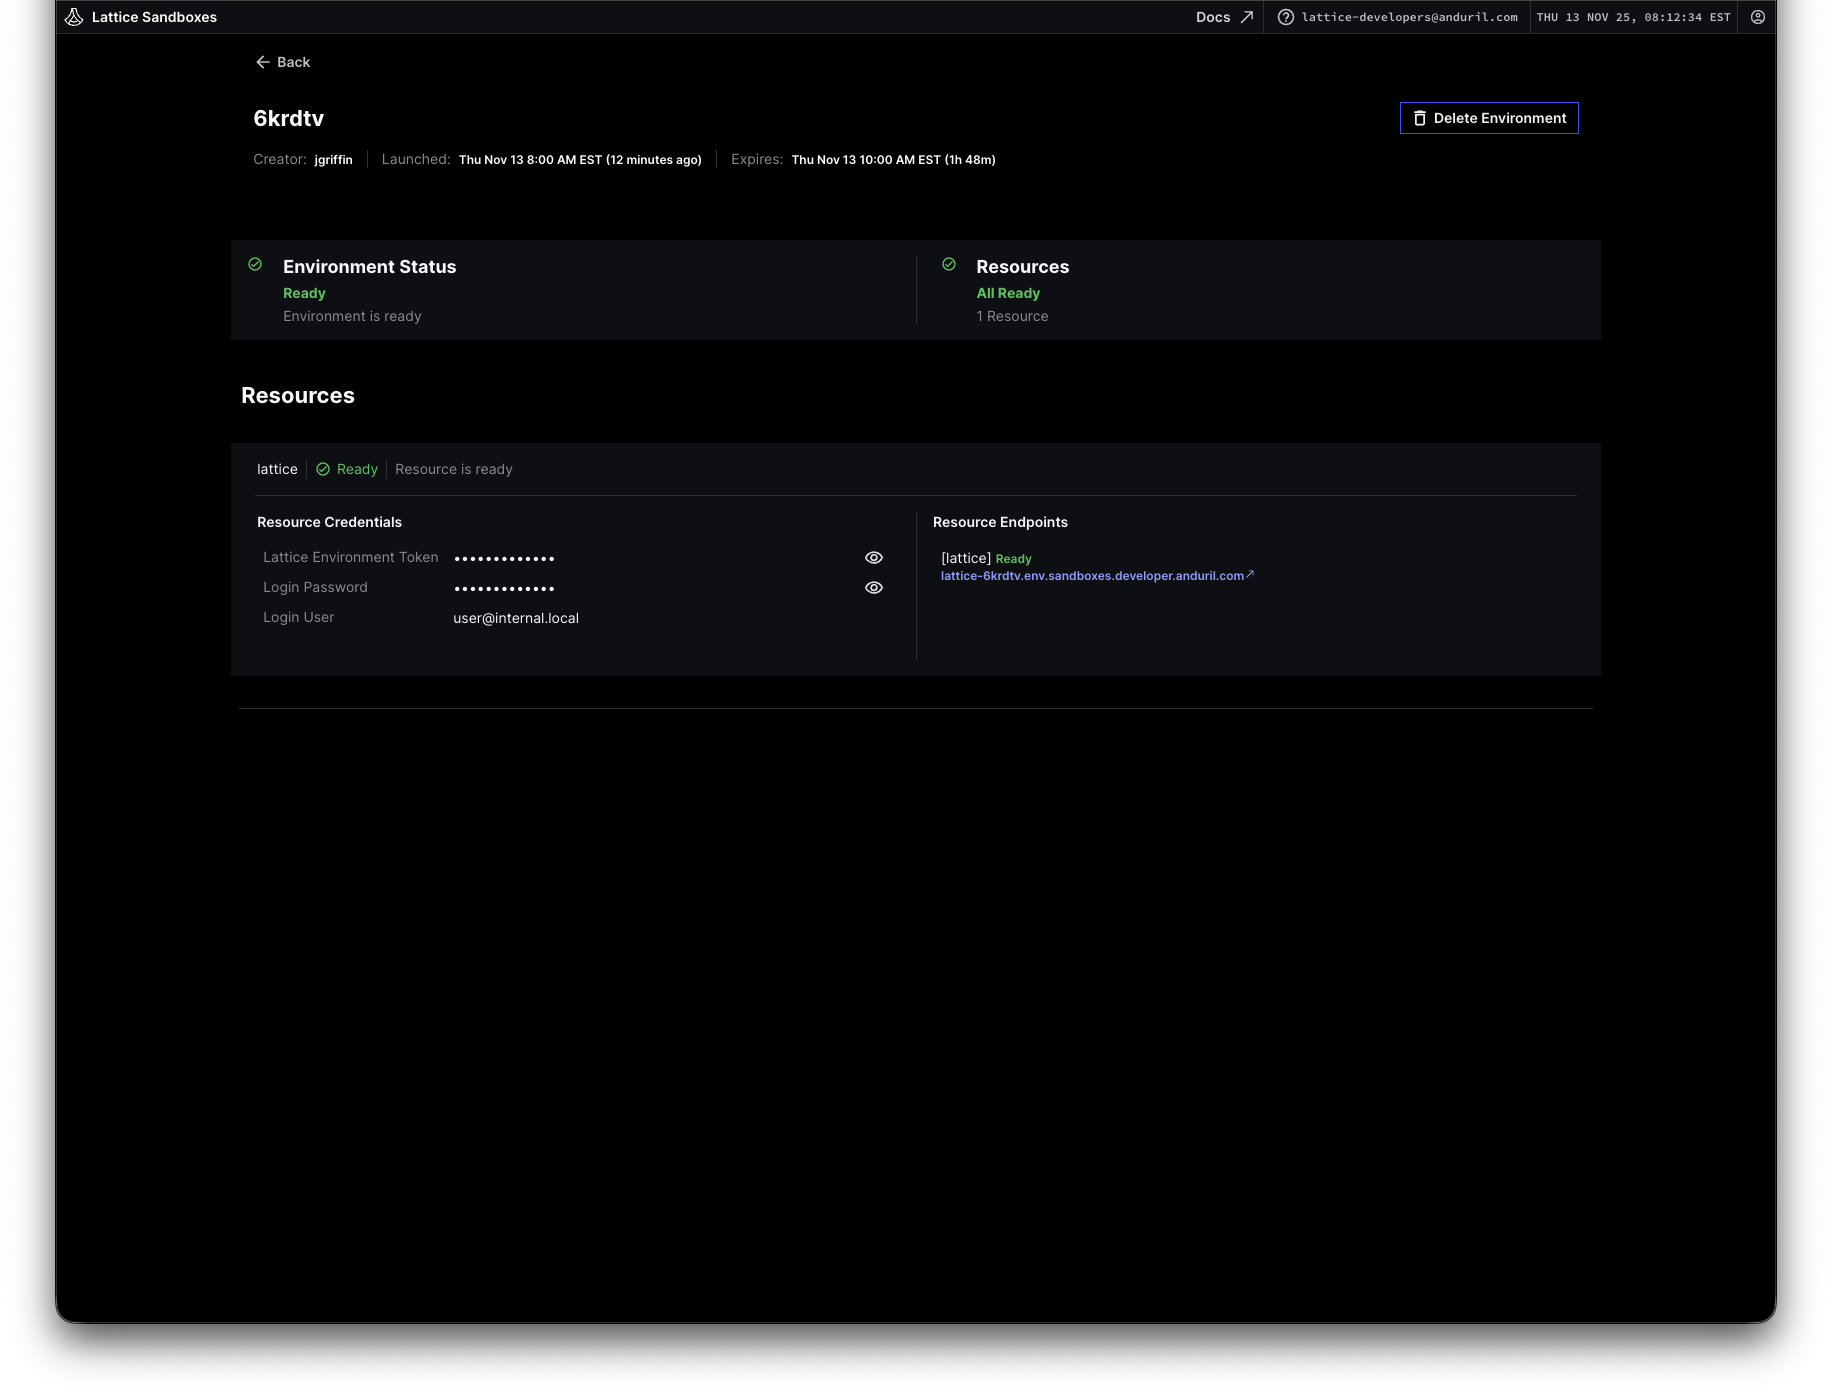
Step 1: Create a Lattice Sandbox Environment
First, you need to set up a Lattice sandbox environment for testing.
-
Navigate to the Lattice Sandboxes portal and login with your developer credentials
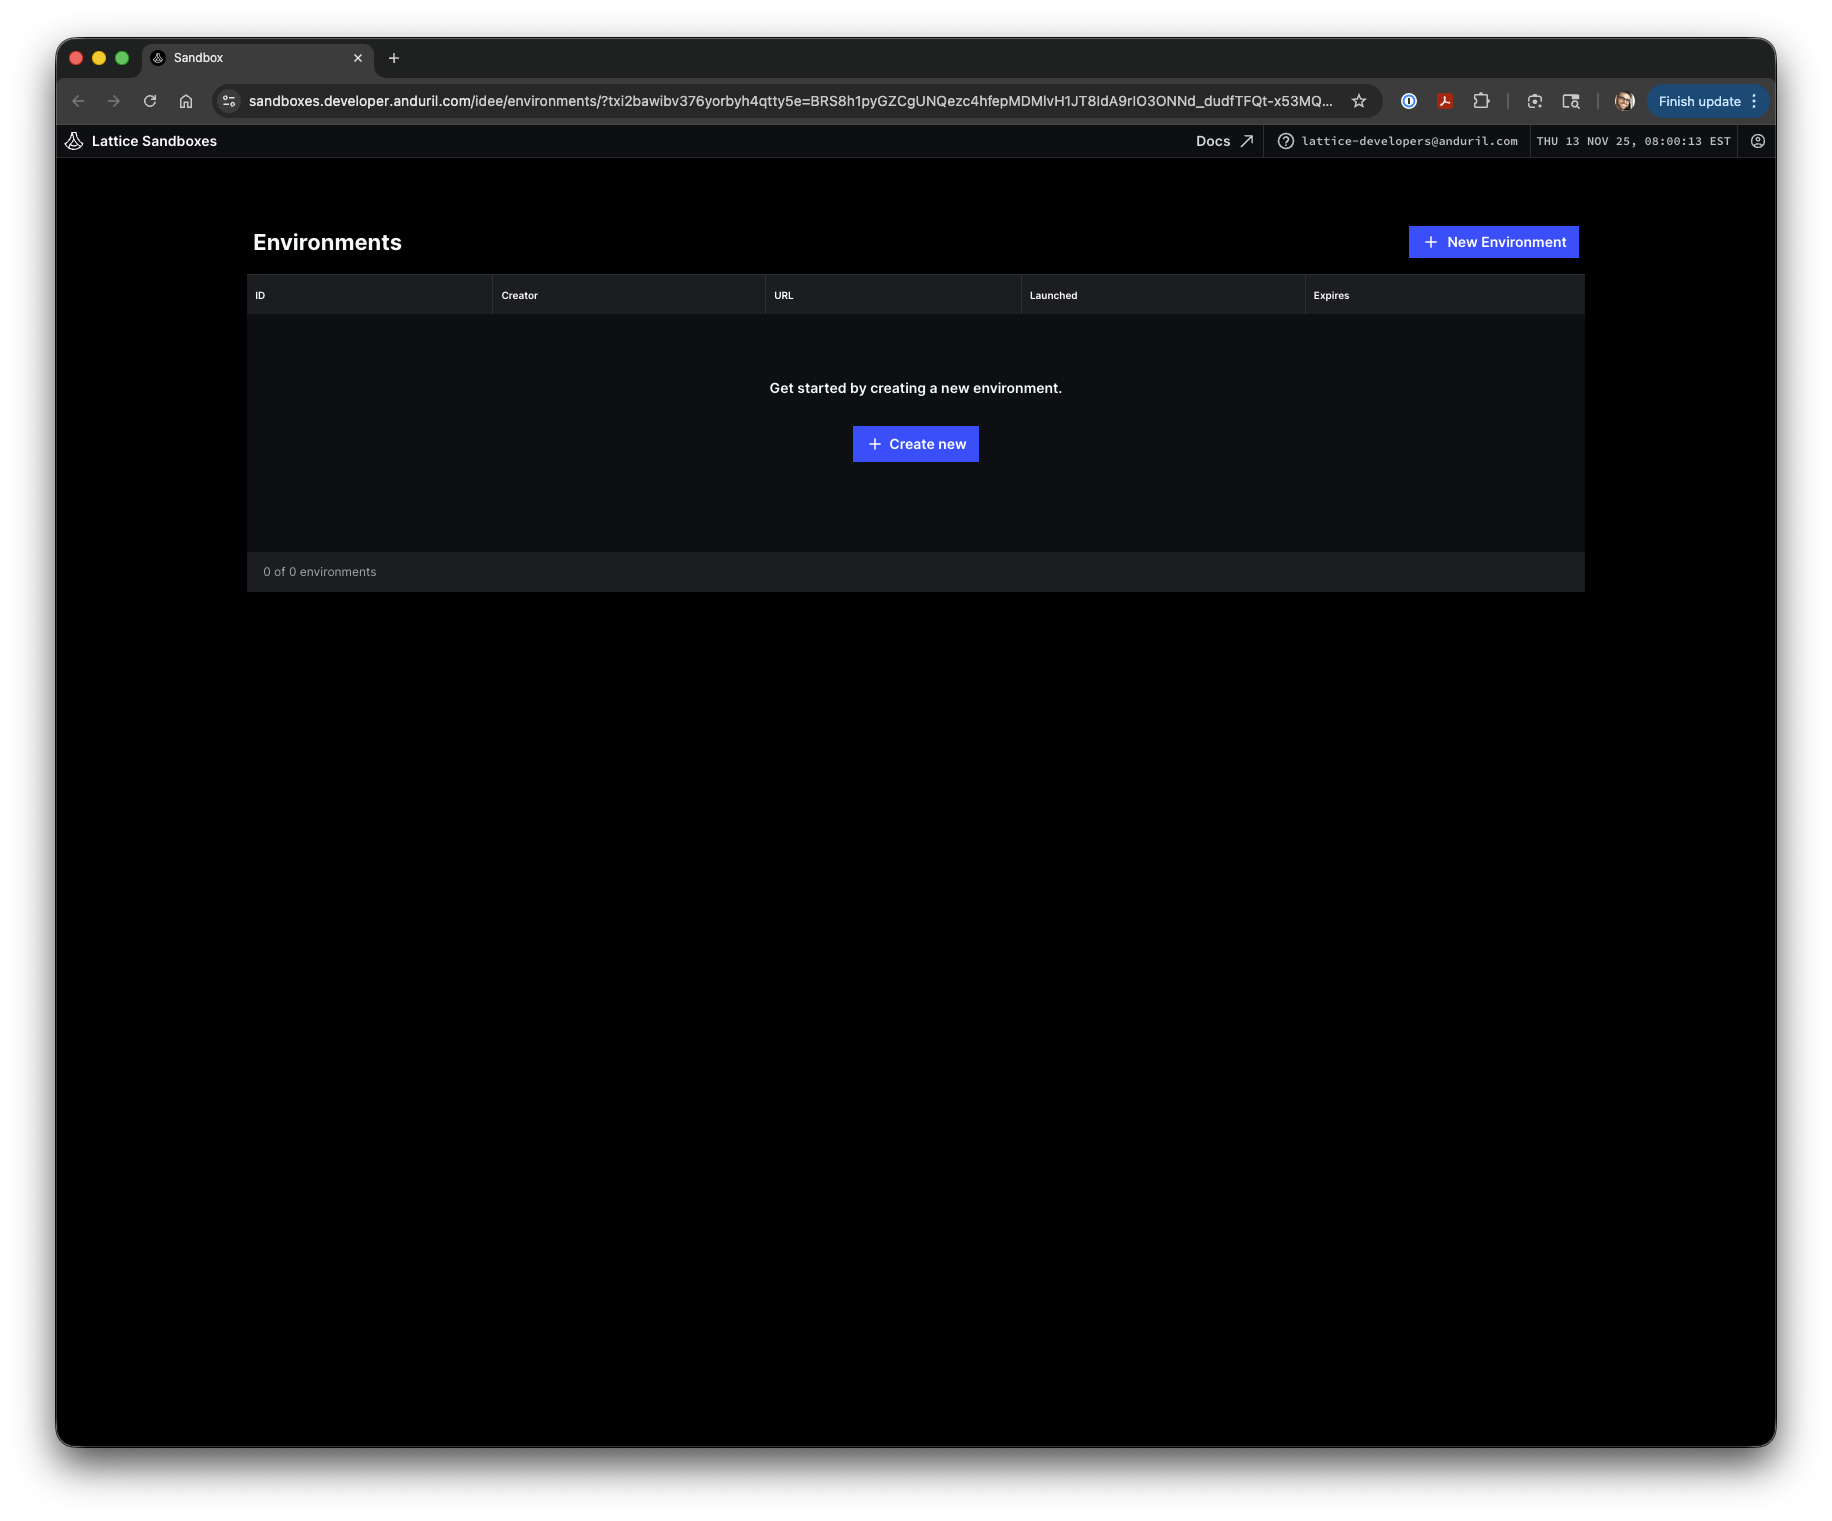
-
Click Create new to open the Environment Catalog
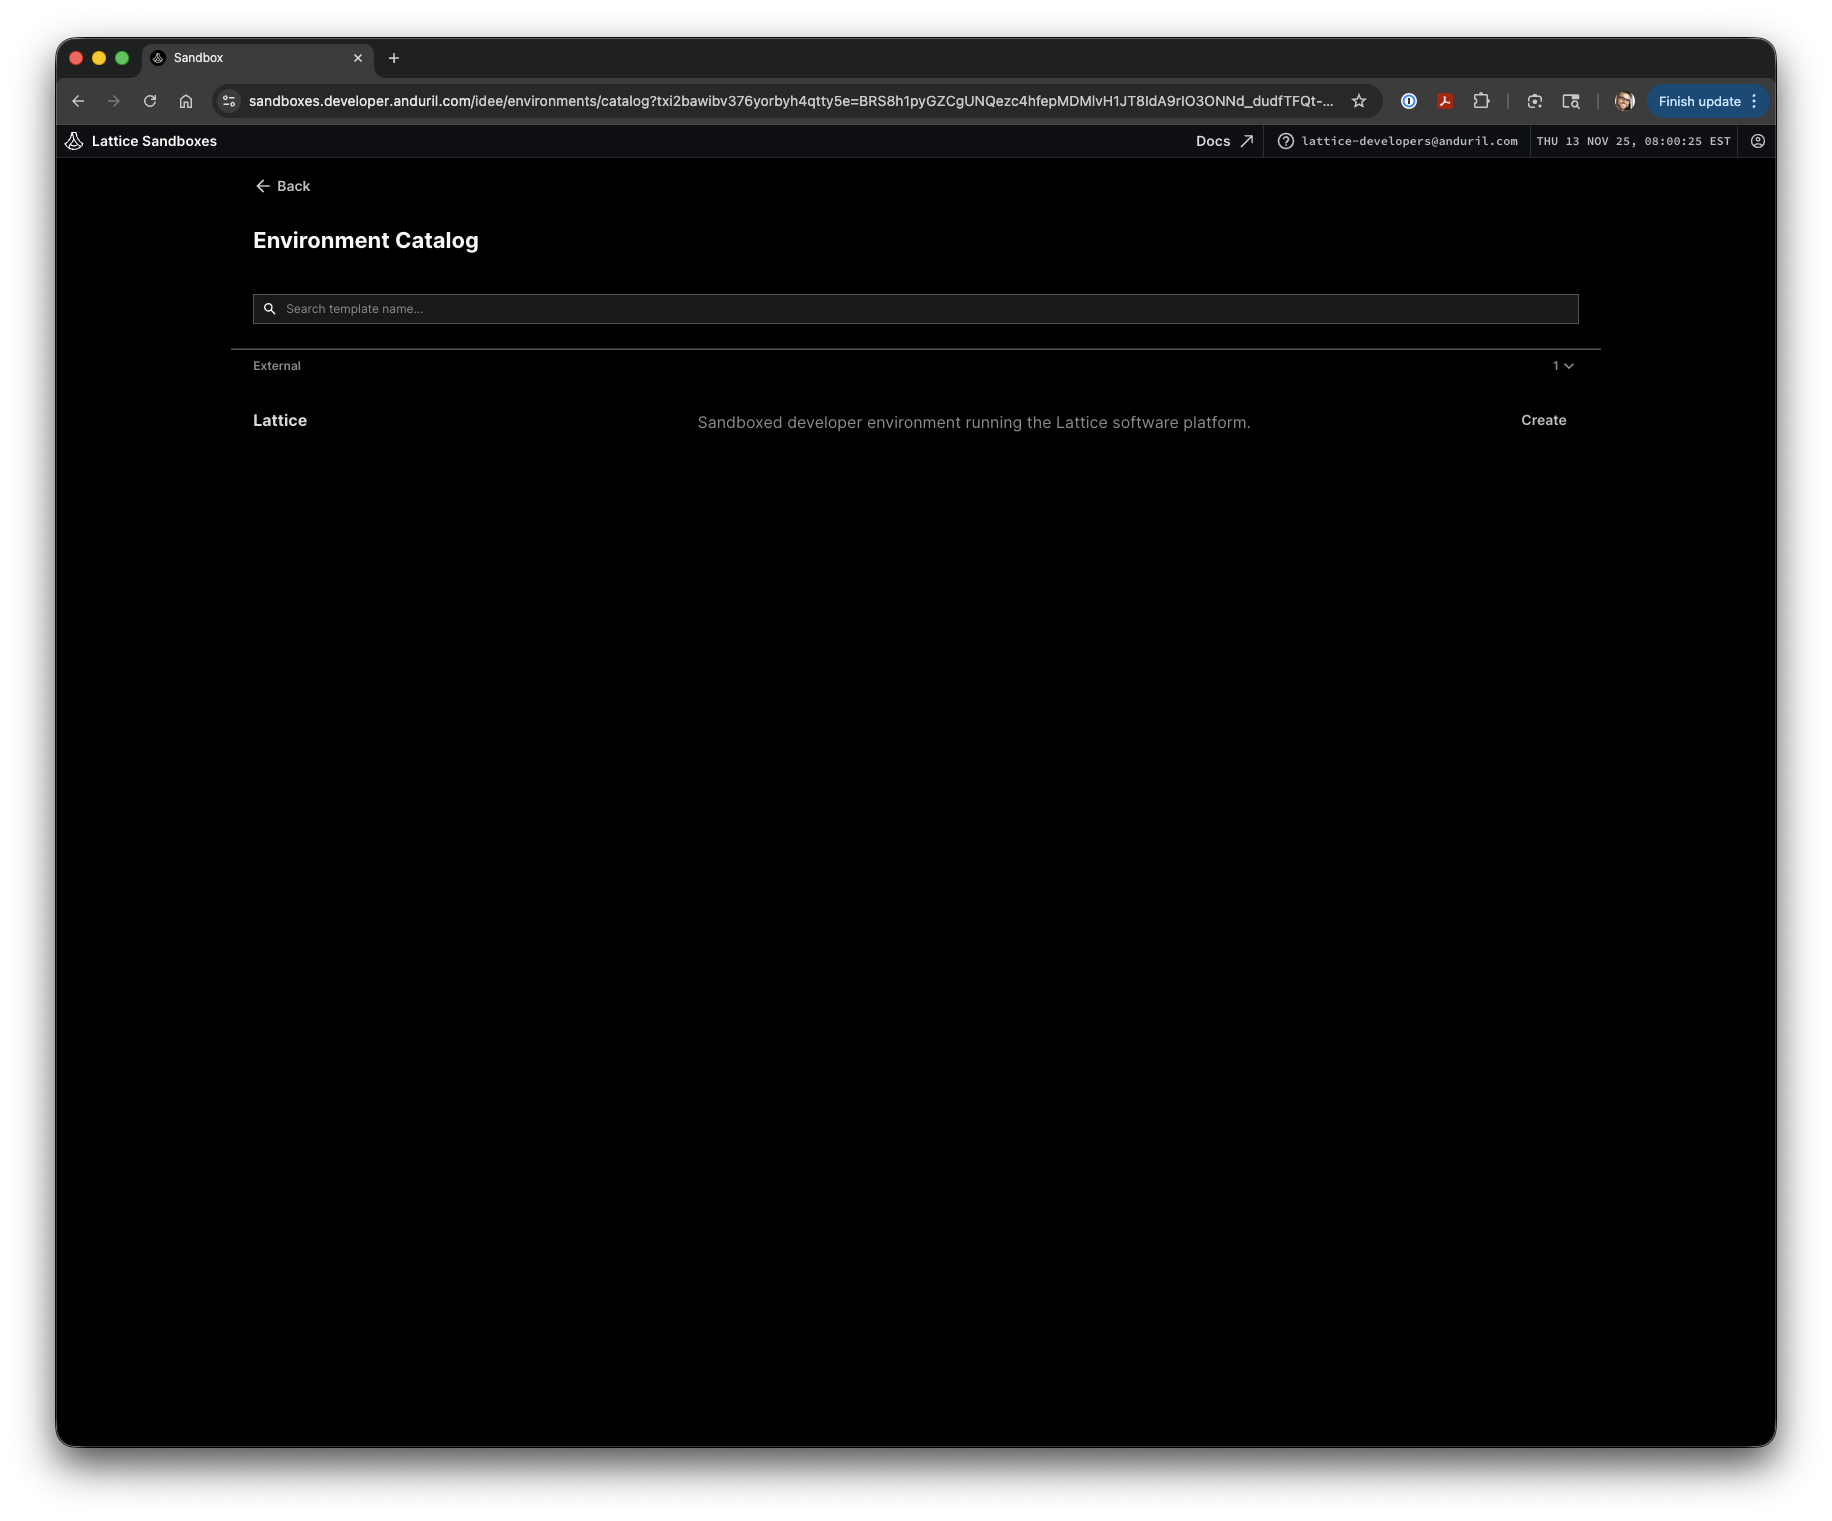
-
Select the Lattice template and click Create
The sandbox environment will begin provisioning. This process typically takes a few minutes.
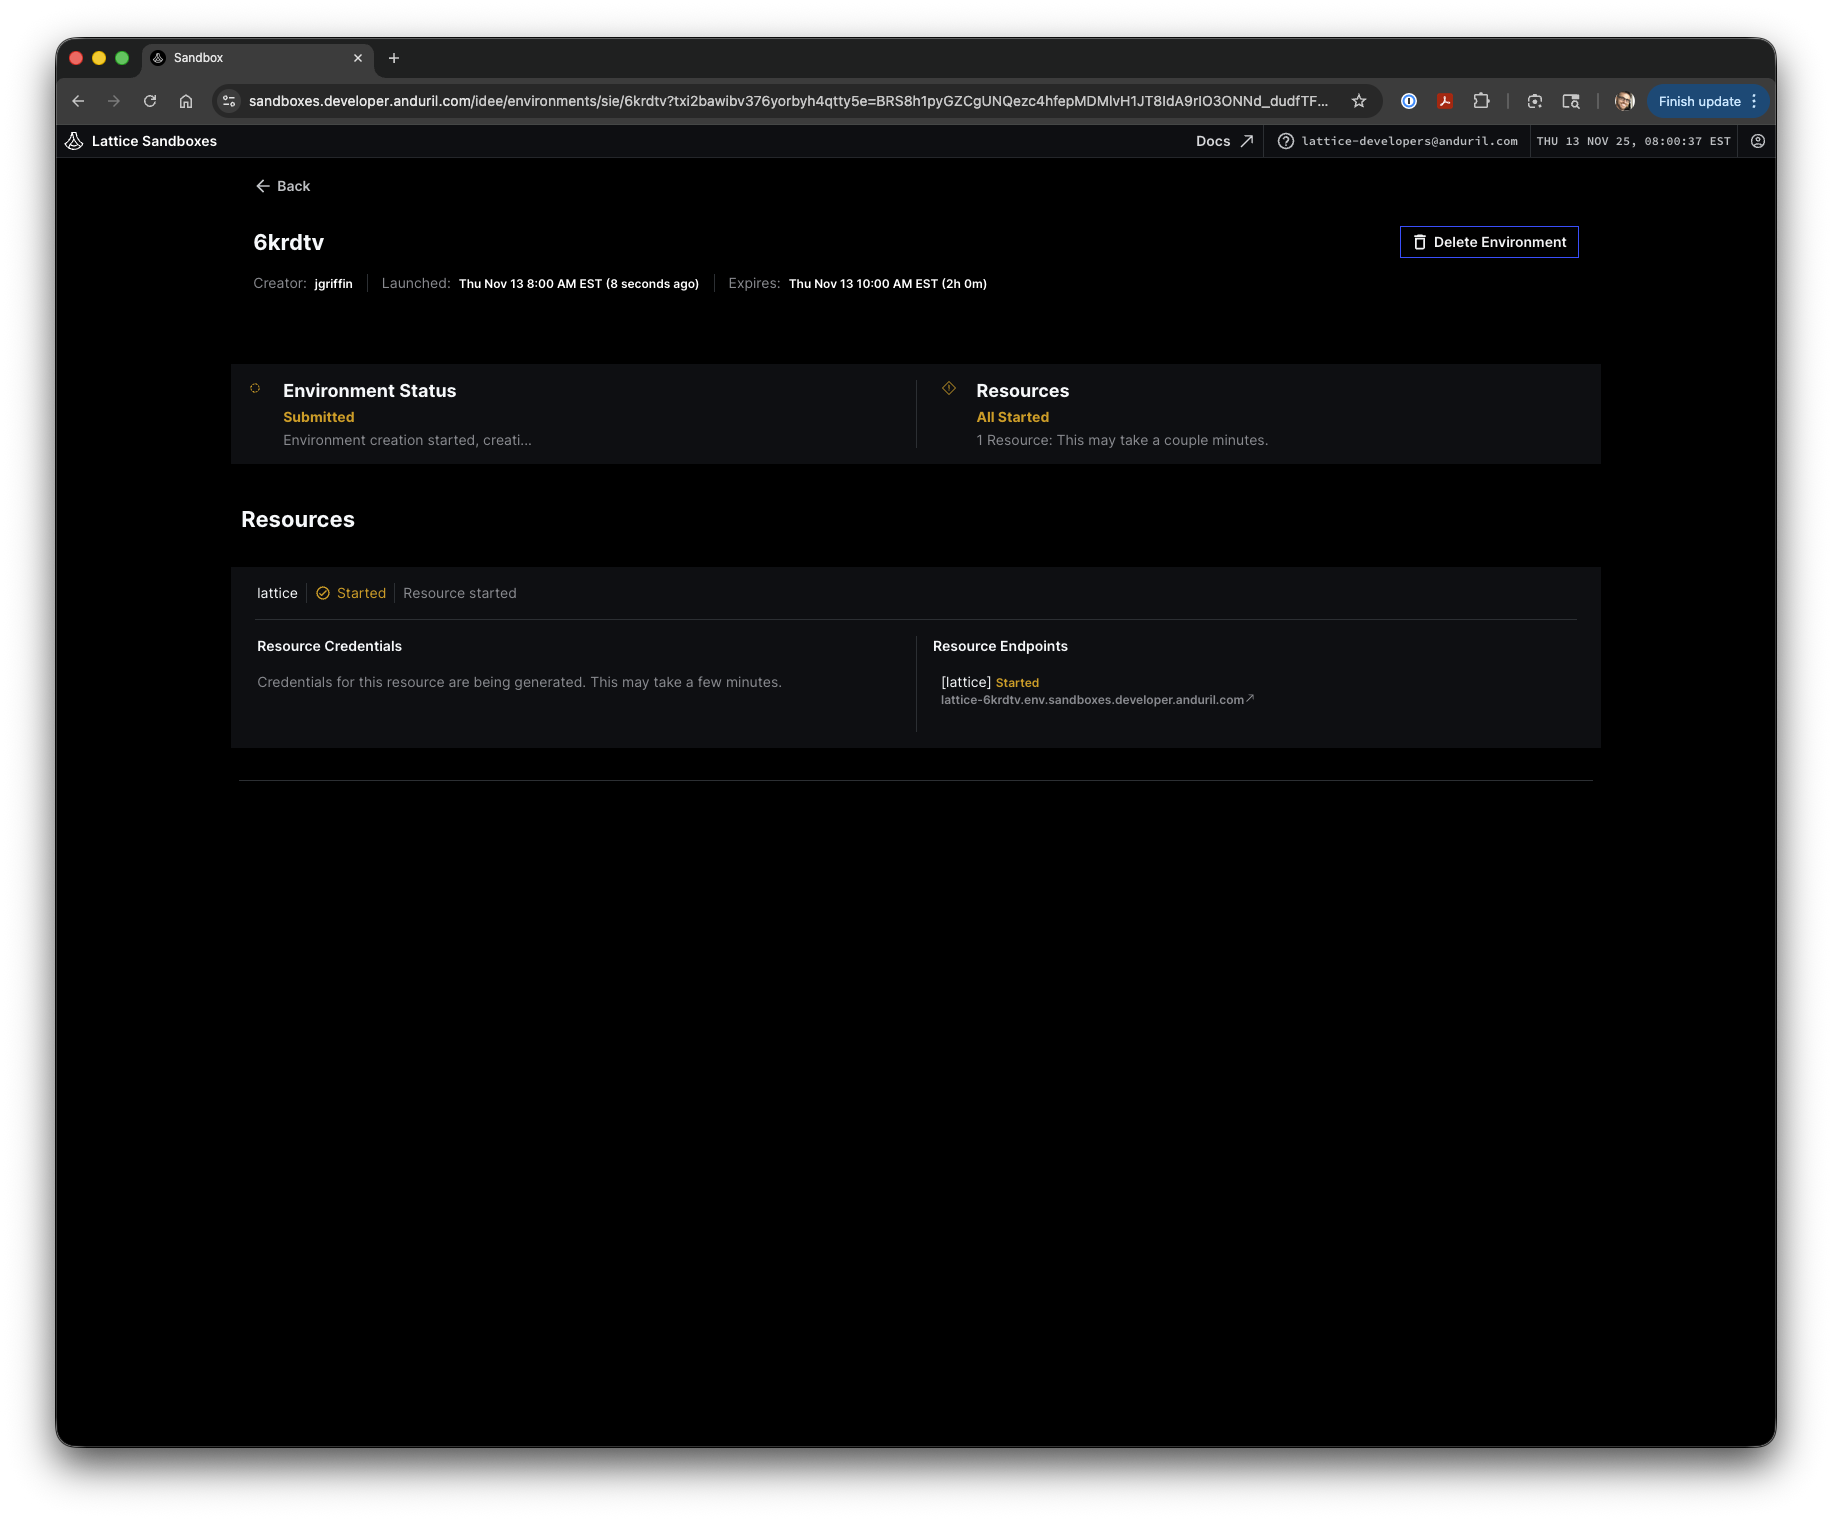
|
Lattice sandbox environments automatically expire after 2 hours. Plan your work accordingly or be prepared to recreate the environment if needed. |
Step 2: Create a New Pipeline
With the Lattice environment starting, you can now create the data pipeline in SDL.
-
Navigate to Catalog > Pipelines in SDL
-
Click CREATE to open the pipeline creation dialog
-
Select Start from scratch

-
Enter a name for your pipeline (e.g., "Lattice Demo") and click CONTINUE
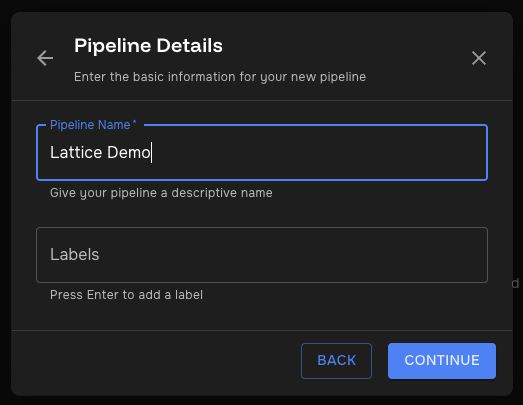
You’ll be taken to the pipeline editor with an empty canvas.
Step 3.1: Add the CoT XML Generator (alternative: connect to a TAK server)
The first component generates synthetic CoT XML messages for testing.
-
In the TRANSFORMERS panel, search for "cot xml generator"
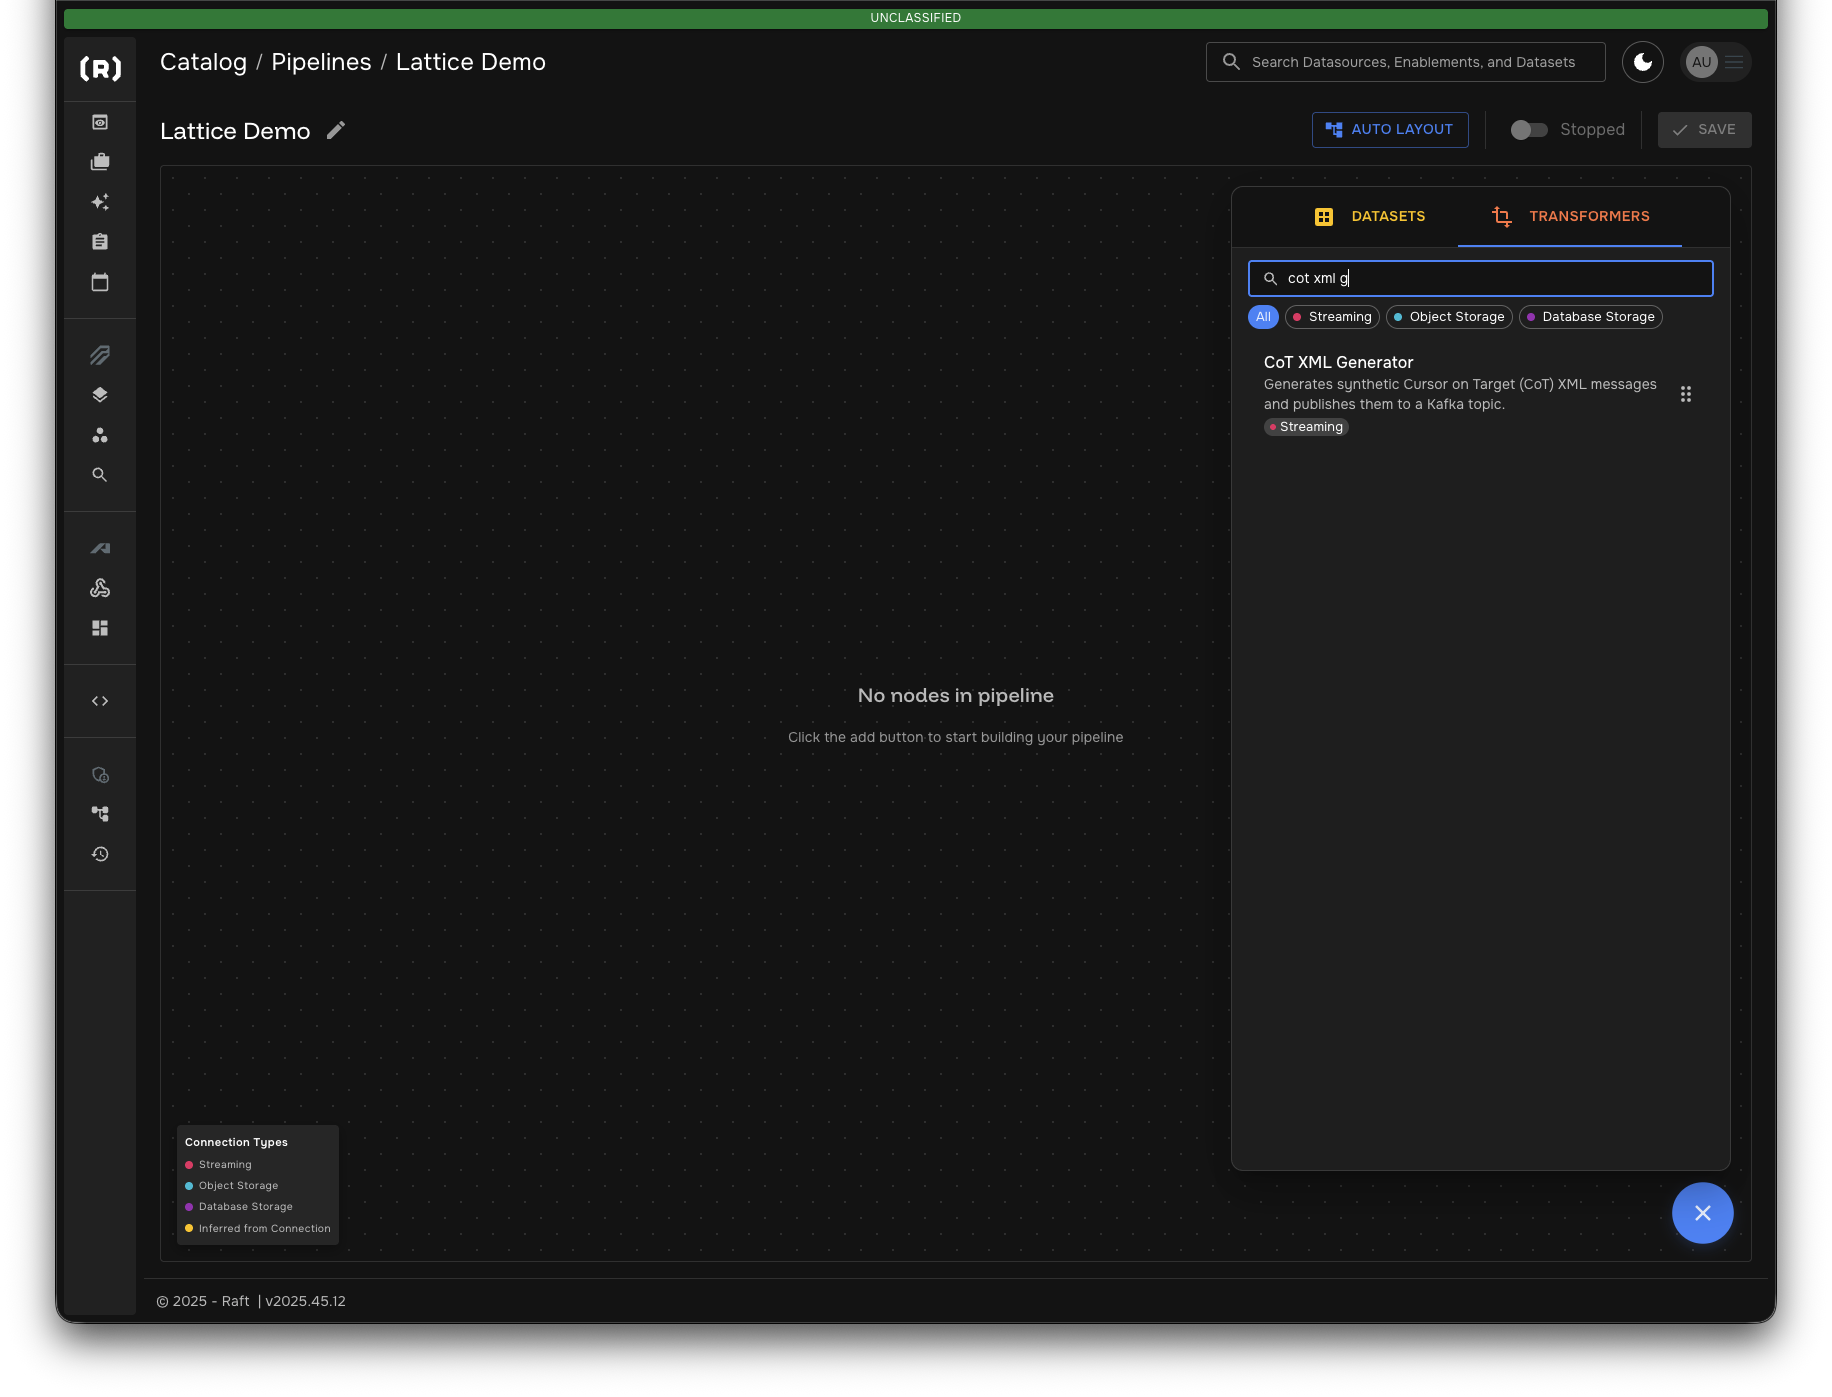
-
Click on CoT XML Generator to add it to your pipeline
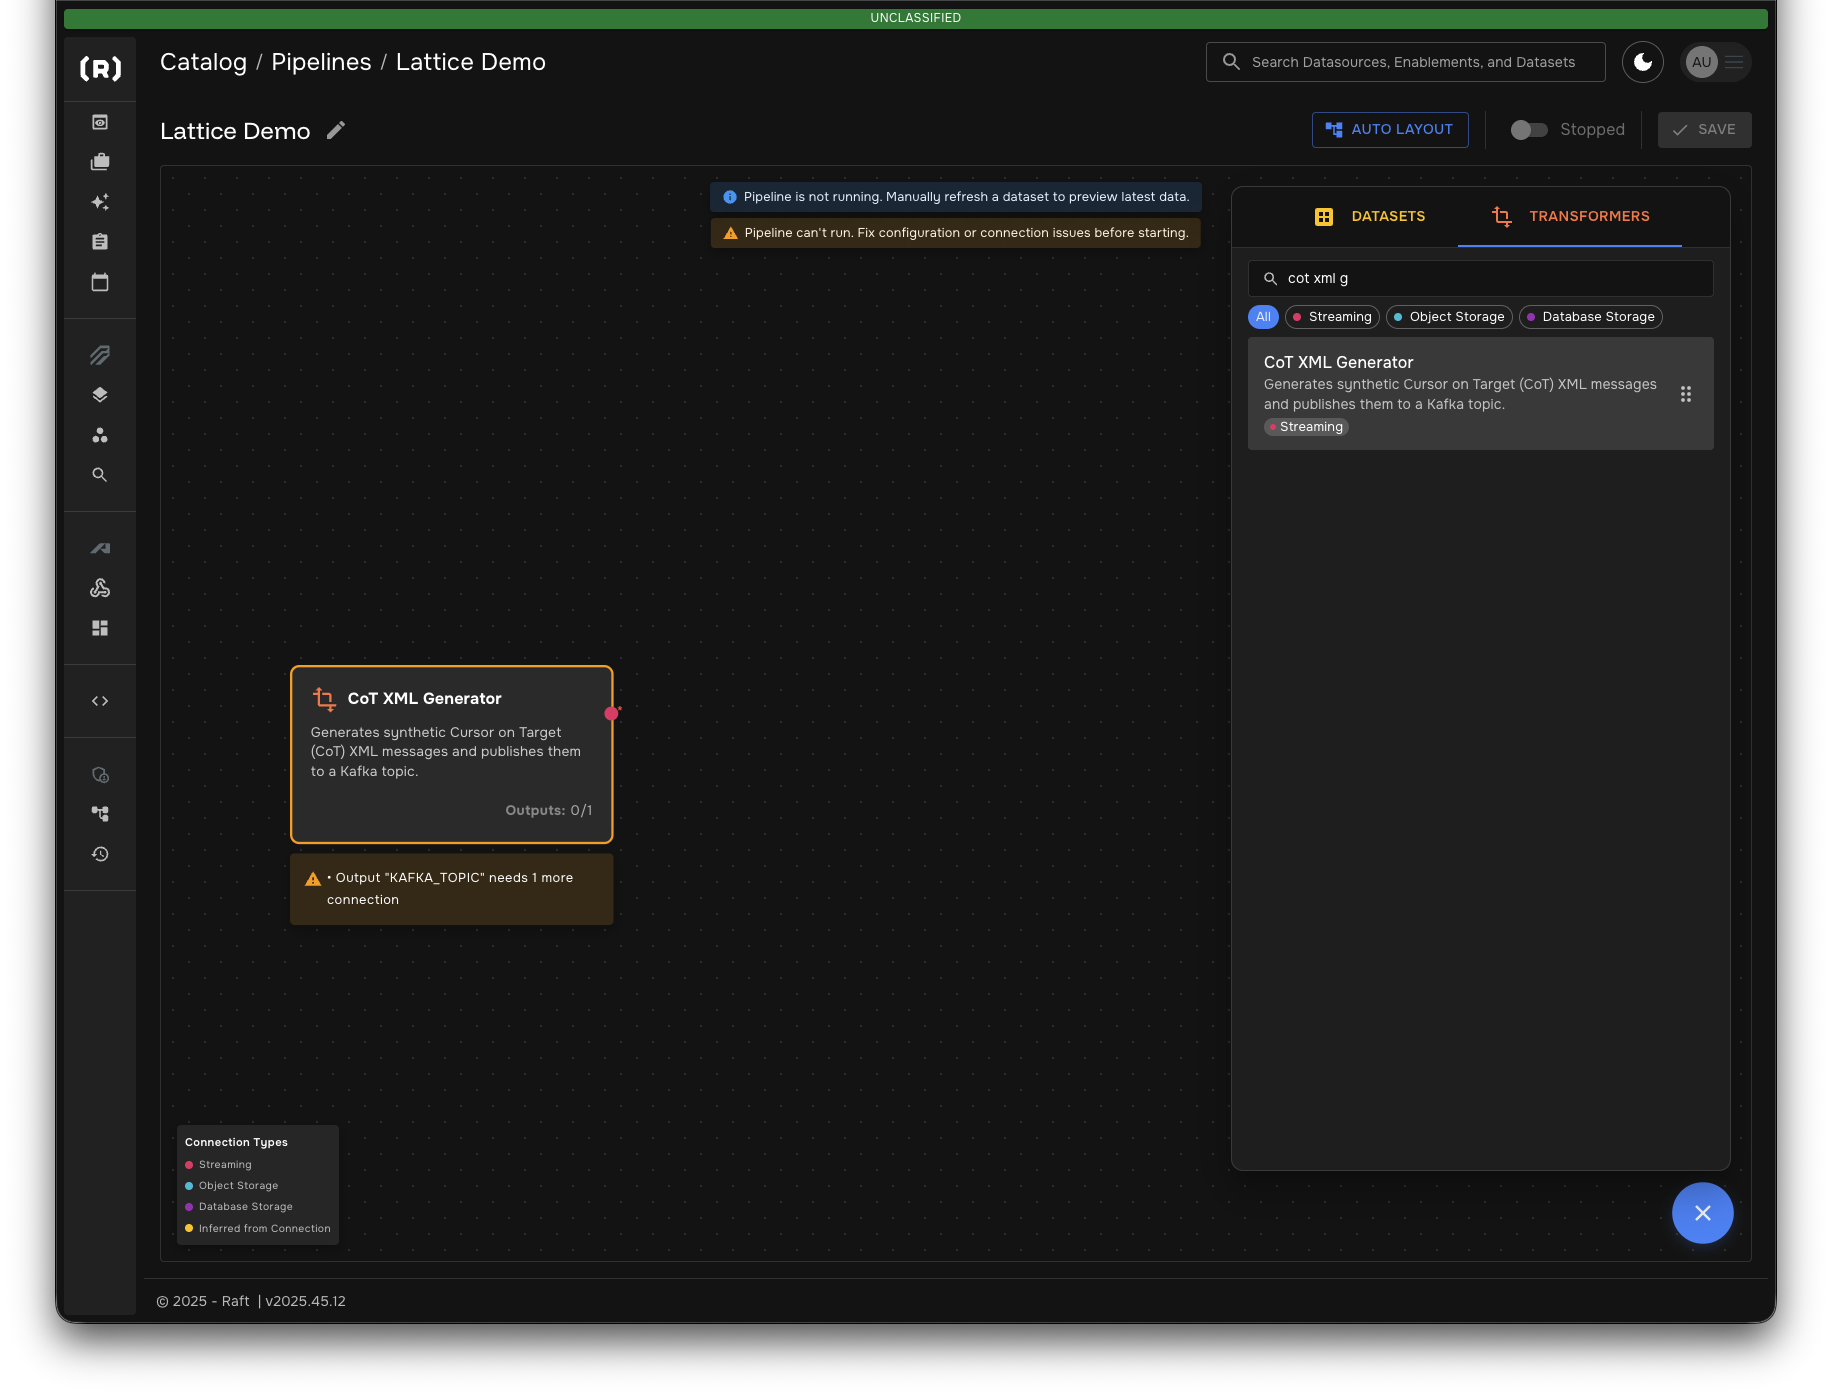
The warning icon indicates the transformer needs an output dataset.
Step 3 Alternative: TAK to Lattice
The first component consumes CoT events directly from a TAK Server connection.
-
In the SOURCES panel, search for "tak consumer"
-
Click on TAK Consumer to add it to your pipeline
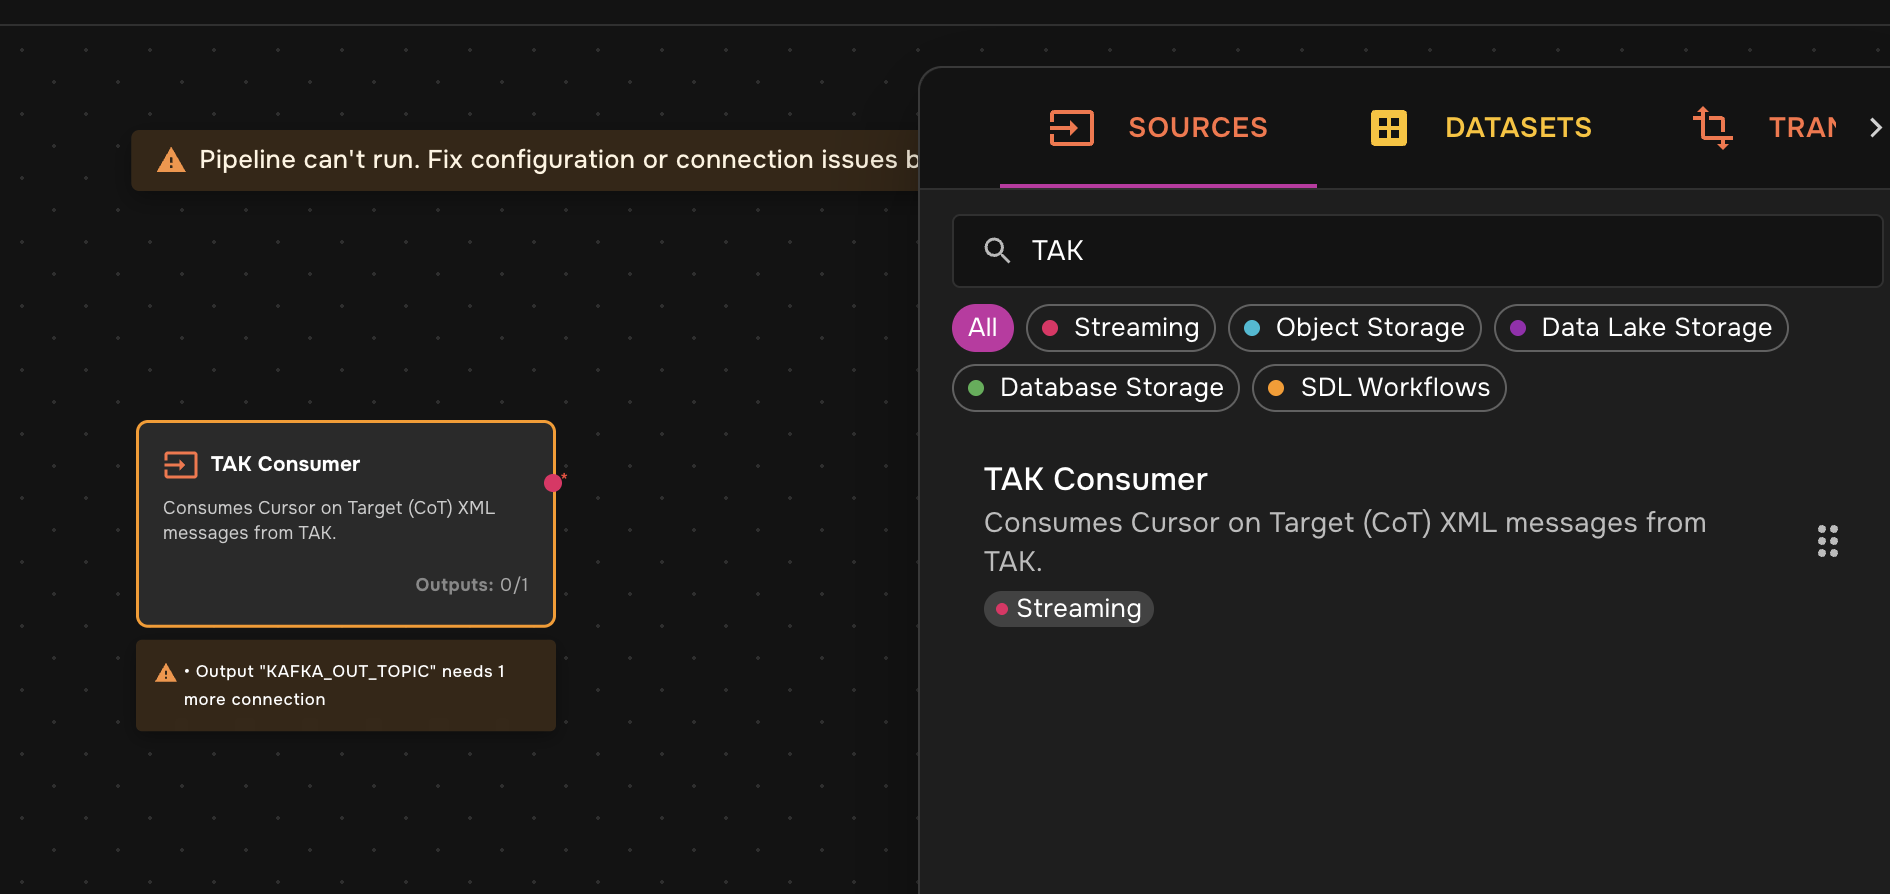
-
Click on the TAK Consumer card and add connection information (url, credentials) under the configuration tab
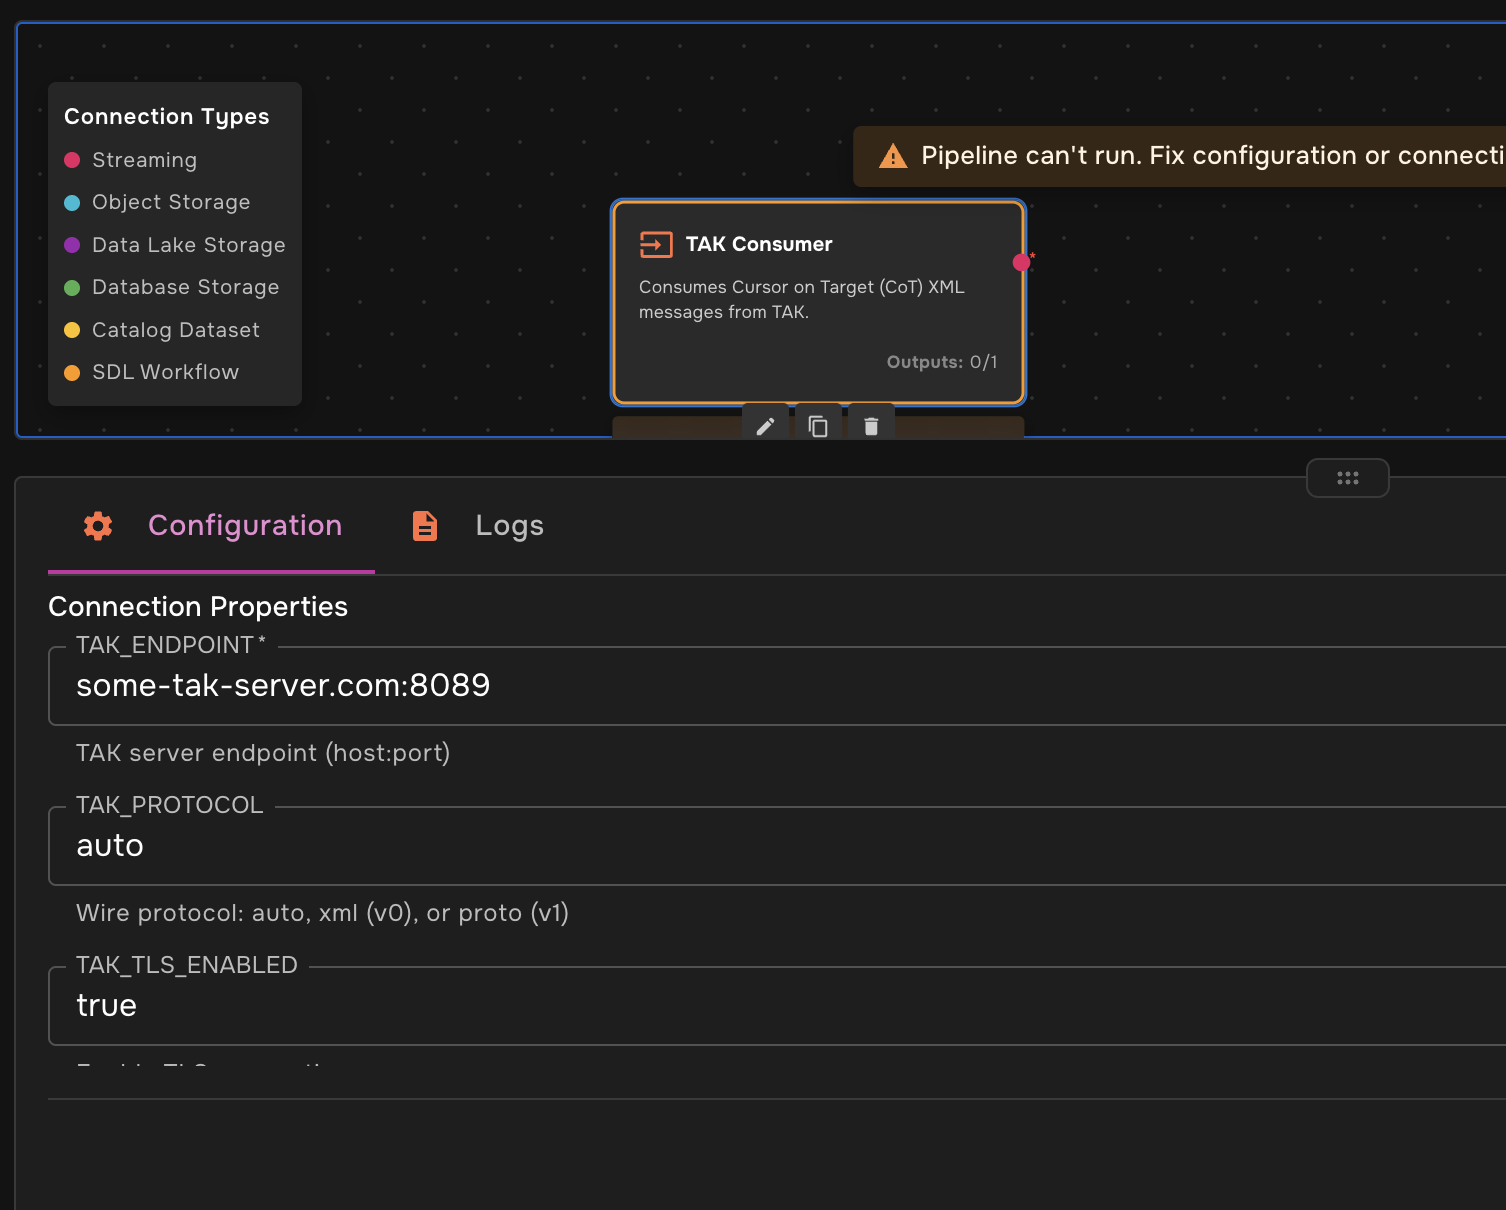
| The warning icon indicates the transformer needs an output dataset and configuration details. |
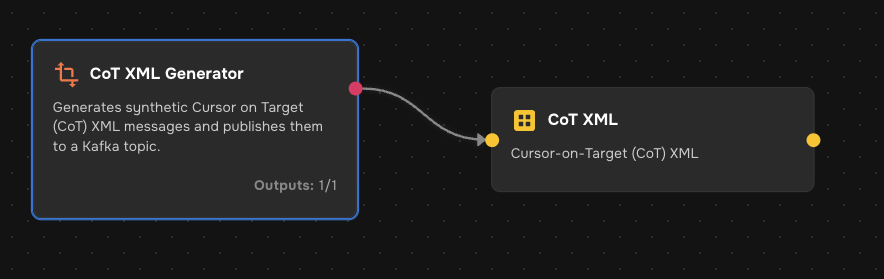
Step 4: Create CoT XML Dataset
Next, create a dataset to connect the generator output.
-
Select the DATASETS tab
-
Configure a new dataset:
-
Display Name:
CoT XML -
Description:
Cursor-on-Target (CoT) XML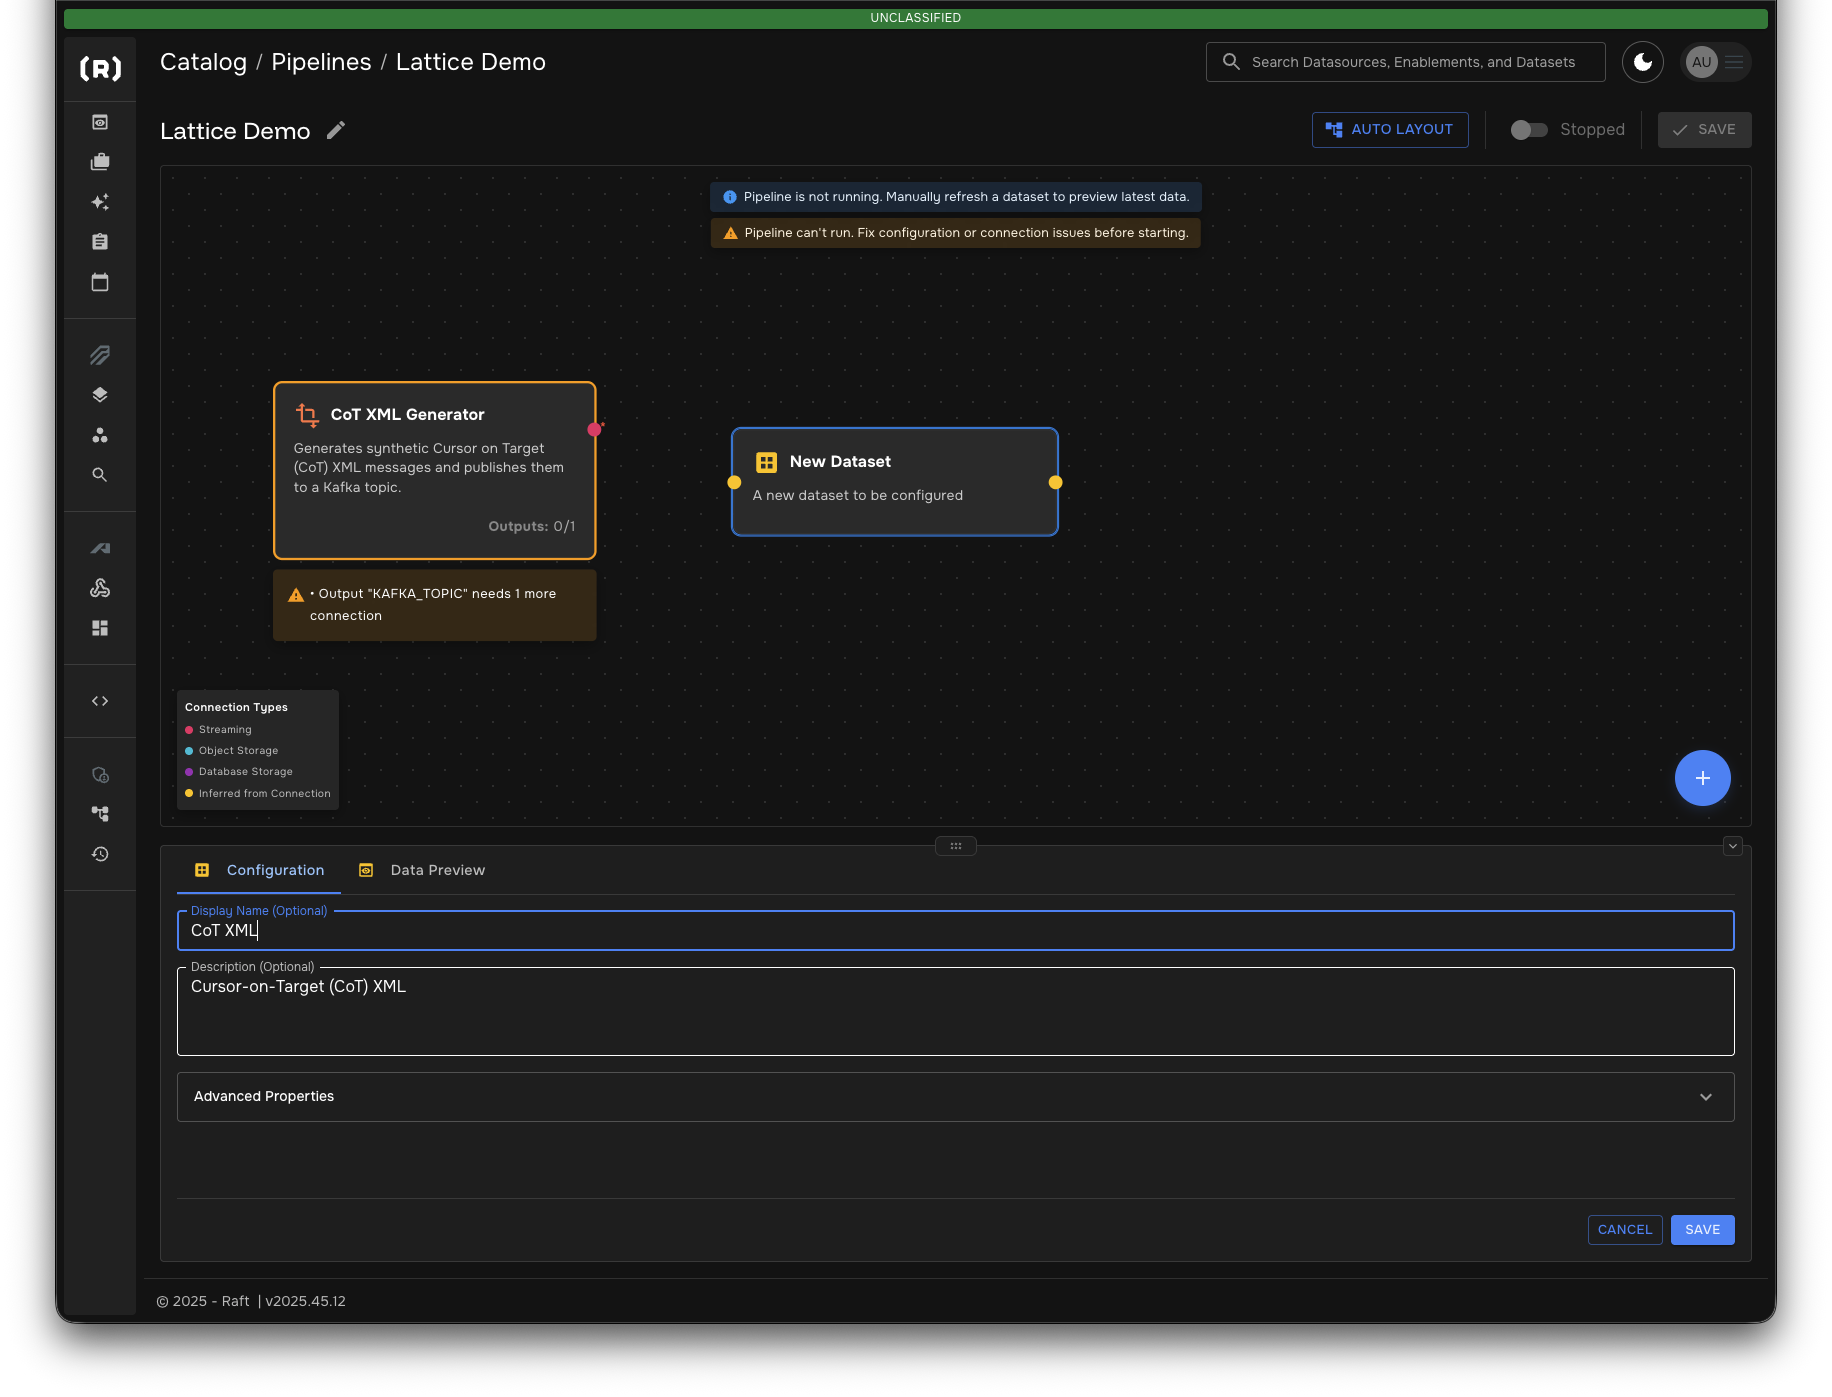
-
-
Connect the CoT XML Generator output to the CoT XML dataset by clicking and dragging between the connection points
Step 5: Add the CoT to Lattice Transformer
Now add the transformer that converts CoT XML to Lattice entity format.
-
Search for "CoT XML to Lattice" in the TRANSFORMERS panel
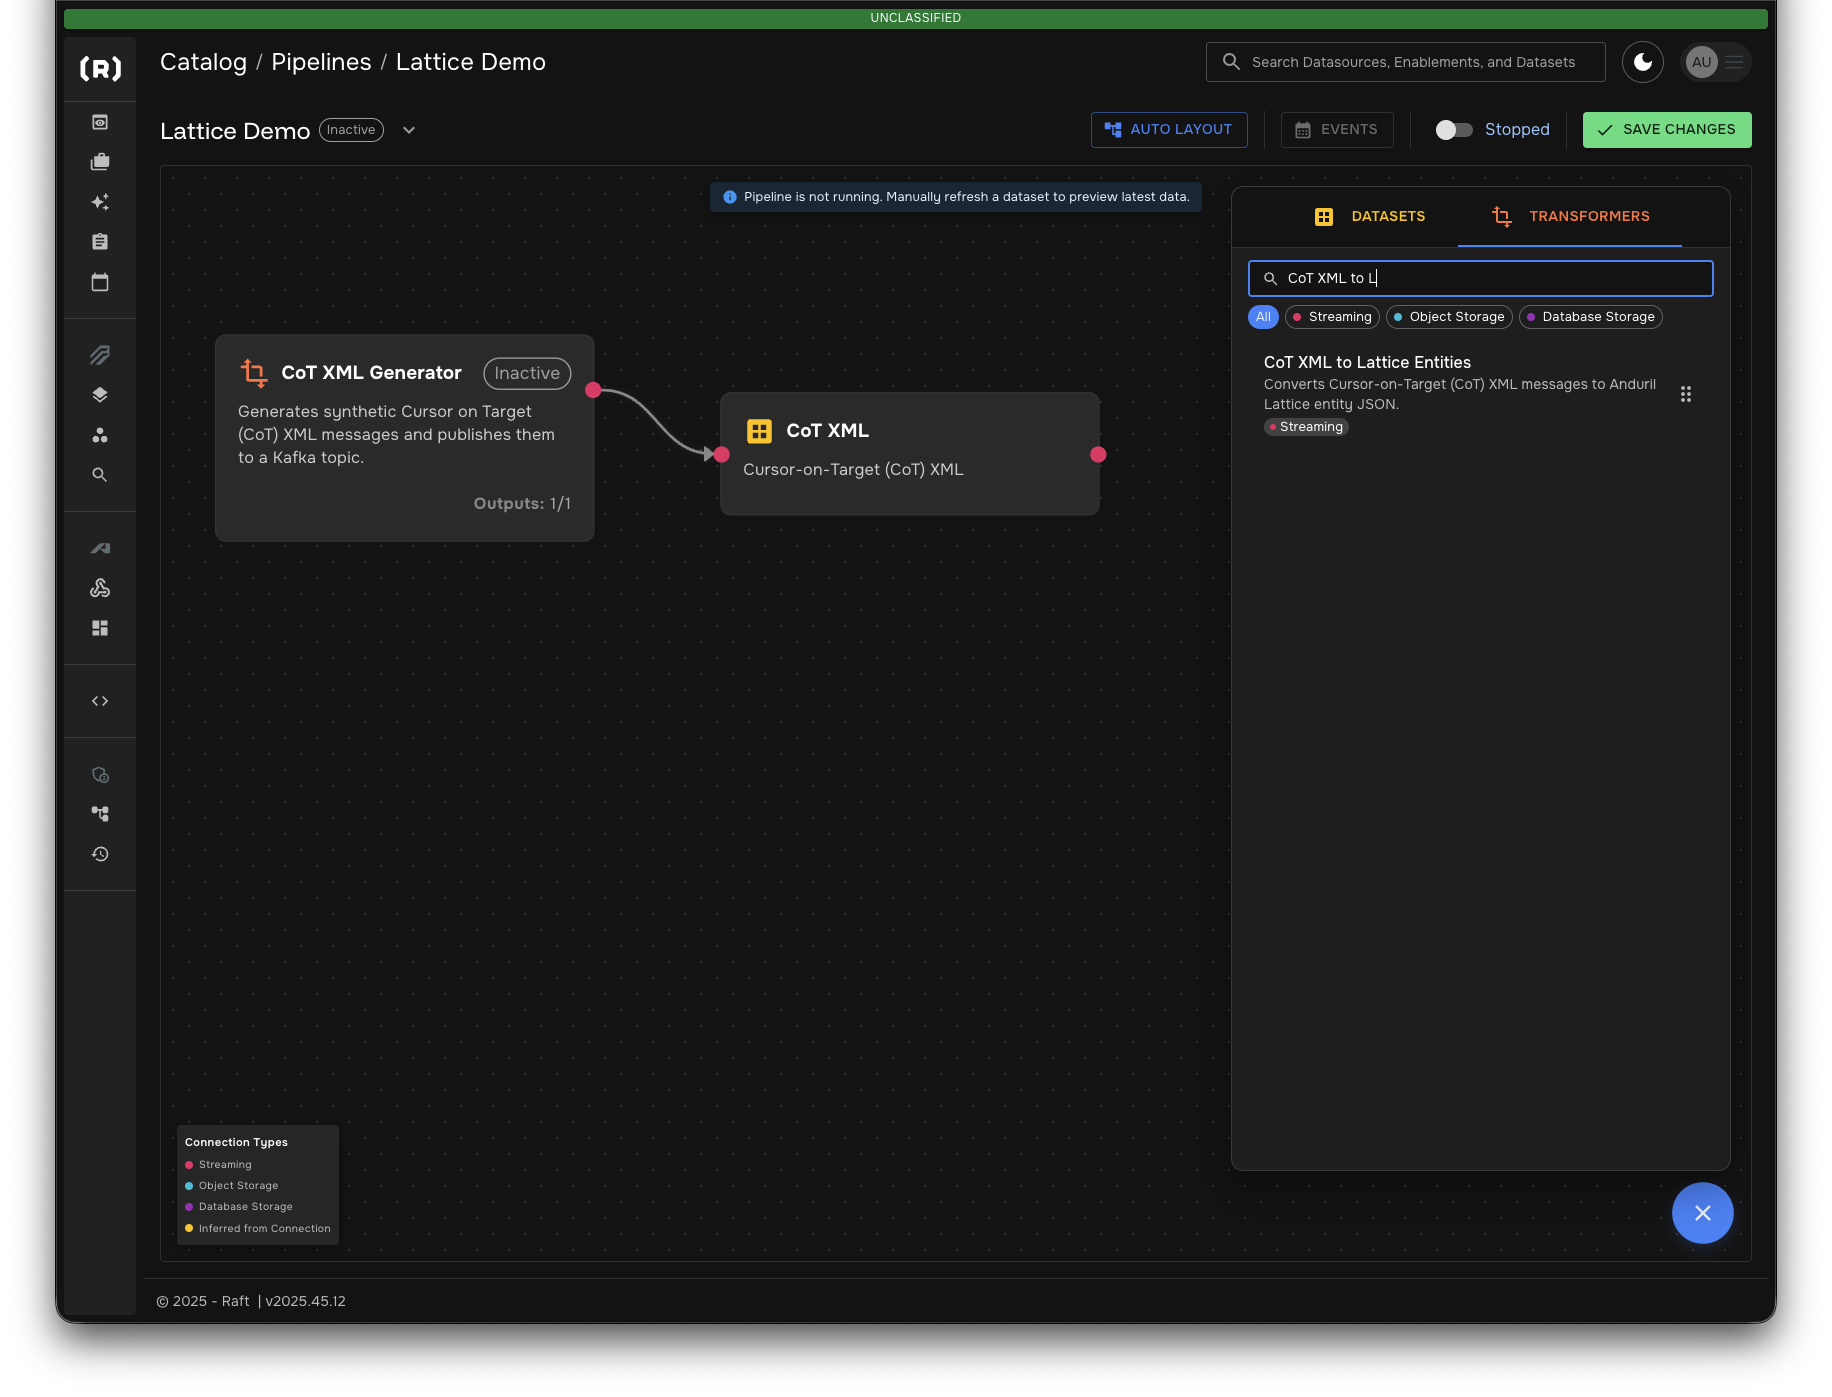
-
Select CoT XML to Lattice Entities and fill in the fields:
-
LATTICE_SIMULATED:
trueThis marks the entity so it appears as a "simulated" entity in Lattice. 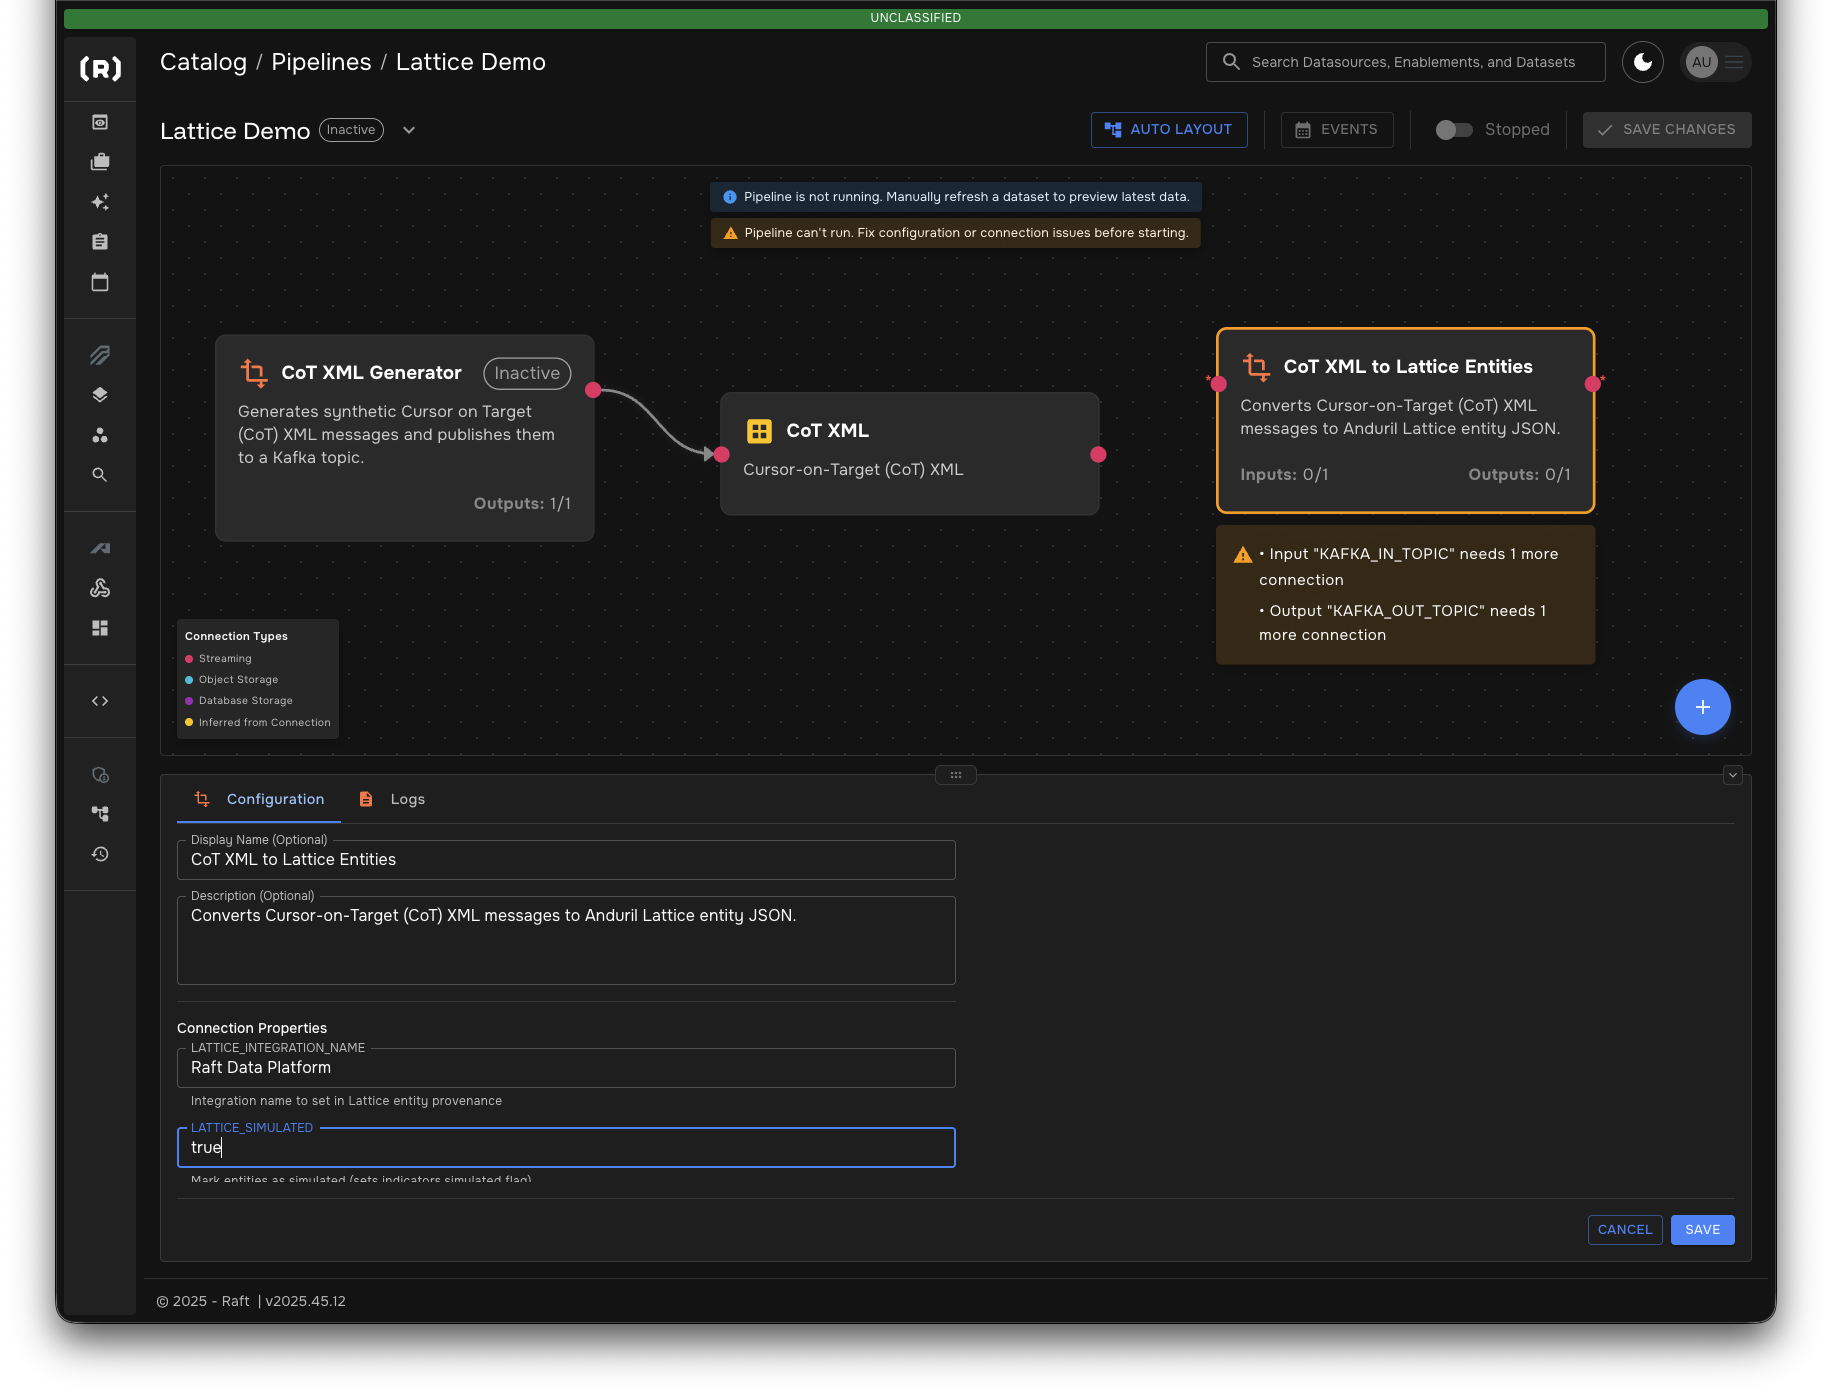
-
-
Connect the CoT XML dataset output to the CoT XML to Lattice Entities transformer input

Step 6: Create Lattice Dataset
Create a dataset to hold the transformed Lattice entities.
-
Click the + button on the dataset node that appears after the transformer
-
Configure a new dataset:
-
Display Name:
Lattice Entities -
Description:
Lattice entities in JSON format, ready to send to Lattice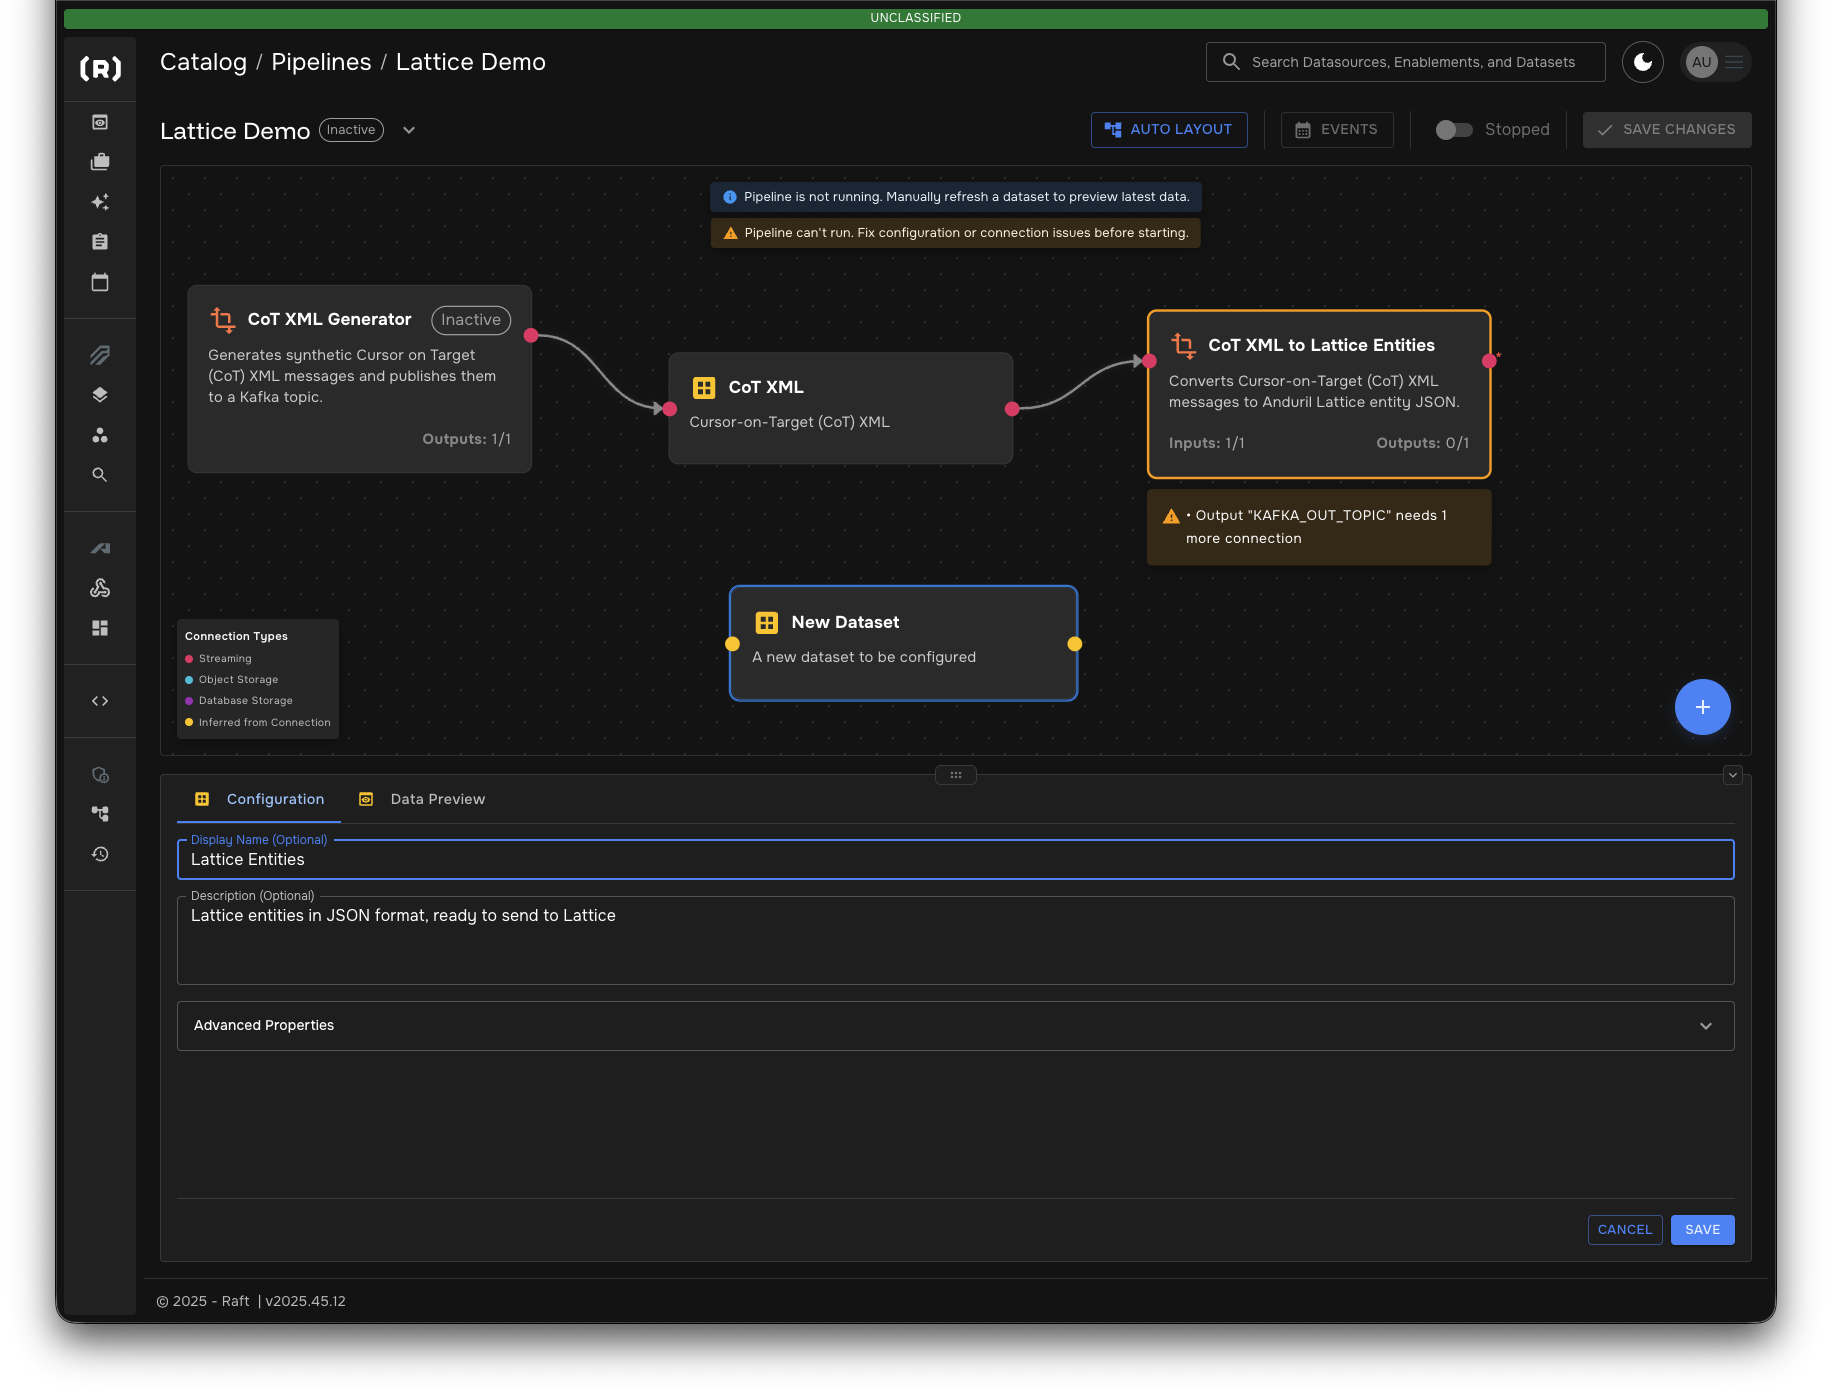
-
-
Connect the output from the CoT XML to Lattice Entities transformer to the Lattice Entities dataset.
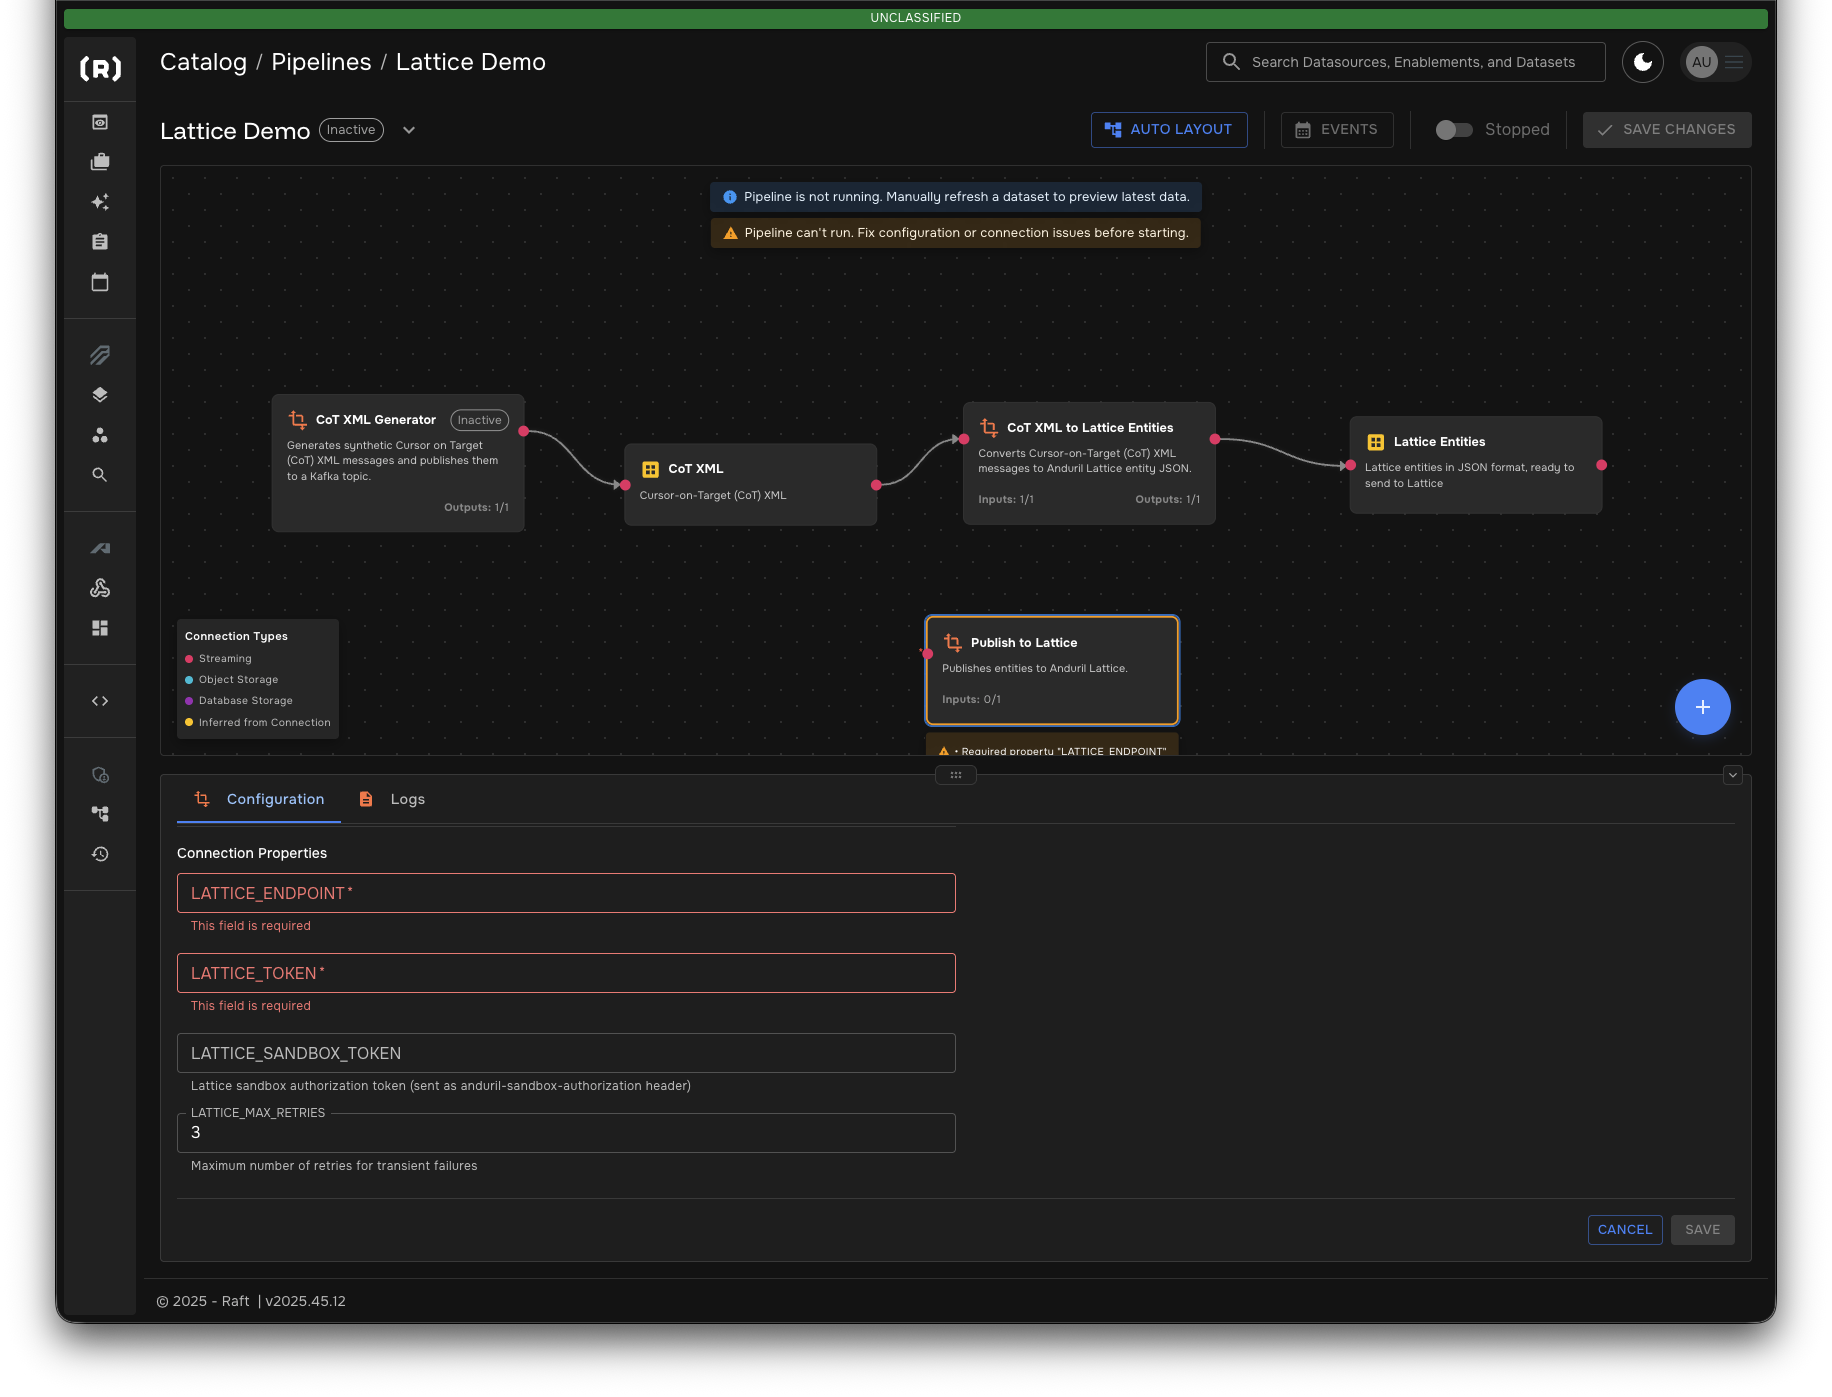
Step 7: Add the Publish to Lattice Transformer
Finally, add the transformer that publishes entities to Lattice.
-
Return to your Lattice sandbox and wait for it to finish provisioning
-
Search for "Publish to Lattice" in the TRANSFORMERS panel

-
Configure the Publish to Lattice transformer
-
LATTICE_ENDPOINT: endpoint to the lattice environment
-
LATTICE_TOKEN: token for connecting to lattice environment
-
LATTICE_SANDBOX_TOKEN: this is your private "anduril developer" sandbox token (only applies when connecting to a developer sandbox environment)
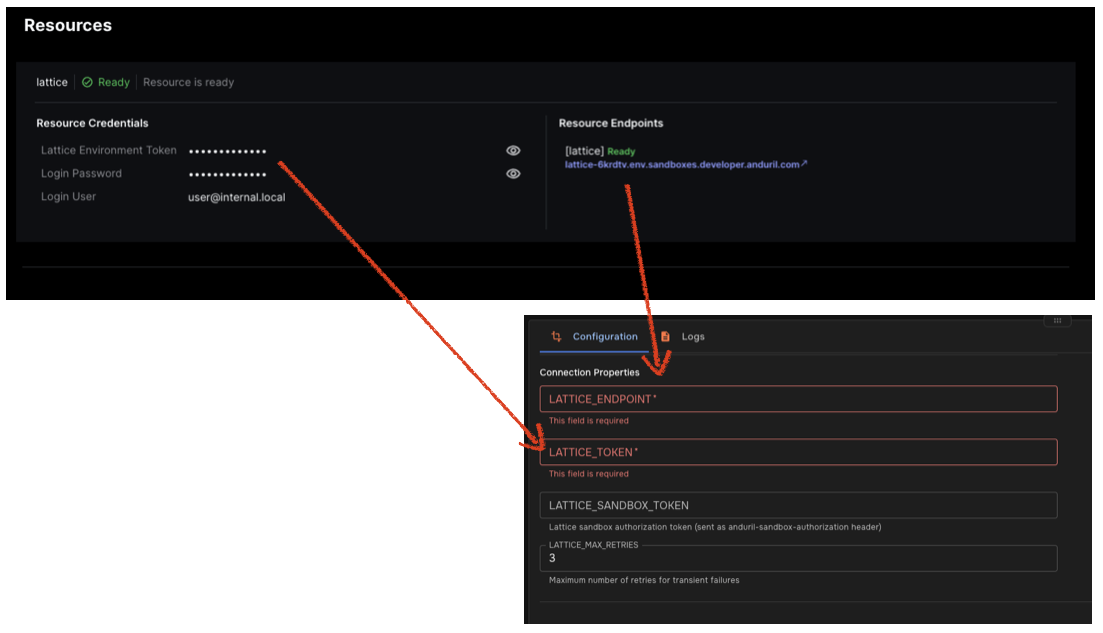
-
LATTICE_RESET_INVALID_EXPIRY:
true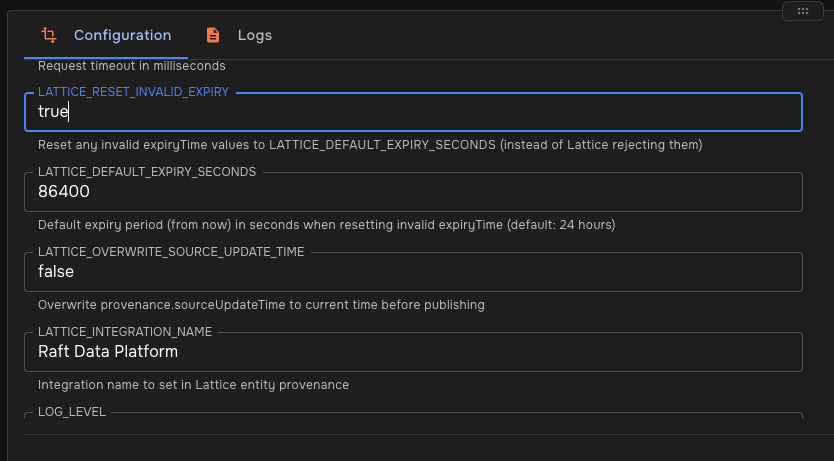
-
LATTICE_OVERWRITE_SOURCE_UPDATE_TIME:
true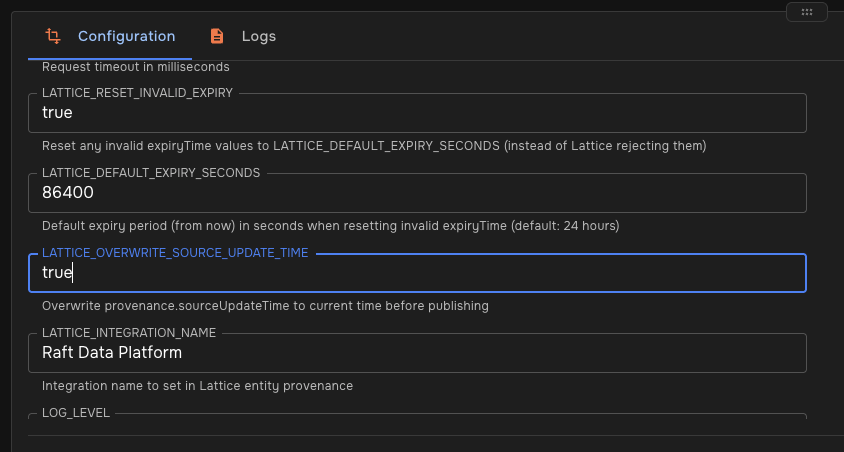
-
-
Connect the Lattice Entities dataset to the Publish to Lattice sink.
Step 8: Save and Run the Pipeline
Your pipeline is now complete and ready to run.
-
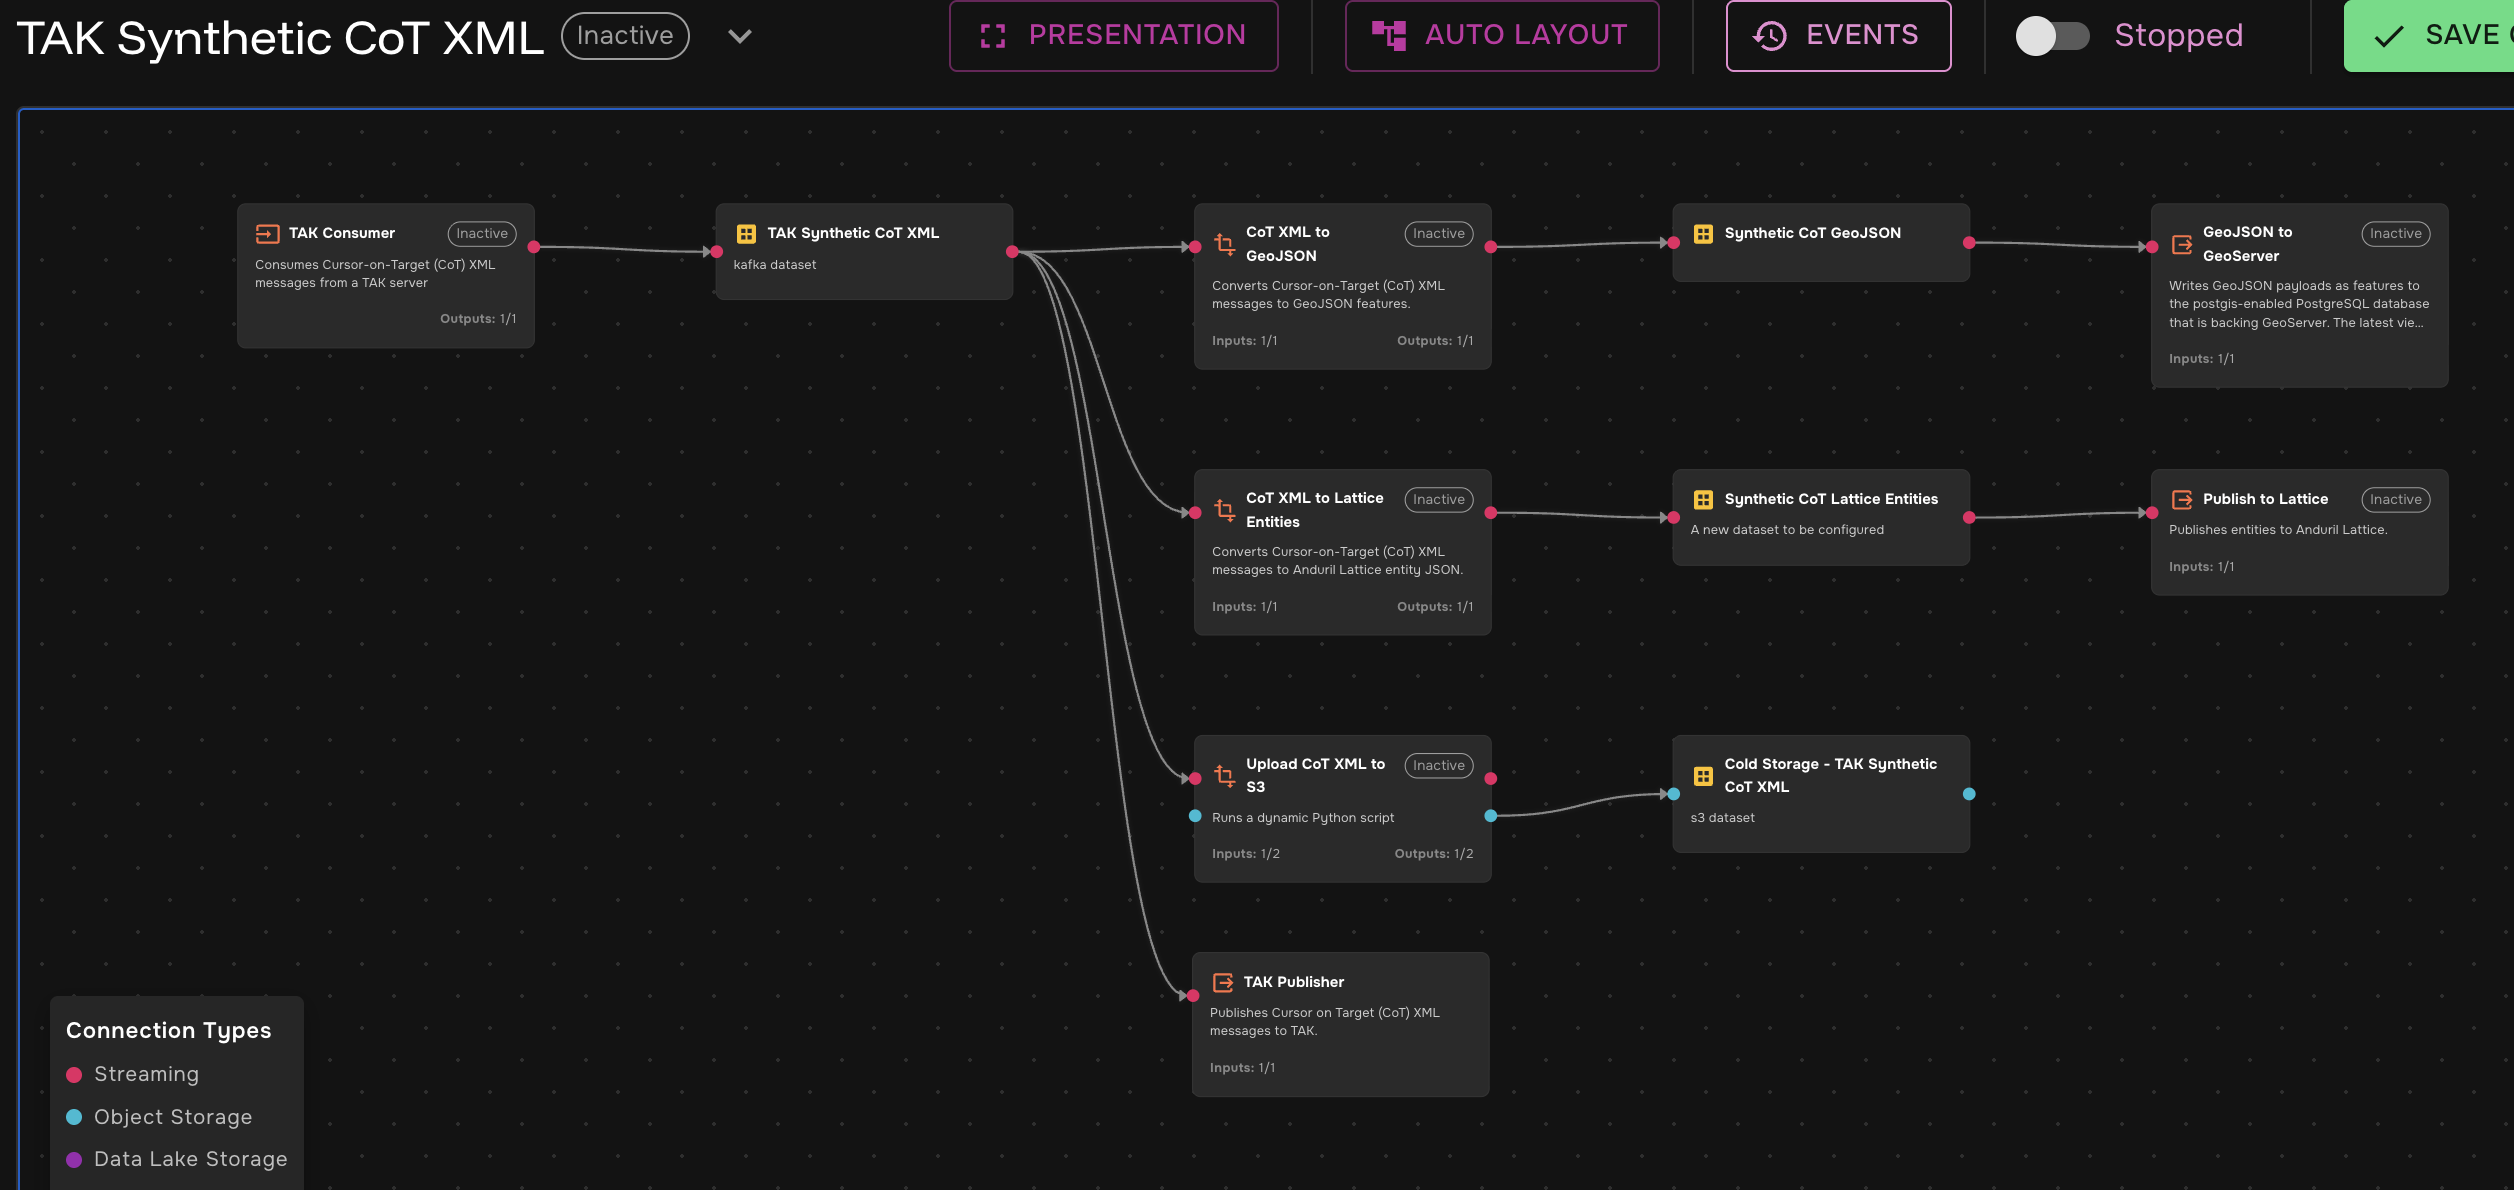
Review the complete pipeline:
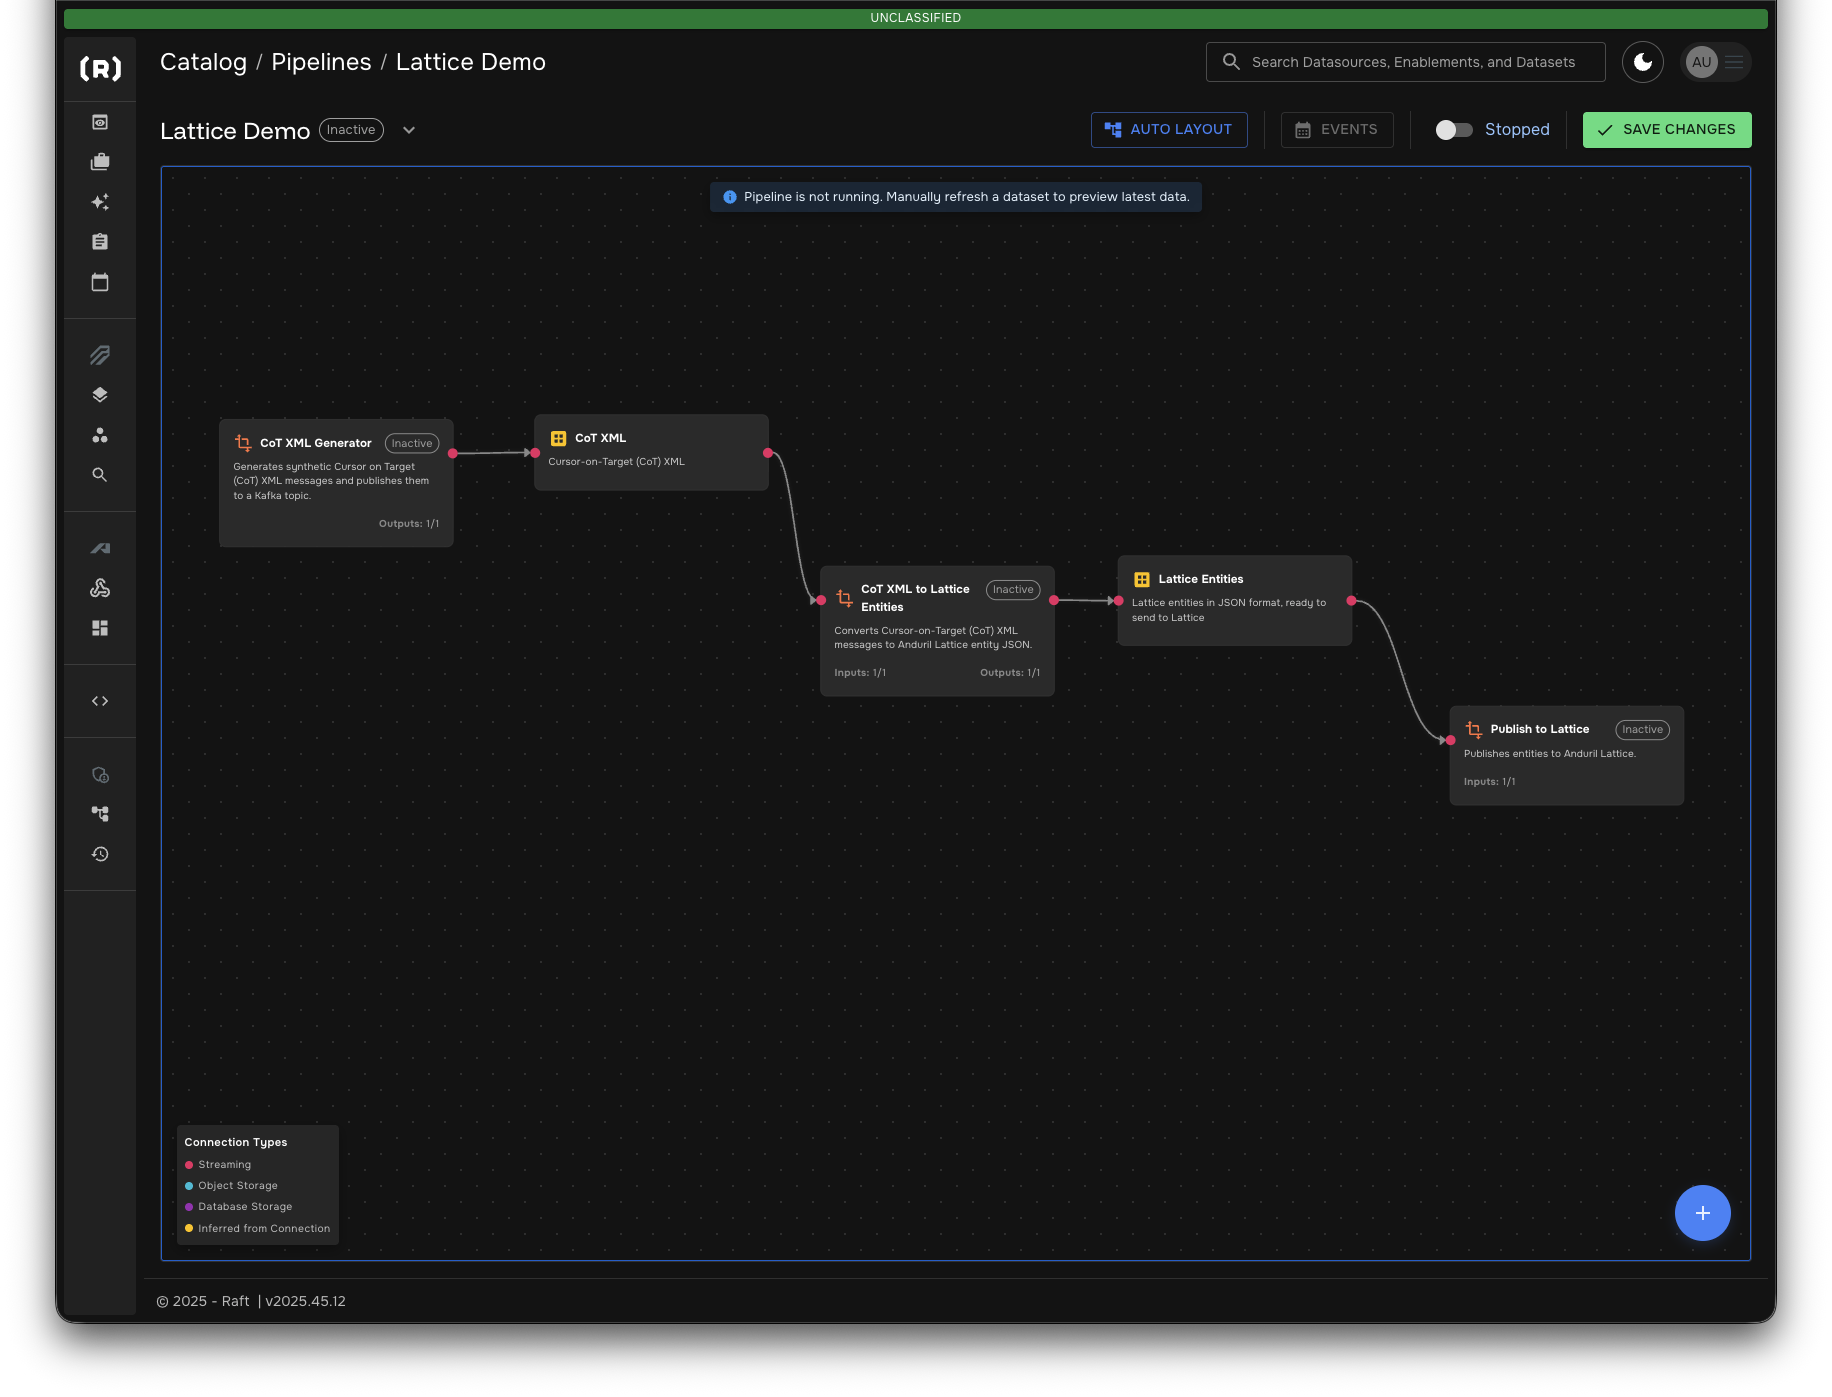
The pipeline flows from left to right:
-
CoT XML Generator (or TAK Connection) → CoT XML dataset
-
CoT XML dataset → CoT XML to Lattice Entities transformer
-
Lattice Entities transformer → Lattice Entities dataset
-
Lattice Entities dataset → Publish to Lattice transformer
-
-
Click SAVE CHANGES in the top right
-
Click the toggle to change the pipeline state from Stopped to Running
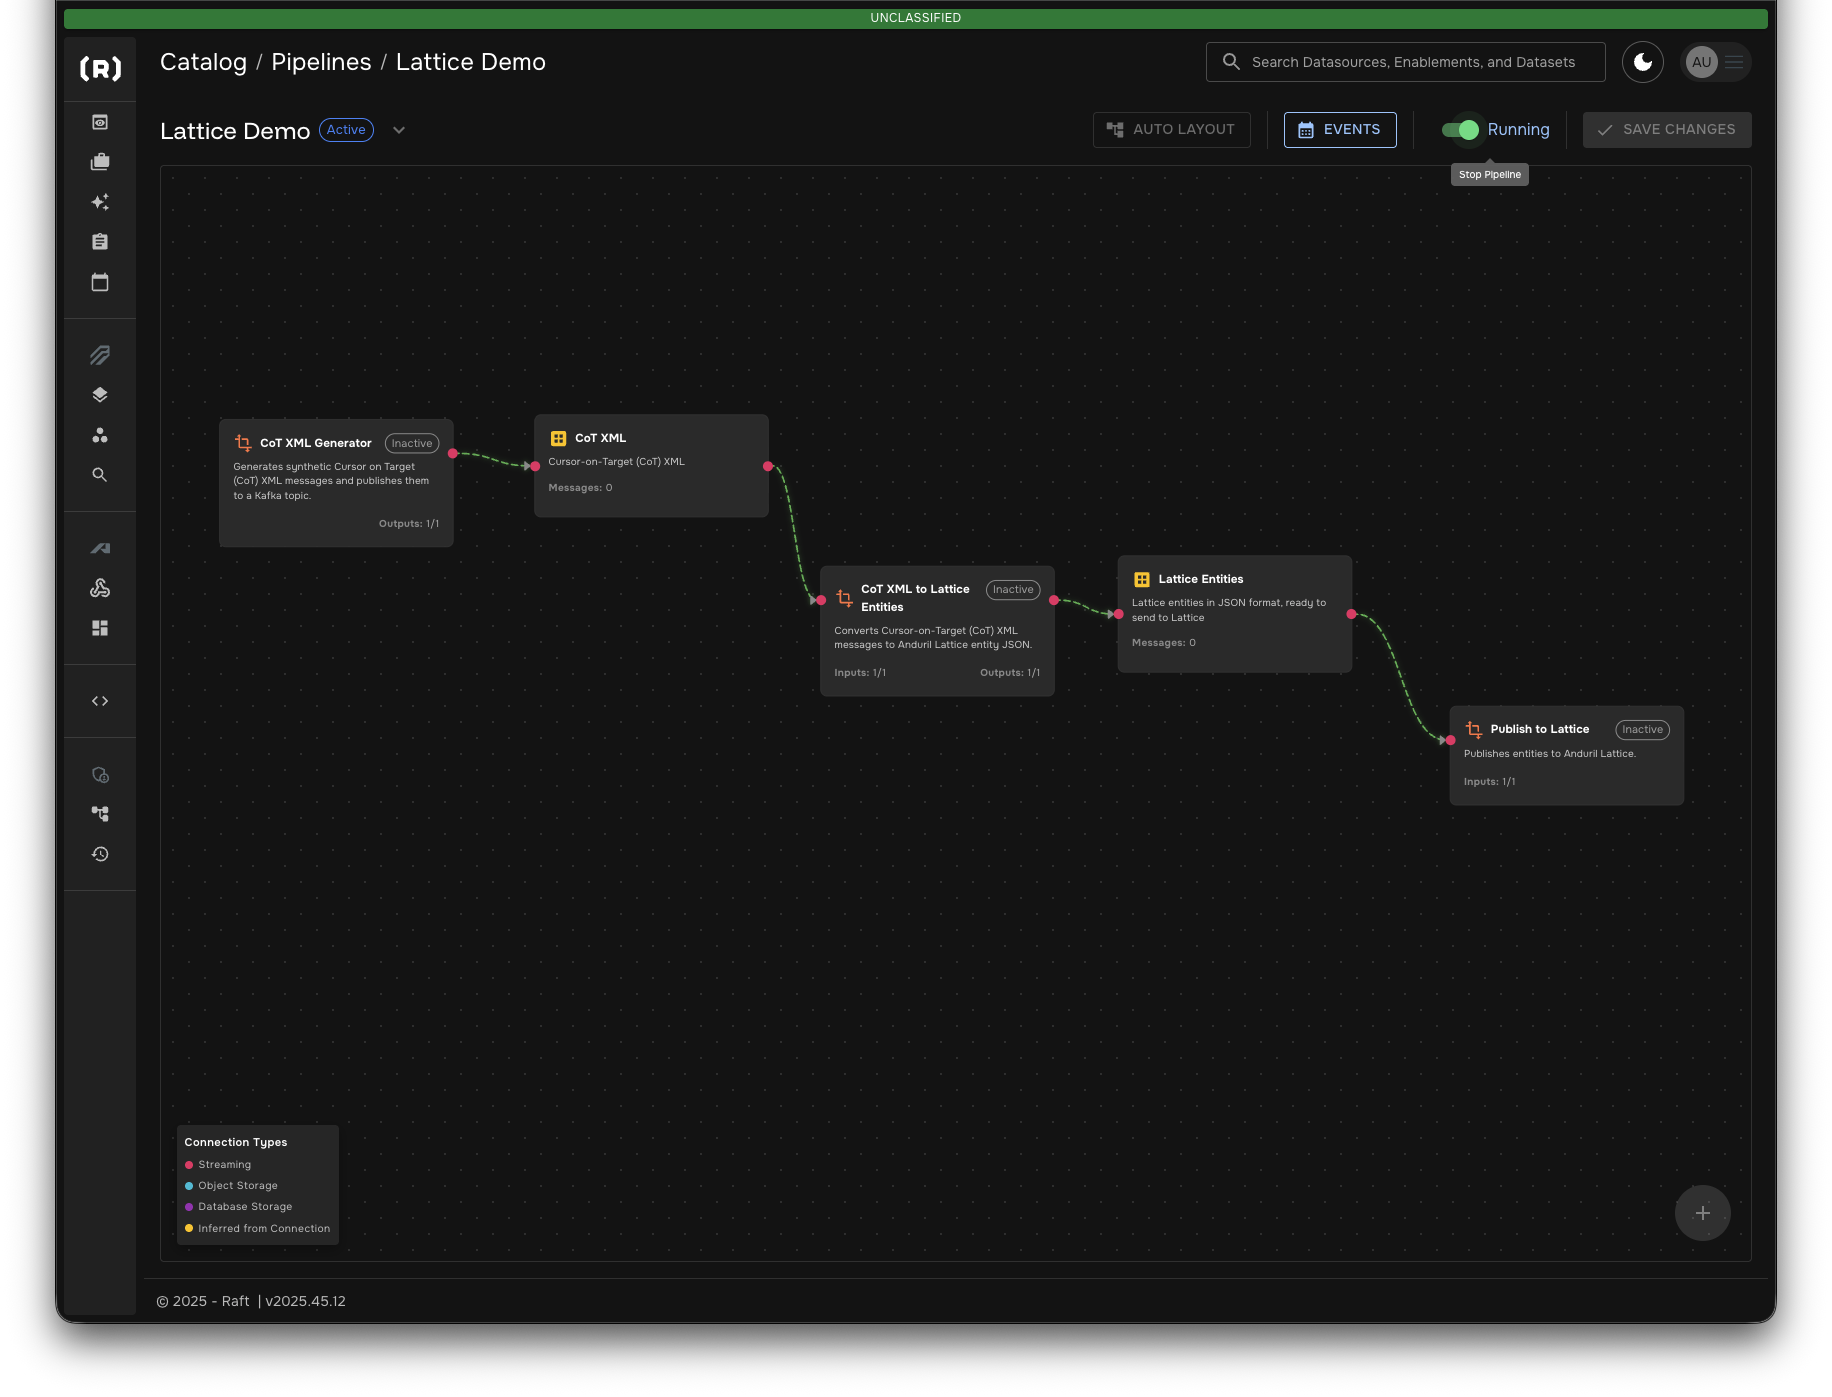
The pipeline will start processing:
-
Generating synthetic CoT messages
-
Transforming them to Lattice entities
-
Publishing them to your Lattice sandbox
-
-
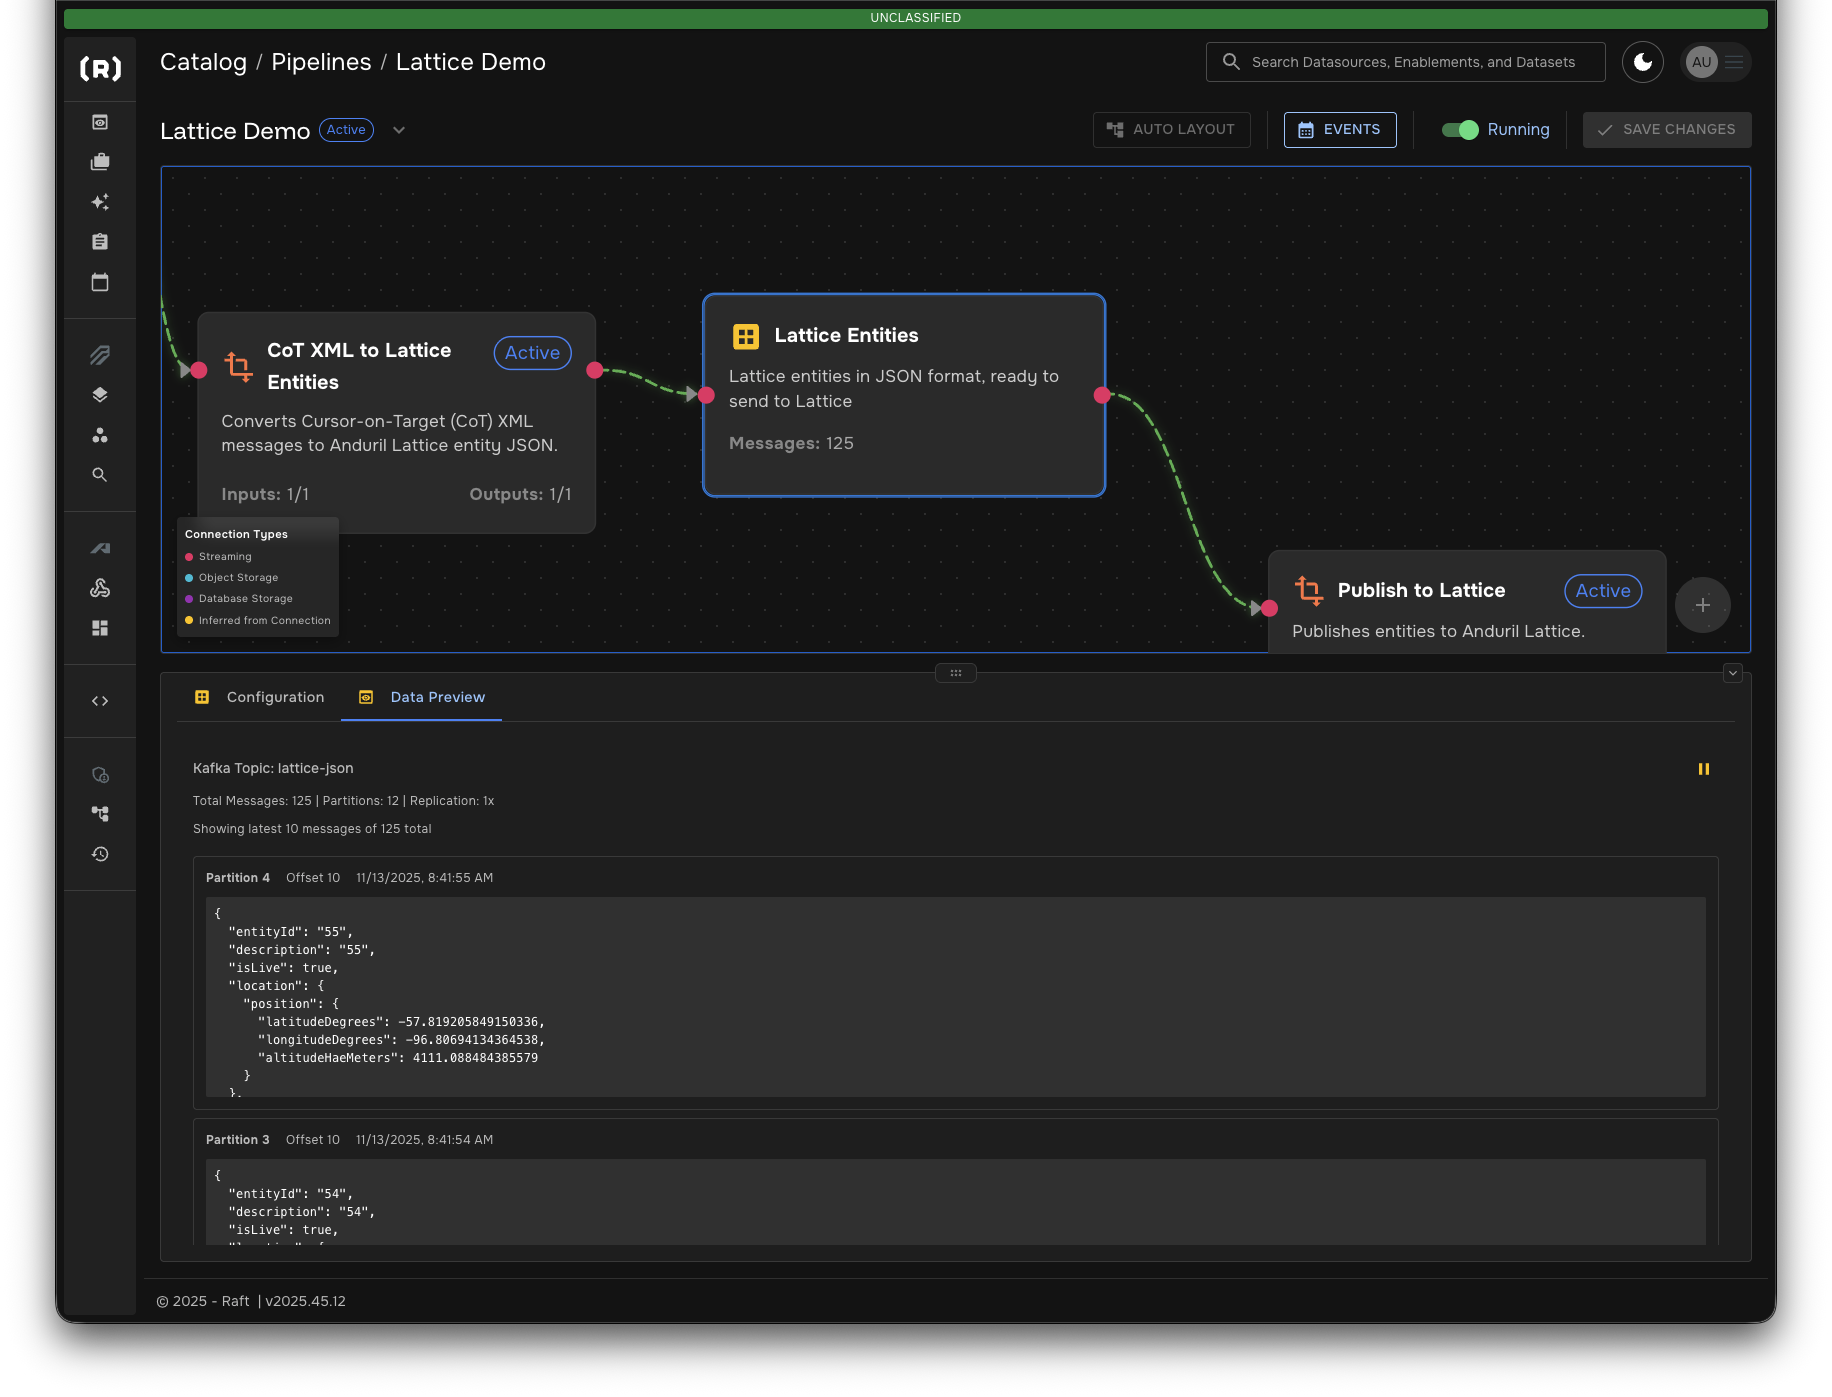
Select the Lattice Entities dataset and click the Data Preview tab to see messages to be published to Lattice
Step 9: View Results in Lattice
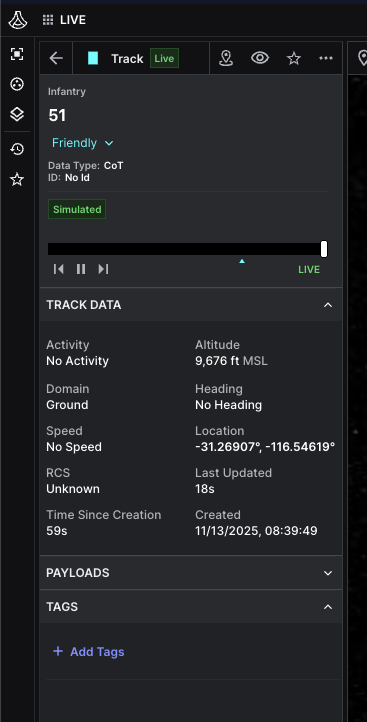
Switch to your Lattice sandbox to see the entities appear in real-time.
-
Navigate to your Lattice instance in the browser

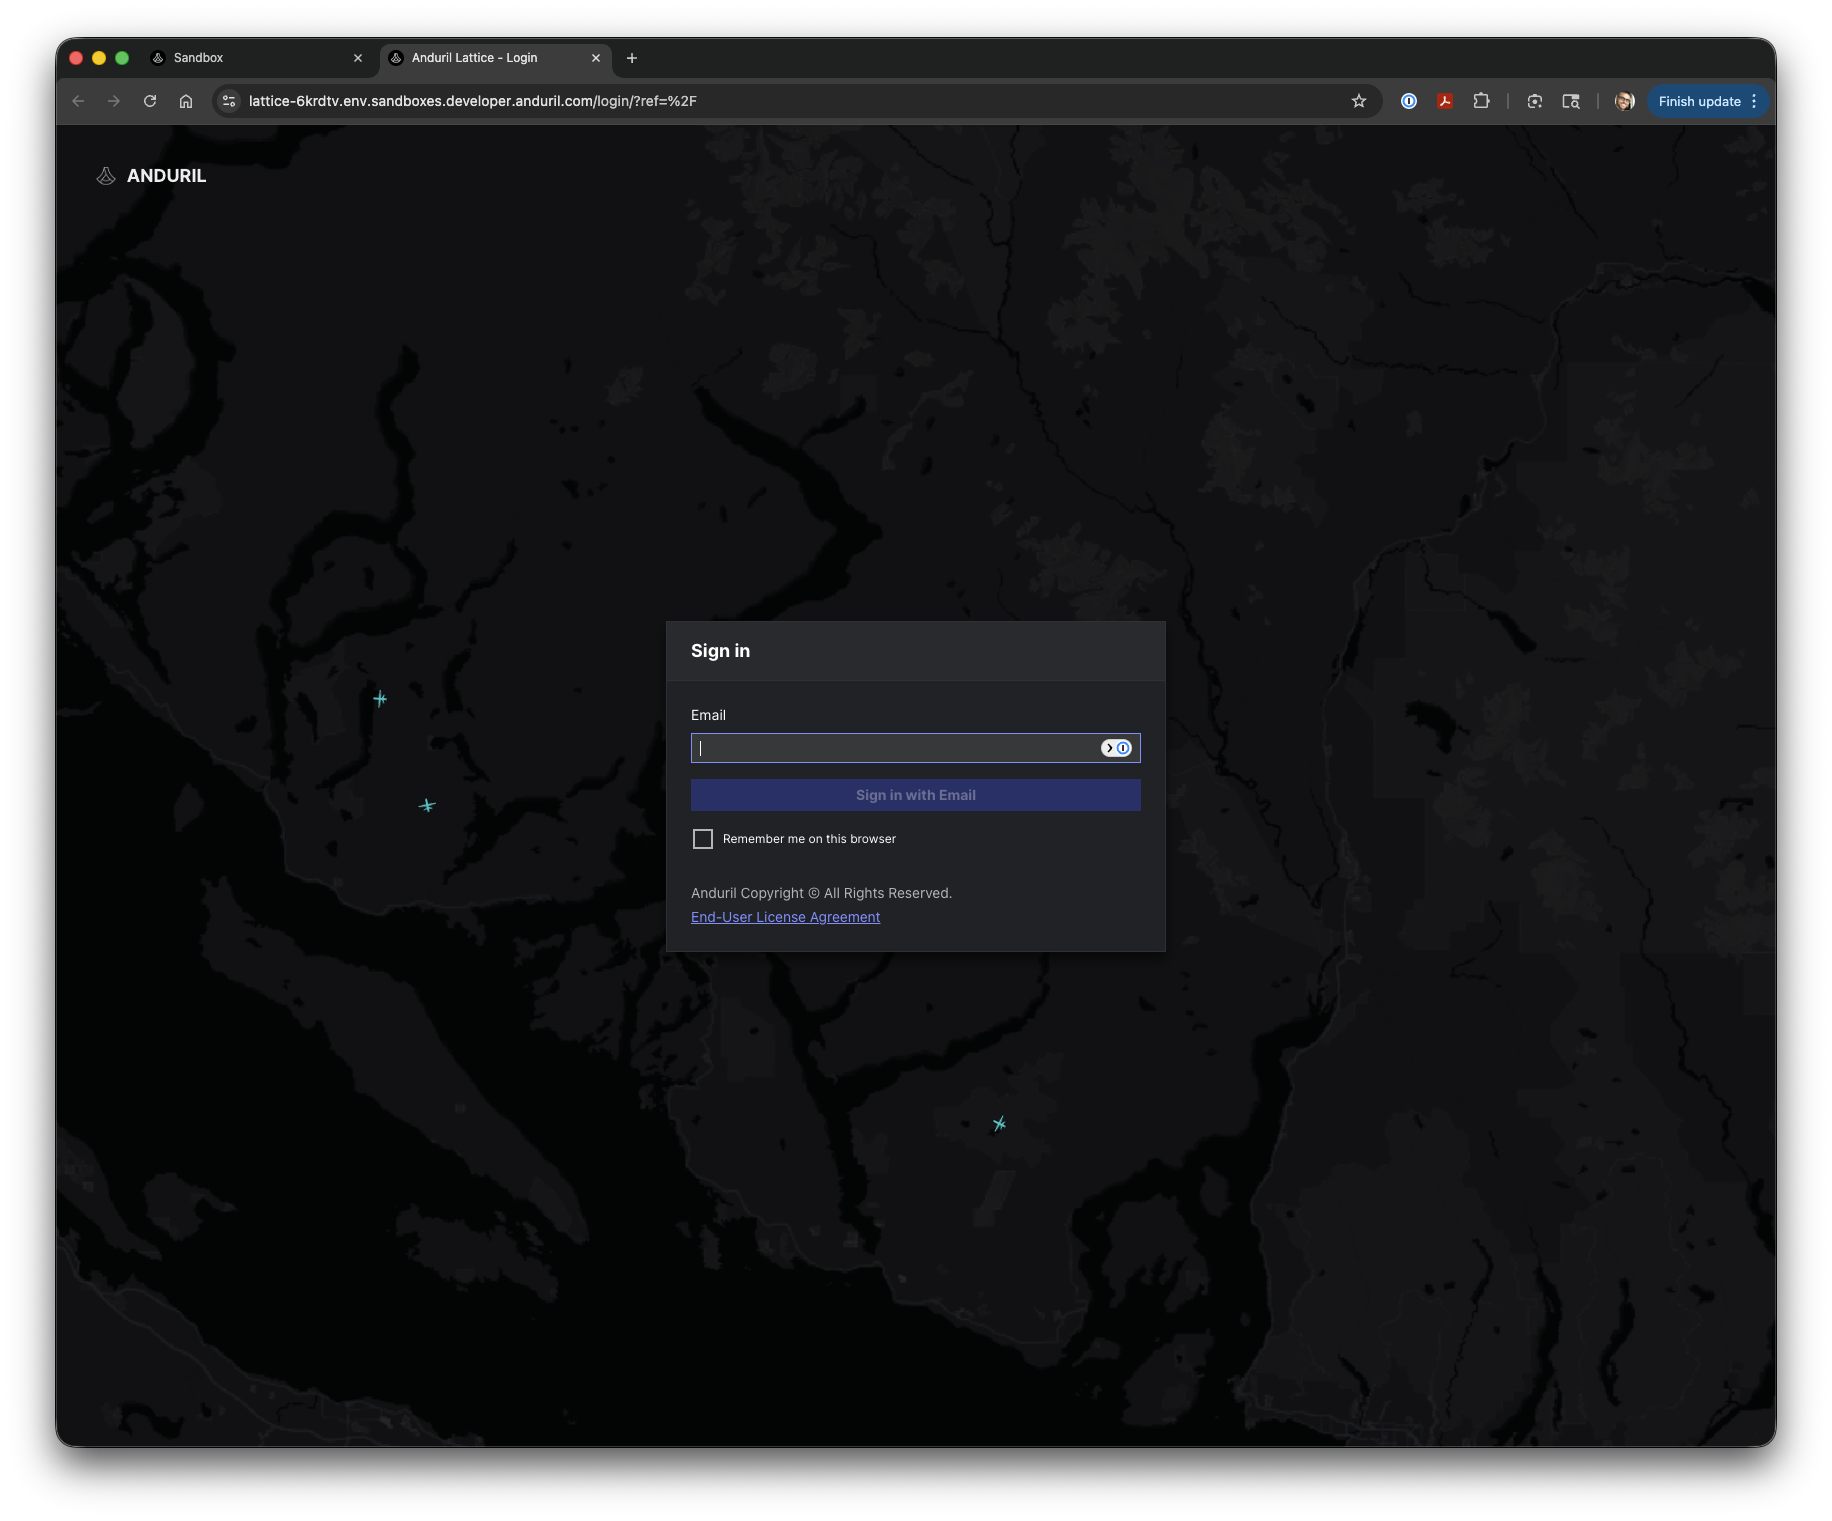
-
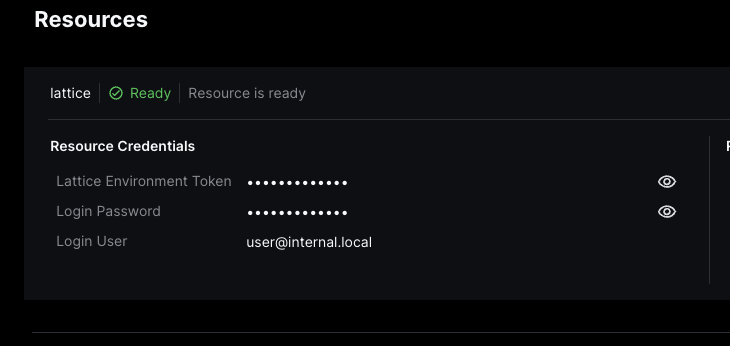
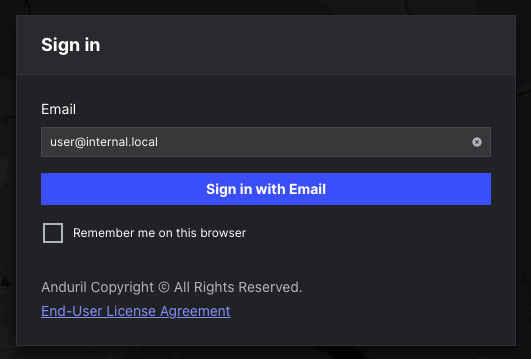
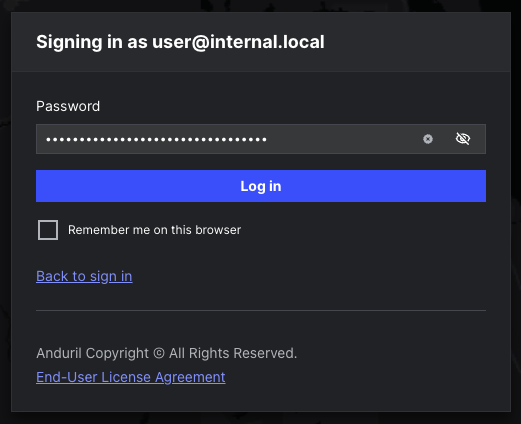
Sign in with your sandbox credentials (Login User and Login Password)
-
The tracks will appear on the map as they are published
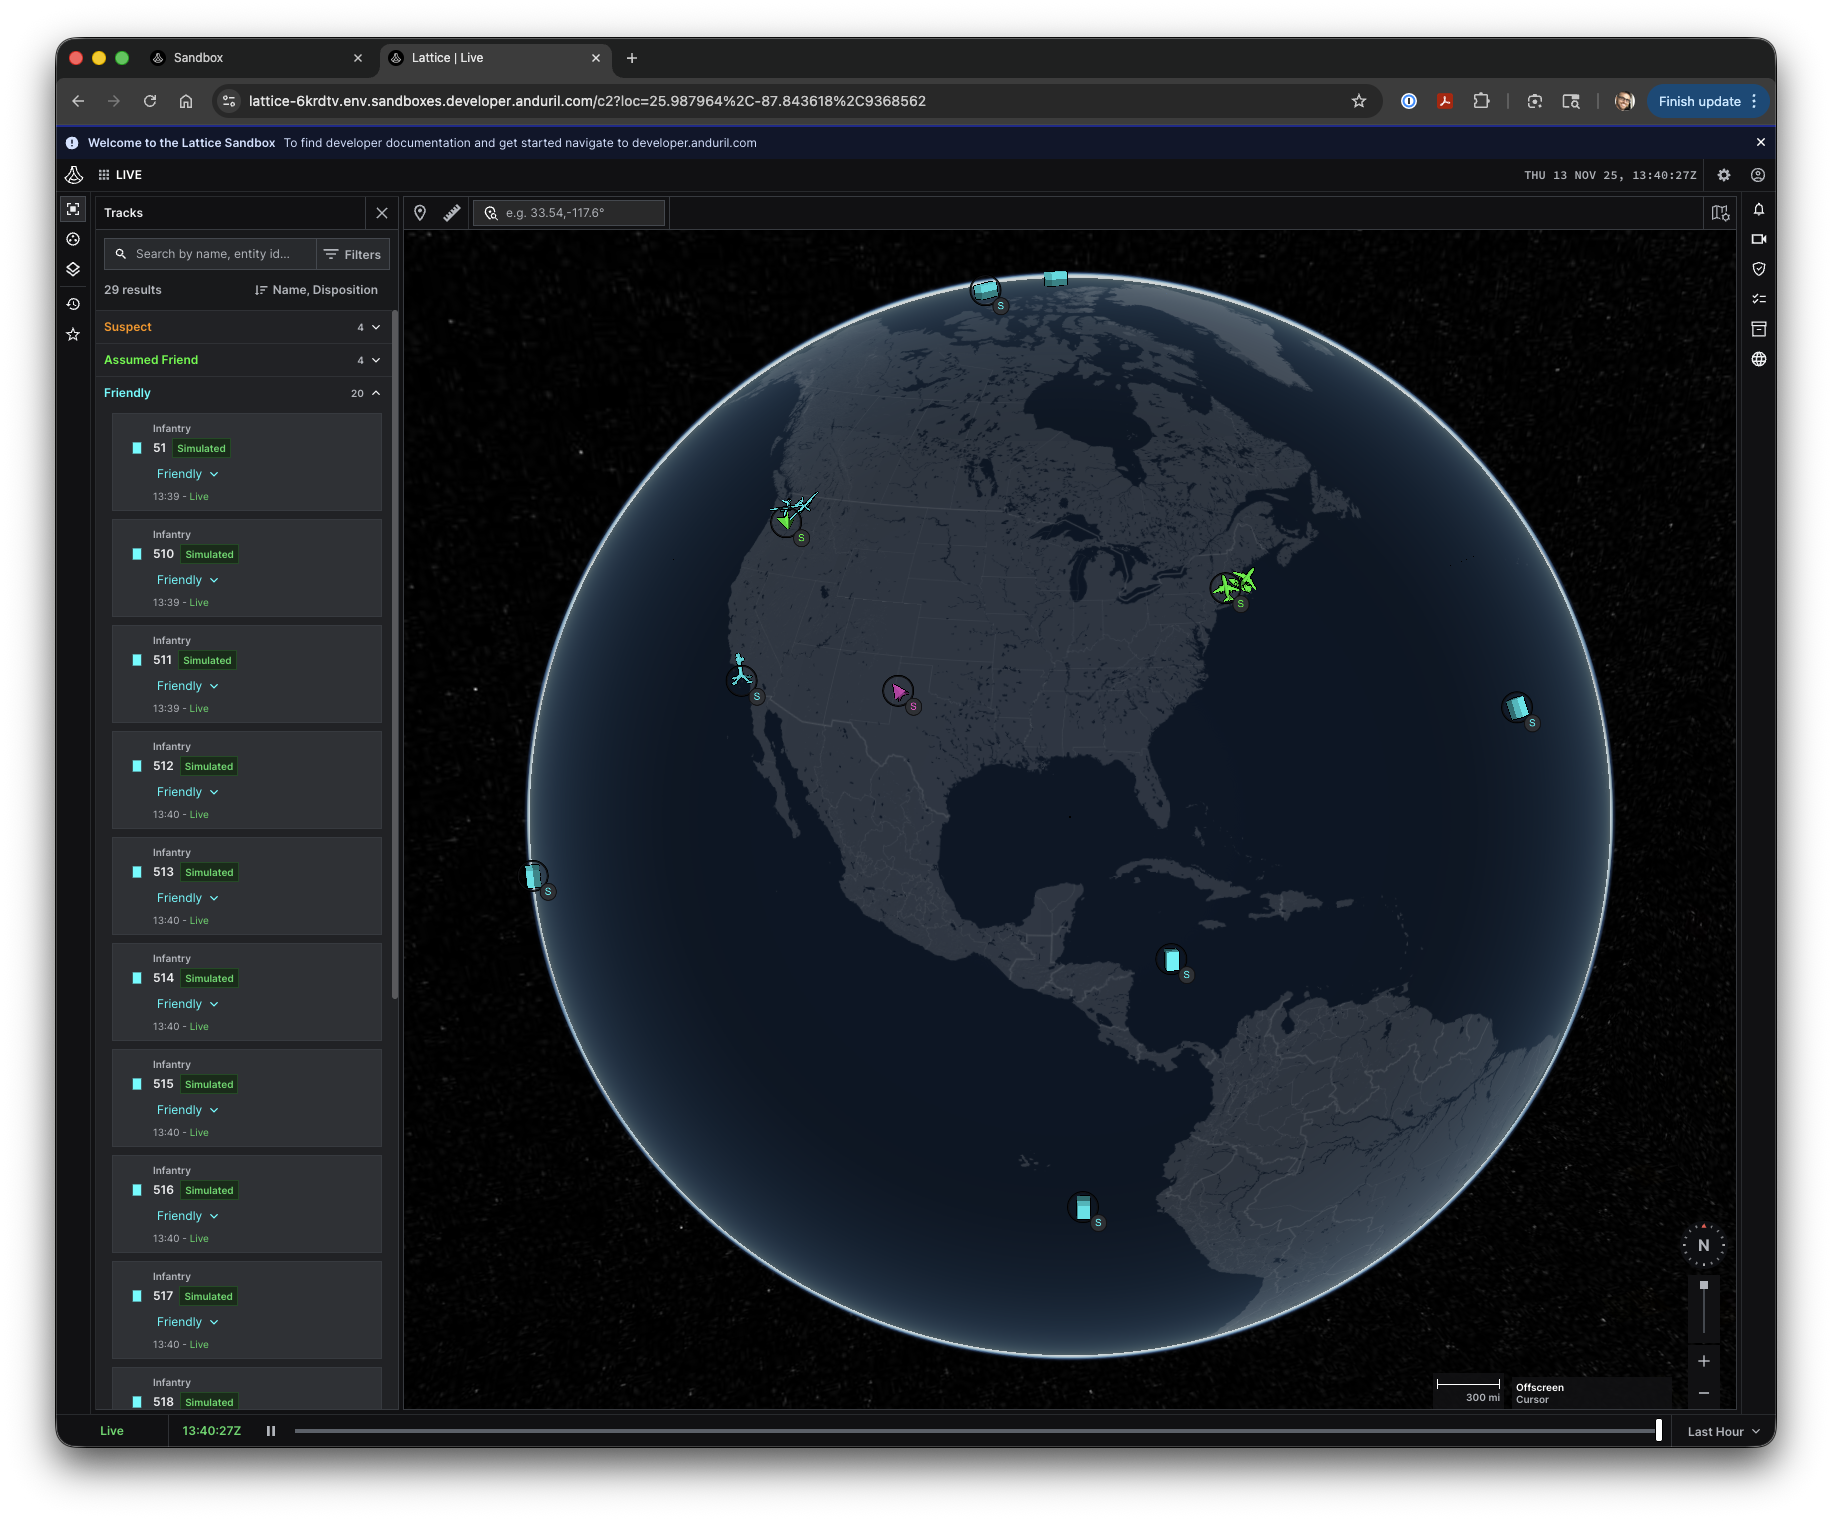
-
The sidebar shows a list of all tracked entities with their details
|
The CoT XML Generator creates various entity types including fishing vessels, aircraft, and surface vessels. Each entity includes location, velocity, and classification data. |
Step 10: Add additional branches and transformers as desired
Stop the pipeline and add any additional branches and transformers as desired. The system supports multiple transformer consumers of a dataset. You can send CoT data to Geoserver with GeoJson transformation, save directly to an S3 bucket for cold storage, or even publish to another TAK Server.
Summary
In this guide, you learned how to:
-
✓ Set up a Lattice sandbox environment for development
-
✓ Build an end-to-end data pipeline in SDL
-
✓ Transform CoT XML messages into Lattice entity format
-
✓ Publish entities to Lattice and visualize them in real-time
Next Steps
Now that you have a working Lattice integration pipeline, you can:
-
Connect a real CoT data source instead of the synthetic generator
-
Add additional transformation steps to enrich or filter entities
-
Create multiple pipelines to publish to different Lattice instances
-
Explore other SDL transformers available in the catalog